Showing posts with label Wargaming Net. Show all posts

Monday, 7 September 2015

World of Warships New Premium The Tirpitz Battleship, The Efficient German

Hi all and welcome back for another Ship review for World of Warships!


The Incredible Opening Trailer for World of Warships

This week I will be featuring the new German Addition to World of Warships the Tirpitz. There has been a lot of hype leading up to this ships release along side the German tech tree. Now this ship has had little over a week to bed into the game, I though this would be a perfect time to give a little on the ships history development and express my opinions on the ship in game.

The Tirpitz didn't have a very exciting service history but the lengths that the British went to to destroy the Tirpitz from its construction to its sinking were extraordinary and are definitely worth of some mention (or alot as this is my longest post to date).


Shore Shot of the Finished Tirpitz


The Tirpitz began its life as a small cog in the wheel of what was known as 'Plan Z' that was developed by Erich Raeder throughout 1938. After World War 1 and the following restrictions laid down by the 'Treaty of Versailles' made sure that German Naval power was extremely limited as to avoid something simular to WW1 to ever happen again. 'Plan Z' was essentially a naval power development program whose goal was to re-equip the German Navy with enough power to challenge the British Navy.

Within the founding design of Plan Z The Bizmark and the Tirpitz were just the start to this grand design to rebuild the German naval fleet. Proceed these ships were plans to build larger more aggressive battleships that the world have never known before. These were the H Class battleships.  These designs only existed in blueprints but they were set to dwarf all known designs of battleship ever conceived, even the mighty Japanese battleship Yamato. The largest of the H designs was the H44 that would have weighed a estimated 155,000 tonnes, been 400 meters long and house eight gigantic 508mm guns.


The Gigantic H44 Design Battleship
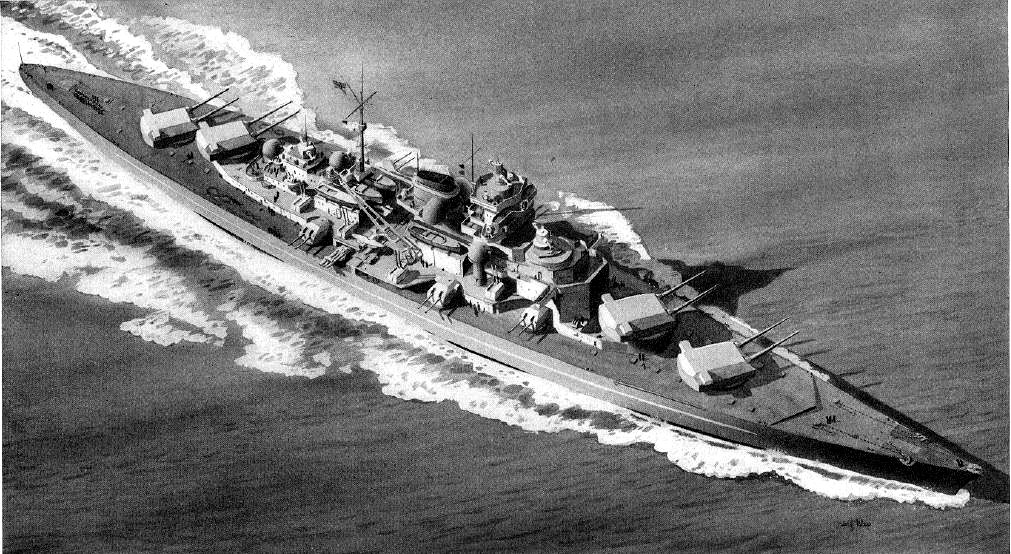

The Tirpitz was laid down in 1936 and launched in 1941. At the time of her launch she was 25% bigger than what the Treaty of Versailles allowed. After wartime modifications she was the heaviest battleship ever built by a European Navy. The ship at the time of her launch was impressively armoured and equip for war. She was fast being able to reach speeds of almost 40mph and was able to fire her projectiles over 20 miles. To the British having already faced off with the Bizmark knew the threat that the Tirpitz posed to a Island nation of Britain. The sinking of HMS Hood stood testament to that. A ship like the Tirpitz having the ability to strike with high speed with big guns,  if left unmolested or allowed to break out into the Atlantic Ocean could reek havoc in the shipping lanes. These lanes were the lifeline that supplied the UK with enough food and materials to not be starved into surrender. Churchill saw the Tirpitz as one the biggest threats to the UK and was determined to disrupt or destroy the Battleship at all costs.


The Tirpitz 


March the 28th 1942 saw one of the boldest operations in the British offensive to disrupt the Tirpitz. The mission was simple, knock out the only dock large enough to repair or service a ship of that size in sailing range of the Atlantic Ocean. By destroying this base it would effectively limit the operation area of which the Tirpitz could be a threat to Britain in. 600 British Commandos moved towards the Harbour against a defending force of over 6000 troops disguised as a German flotilla. This was inevitably going to be a one way trip for many of the troops with the odds so heavily stacked against them and no way of being able to retreat. The flotilla ruse worked in allowing the Commandos entrance to the harbour where they beginning their attack. In the Action the Campbeltown Destroyer I42 rammed the dry dock of the Saint-Nazaire harbour allowing the commando's landing quick landing onto the dock but disabling the ship. After the intense fighting between the Germans and British Commandos the fighting came to an end by either the capturing killing or capturing of British troops. The Campbeltown sat firmly in the in the wall of the dry dock harbour and the German forces boarder to search the ship. After the all clear was given the german troops settled down to celebrate their victory.


The Campbletown Wedged Firmly into the Harbour Wall

The search of the Campbeltown was not thorough enough and missed the large amounts of explosives hidden deep within her hull. Just before noon 4 tonnes of high explosives erupted in a massive mushroom cloud, sowing panic and either killing or wounding over 200 German solders near the ship. The explosion had completely destroyed the dry dock rendering the harbours ability to be able to be a base for the Tirpitz's intended battles in the Atlantic.

Following this set back and a few further unsuccessful brutish air attacks the Tirpitz was ordered to Kaafiord in Norway to put her out of reach from any British Air attack launched from within the UK. The ships new position was ideally situated to strike at convoys travelling between Britain and Russia, something the Russians sorely needed to stay open to aid their fight against the German. The Brits decided to take a new approach at tackling the German menace that had thus far avoided any serious damage from numerous air raids. The decision was made for a more stealthier approach, a under water strike with manned vessels.

Following Britains first failed operation using submersible torpedoes called 'chariots' to attach explosive charges to the Tirpitz hull, a new operation was initiated using Midget subs or X Craft. The Tirpitz by this point was defended a vast array of field guns, machine gun nests and torpedo nets in a bay that gave the defenders a natural fortress.


Torpedo Nets Can Be Seen from Aerial Shots.


When the Operation was in progress and the subs were approaching the mission area only 2 of the 3 X Craft launched made it to strike the Tirpitz.  After the 2 X Craft snook into the bay behind a smaller patrol vessel the crews found themselves behind the Torpedo nets and with the Tirpitz clearly in sight. Explosives were successfully attached to the Tirptiz's hull before the crews allowed themselves be captured. The proceeding detonations caused crippling damage to the ships infrastructure, buckling the hull of the ship. The turbines had been destroyed in the blast and the the rudder was severely damaged. Not only did this mean a lengthy period of repair work following the X Craft attack, it was a huge moral set back for her crew. For a ship that many hoped would be at the forefront of glory and German supremacy she had so far only fired her guns in anger once at shore targets.


A Midget Sub or X Craft Sub


Following this attack Churchill ordered a huge air attack on the Tirpitz on the 3rd of April 1944 with 41 new Barracuda dive bombers with Corsair escort to which little effect was done. Churchill was at wits end. Every attack sent failed to deliver the decisive blow he craved to secure waters around Britain. Churchill turned to Barnes Wallice, the infamous inventor of the bouncing bomb, for a final solution the would end danger imposed by the Tirpitz. Barnes Wallace's response to this challenge was the invention of the impressive but truly terrifying 'Tall Boy' Bomb.

The Tall Boy was 20 ft long and weighed in at about 12,000 lb (5443 Kg). The blast craters left in testing were up to 100 ft wide and 35 ft deep, a purely destructive weapon perfect for destroying any target it would hit. Churchill called on the infamous 617 squadron to carry out this risky precision bombing exercise on the Tirpitz. This squadron had already made a name for itself after successfully carrying out the famous bouncing bomb run that destroyed the dams in Germany's Ruhr Valley.
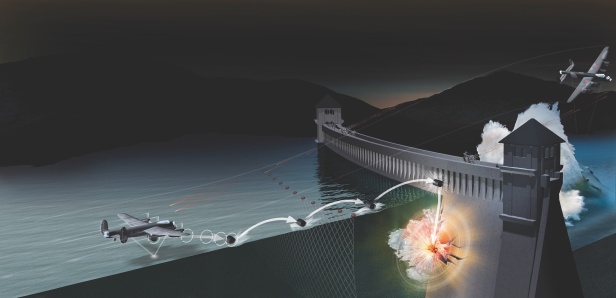

The Famous Bouncing Bomb


On the first bombing attempt 27 Lancaster Bombers from the 617 had to travel to a remote Russian Air Base to be within striking distance of the Tirpitz in Norway and await clear weather. When the operation was green lit and the 617 squadron was  approach the bay where the Tirpitz was sleeping, the defensive smoke generators were activated in response to the incoming air attack. The smoke released had almost covered the Tirpitz and the bay in smoke making bombing the Tirpitz even more difficult. The Tall boy was extremely expensive so the crews were told only to drop the bomb if they thought it could hit the intended target. Many of the 27 Lancaster bombers didn't drop their payload but from the ones that did one tall boy hit its mark near the bow of the ship. The blast was huge leaving a mangled gaping hole where the bomb had struck. This hit had rendered the ship more or less useless as a sea vessel due to the extensive structural damage sustained and the decision was made to move the ship to a a static location where she could act as floating artillery.

The Tirpitz was moved to Tromso and was placed in shallow waters to act as a floating artillery platform. Special bed on the bay were constructed so that if the ship was to take on water and sink she would just rest on the bottom and still be able to fight. This move to Tromso was a vital mistake put her within striking distance of Lancaster bombers launched from the UK. On near perfect conditions on 12th of November 1944 the 617 squadron set out again. The Luffwafer air base set up near the Tirpitz to defend her in the event of a air attack scrambled in response to the incoming attack but went to the wrong location leaving the Bomber a clear attack run to hit the Tirpitz.
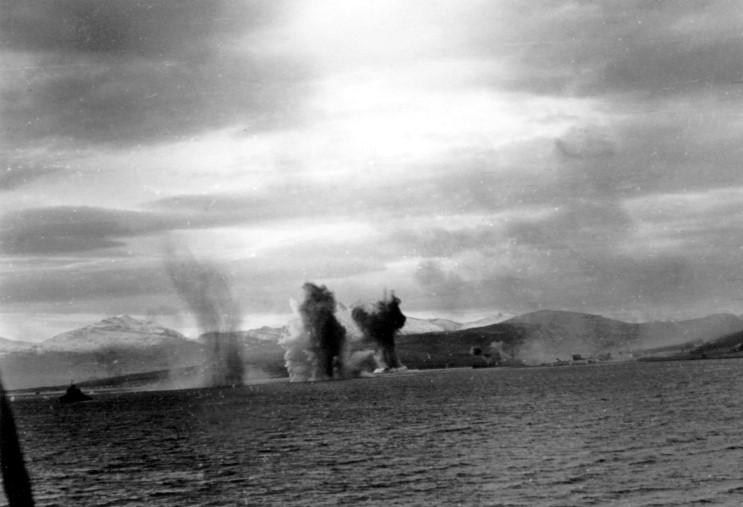

Tall Boys Explode Around the Tirpitz During the Attack


29 Tallboy's were dropped and the ship took 2 direct hits and one near miss. Several of the Tallboys hit close enough to disrupt the sea bed and the sand bank specifically built to cushion the Tirpitz in the even that she was to sink. The first hit struck the deck between turrets Anton and Bruno but failed to explode. The second hit amid ships between the catapult and  funnel ripping open a huge hole and causing massive damage to the ship. The blast had ripped a hole from the side of the ship to the bottom; an entire section of belt armour had been obliterated by the blast.  The third seemed to have struck to the port side of Turret Caesar blasting more holes below the water line. The ferocious bombing cause the ship gradually list to port. As the list increase further and approached 45 degrees and as the ship looked as if she would stabilise, the Turret Caeser detonated blasting the turret roof and parts 25 meters into the air that landed back into the water ontop of a group of men swimming to safety. The damage sustained had exceeded the threshold that the mighty Tirpitz could handle in a final explosive show of fury, the once monstrous beast rolled over capsizing in surrender.


The Hull of the Tirpitz after Her Capsizing

Over 5 years the ship was attacked over 40 times and never got to achieve the glorious nature she was built for. The dogged determination and grit of the British had finally made the ship succumb. The Tirpitz's service to the German nation never more strategic than that of actual battle, tying up available ships that would have otherwise been used else where to defend British interests. Churchill's main concern was worried that she may interfere with the D Day landings due to her location in Norway. In the end, like most of the biggest Battleships of the second world war, the ship succumbed to relentless air attack. 

Wow that was a bit of a mouthful but this ship is definitely worth the time it took to rustle up the history on this ship. It cause a real headache for the British Navy and Air force and even though its service history in the was lacking a heroic battle. The plans to sink her couldn't have been more interesting to read so I Just couldn't miss them out in telling the story of the Tirpitz.

So down to the Business of talking about how this ship performs in World of Warship. What are my initial thoughts on this ship? The Tirpitz can boast that it is the best well rounded ship I have played to date in World of Warships. All being said this ship is on sale for little over £40 and in my opinion that is way too much regardless of how good this ship is.

Since leaving the Closed Beta battleships have just not been that fun for me. Shooting the Guns mostly rely on praying to RNGesus to grace you with his light whilst suffering splicing shot after splicing shot. This is made worse when trying to shoot ships at close range and your shots miss by a fricking mile. This is a problem that will largely now have been fixed in the new patch (wargaming are massively boosting Battleship accuracy for ranges under 3km) but still when you have a very slow reload time and miss all your shots, your pretty much waiting to die by horrible torpedo death. This has made many battleship captains as far back from the fight to counteract the close range 'Armageddon' cause by the nimble destroyer in close quarters. The ensuing passive play style is, in my opinion, on of the main contributing factors why most matches end up in draws in World of Drawships current state.

I have had some serious fun in the Tirpitz and I put this down to the fact this ship reacts more like a heavy cruiser than a battleship whilst still maintain arsenal and armour. Her 15'' guns are relatively quick firing of 2.3 rounds per minute and have a good turret rotation time at  36 seconds for 180 degrees. This highlights the first main strength that its a good close range brawler against other battleships and cruisers. The Amagi has a turret rotation speed with its top hull of 42 seconds per 180 degrees and the North Carolina has a Turret rotation speed of 45 seconds. Having this speed in acquiring your targets allows you to keep your guns pointed at a target at close range against even destroyers and also gives you the ability to switch between targets at range without waiting for your turrets to turn. This allows the Tirpitz to be more flexible and fire more shells down range than any other battleship close to its tier.


World of Warships, the Tirpitz


The Tirpitz does however have 15'' guns over her equal tiered 16'' gunned Japanese and American battleships. This is a obvious disadvantage when it comes to initial alpha damage output from impacting shots, however there are advantages to having a smaller gun size. The Tirpitzs has a vastly superior fire rate and the rounds have less chance of over penetrating lighter armoured cruisers like the Pensacola. This enables harder hitting shots to targets that may be harder to damage effectively. This combined with decent turret rotation makes these ship a joy rather than a fight to get the most out of them

The dispersion of the shots fired on paper doesn't look very good. 280 meters dispersion at maximum range is pretty bad when you consider the Amagi's 128 meter or the North Carolina's 270 meter dispersion. This dispersion is really off set by that its inaccuracy is as maximum range of its guns. The Tirpitz can fire up to 21.4 km, so when your at normal combat ranges of 15km - 10 km you can assume that the dispersion will be roughly half that which is more than good enough to get hits on any salvo being let off.

I predict this is probably what's going to characterise the German Battleships over the other nations ships having smaller sized fast firing guns. German ships in the second world war had smaller sized guns compared to other nations ships so may lead to this being uniform for the ships to be implemented in the near future (until you consider what ships they wanted to build through Plan Z that could make their way into the line up in the German Tech Tree). I think World of Warships will probably end up implementing the German nations ships as being well rounded DPS ships. Its still hard to see what Wargaming has planned for the nations characteristics until we get at least one more nation to see an average of stat's to compare against to really make that kind of assumption.


Stat Comparisons

The Tirpitz in battleship terms has the ability to manoeuvre pretty well. The ships rudder response speed is extremely fast (for a battleship) to help react quickly to incoming fire or torpedoes. At 21 seconds for pretty damn good for a battleship rudder shift time considering when the Amagi has 25.6 second and the North Carolina has 28.6 seconds respectively.  The turning circle radius is a little disappointing however at 850m (or could be very average but we won't know until another nation is added to see where it sits in nation characteristics) but again this is offset more or less by the ships rudder speed enabling you to get a full lock faster than any other battleship of your tier. 

One advantage this ship has many people talking about it are the addition of torpedoes to a Battleship. This is unique to the battleship class its only the Tirptiz that has them thus far. On both sides of the ship she has a single quadruple torpedo launcher. These Torpedoes do lack in size over the Japanese torpedoes but they are fast (64 knots) and have a 6km range. This makes them incredibly hard to dodge at close range and adds a very potent sting to ships that like to hero run on battleships to sink them (if all the torps hit its almost 55k damage potential).

The biggest weakness of the Tirpitz is its AA potential. This is a battleship that really needs to have cruiser escort to survive any large scale air attack by the enemy. This ship did survive over 40 air raids before her eventual demise at the hands of the 617 squadron so I think this has been a little harsh on balanced in my opinion but its something you will have to adapt to when taking this ship out.


The Swept Lines of This Ship Are Gorgeous

As far as my over all view of the Tirpitz, I really like this ship and will be eagerly awaiting the German line of ships and what they will have to offer. If its more of this it looks like I will be liking them a lot more than the other nations ships. The higher dpm off sets the accuracy of the guns by sheer volume of fire in battleship terms and the turret rotation speed is much more enjoyable diverse play than other battleships. The torpedoes give a nice edge in close quarters but only to be used as a last resort other than a main armament. I have fallen for the noval trap having knowledge of Torps in a battleship and motoring ahead to try use them. As fun as it is to destroy other ships it will end up pushing you too far forward to be able to dodge incoming fire and ultimately lead to a premature death. The armour on the Tirptiz is pretty awesome and with some angling you will cause serious problems for ships firing AP as may will jsut bounce harlessly off. Combine angling with your rudder speed when facing incoming fire and you will be a hard nut to crack when you decide to make a stand. Any CV captain with any sense will single you out as a priority target if he has the sense/chance to hit you. The AA its good enough for self defence against a few planes but a determined attack will really cause you headaches if not a quick trip back to you port. The ships ability to adapt because of its versatile nature makes it a real power house. Its a great ship and a good money earner for in game credits. I think the pricing for many people will be a big deal breaker when thinking about getting this ship. I do love this the ship but still think its very over priced for what it is. In hind sight of just buying this ship to review and experiencing it, I could have just bought a new game for what it cost to get this ship, however I don't regret my purchase the Tirpitz as it has to be played to be understood.


One of My Many Average Games but Shows the Ships Money Making Potential of This Ship

Thats all for this week. I hoped this provided some insite before looking at looking to buy this expensive ship. I will catch you back here for a tiger styled update later on in the week. Till then late care and have fun. 


Tuesday, 25 August 2015

World of Warships American US Navy Cleveland Class Cruiser - DPM Central Ship!

Hi and welcome back for my fortnightly World of Warships Ship review!

For this weeks review I will be taking a look a at one of the best ships for its tier in the game. This is non other than the Cleveland class cruiser. The Cleveland is one of the highlights of the US cruiser line. This ship doesn't seem to have any major weaknesses and does everything that you would expect from a cruiser very well. Having a total of 12 rapid firing guns, fast turning turrets, dangerously formidable AA defence combined with a strong mixed of all round manoeuvrability and armour, the Cleveland really something to write home about. When captained right this ships DPM put out some serious hurt to any and all ships and is able to take considerable punishment in return. Being a capable chip is not the only talent of the Cleveland, its also very charismatic, being one of the best looking ships on World of Warships. A sexy little addition of warship porn to any captains harbour.


Cleveland Class Cruiser on Patrol


The Cleveland is the first fully Second World war design in the American Cruiser Tree. The Cleveland was commissioned in 1942 and remained in service till 1979. The American Navy completed 27 Cleveland Class Cruisers from the originally planned 52. Nine of these 27 completed Cleveland cruisers were completed as Independent light aircraft carriers which is also in World of Warships. The Cleveland Served mainly in the Pacific Fleet throughout the Second World War in fast carrier task forces but some were stationed in and around Europe and Africa. Throughout the all the fighting in Second World War non of the Cleveland Class Cruisers were destroyed, some were heavily damaged in combat but were never sunk as a result of it.


Main Battery Fire

The Cleveland's cruiser were the back bone of the US Navy. They bared the brunt of Kamikaze strikes, torpedo hits and naval gunnery battles, even one (the Columbia Cleveland Class Cruiser)  played a part in the sinking of the Fuso Class Battleship at the Battle of Leyte Gulf. The Anti Air was so fierce that the Cleveland's could put up almost impenetrable walls of flak against incoming aerial attacks which saved many a escorted ship. One such example is the 'Cleveland' cruiser, even after suffering a direct bomb hit she was able this take down 7 attacking planes in a furious AA response in the battle of Empress Augusta Bay. The Cleveland Class Cruisers served the US Navy throughout the whole WW2 up untill most of them were scrapped between 1959 and 1961. Six of the Surviving cruisers were converted to guided missile cruisers and were reactivated during the 1950s and served into the 1970's. The last of the Cleveland Class Cruisers, Oklahoma City, was finally decommissioned on 1979 ending its 37 years of service. Its a testament to just how good these ships were in real life.


Ship Porn, The Cleveland Class Cruiser

Considering the ships history its no wonder this ship is such a formidable foe to face in World of Warships. The more service history you read from the achievements of the Cleveland's the more you begin to realise the awesome potential of this ships fire power and defensive armaments. The Cruiser was very robust being able to take large amounts of damage whilst still maintaining a effective fighting standard in the heat of battle. This seems to be modelled pretty well into the games as anyone that underestimated a Cleveland will definitely regret it when subjected to its hellish rapid firing guns.


Shells Away

Its 4 Turrets each mount triple 152 mm guns which each fire 7.5 rounds per minute. These guns have the potential to do 198000 hp damage per minute with HE alone. The damage potential of its AP rounds is a staggering 288000 hp. This is just what makes the American Cruisers so much fun to play. Destroyers will be taking detours to avoid you in this rapid firing ship as you can really ruin their day in just one well aimed salvo. The ship also has 12 dual purpose AA and anti ship 127mm secondary guns with a 4km range. Mixed with its 13x20mm, 12x40mm the combined fire power with the 12x127mm guns is truly terrifying for carrier captains. I actively screen for the rest of my fleet in this ship rather than run away from incoming air attacks. The Cleveland also has access to the defensive fire cool down, increasing its anti air power and decreasing all air attack accuracy for any air squadrons caught in its flak barrage. To top this is also has a deployable fighter aircraft for added measure... need I really say more about this ships huge anti air capabilities other than its just a power house!


More Ship Porn

Having a rudder speed of 9.4 seconds means this ship is no slouch in have to respond to dangerous situations, and is small turning circle (660m) means you will be dodging fire like a boss. The ship has a solid top speed of 34 knots meaning you will be able to effectively kite battleship's and keep them at range. I for one have been caught out whilst sailing my Warspite and chasing one of these ships and underestimating its ability to dodge incoming fire and put out some serious damage. The Cleveland also has a respectable health pool as well of 35.2  thousand hp. When the Aoba has 30k with less armour and even the proceeding Pensacola (pepsi cola... definitely a better name for this ship), you get a understanding of this ships ability to take on more than you would expect.


Cover Your Eyes Even More Porn!


I don't normally talk about my choices in upgrades that I put on my ships as this is mostly down to personal preference which I should really start to incorporate into my reviews but I think that the Cleveland is as good a ship as any to start with telling you how I set my ship up. With the Cleveland the main focus of this ship is its pure gunnery action, so with my first upgrade I went for the Main Battery Mod 1 to lower the chances of turret detonation or them being knocked out of a fight. For my second mod I went for the Main Battery Mod 2 so increase my turret traverse speed and firing speed. These first 2 mods are just to accentuate the main strengths of the Cleveland to their full potential. I may have choose the accuracy mod in the second upgrade slot  or the AA upgrade but I thought the added rounds per minute mitigated the increased accuracy and the defensive AA cool down made the need for the AA buff unnecessary. For my third upgrade I went with the Damage Control mod to prevent fires and reduce the risk of flooding. The Cleveland is still a cruiser and does still have a limited health pool, so as to avoid loosing extra health from taking fire damage, I choose this upgrade. You can still suffer from your engine being knocked out and rudder being jammed but I feel with most people firing just HE in this game rather than switching between AP and HE (dependant on situation) its better to take fire/flood prevention mod. For my Final Mod I took the rudder shift time improvement. I like my ships to be responsive as possible and this increases my rudder shift time by 10% which gives me an added edge in dodging and turning away from fire and torpedoes. I feel this ship doesn't take a long time to reach full speed so really doesn't need the added help reaching top speed as much as the added  rudder shift time.


Possibly the Most X Rated Review Ever

In conclusion for this ship, use its great DPM to bully cruisers and destroyer with high explosive and armour piercing rounds. Battleship drivers can also panic when they start to recieve the numerous hits you can put out so use this to your advantage. This ship performs best at around 10 to 12 km distance where its high firing arch can give good damage potential for your AP rounds and give you the time necessary to change course and dodge incoming fire. Learn to kite enemies toward your fleet whilst using your quick turning ship and turrets to rain down the pain on your pursuers. The health pool is good so you can withstand some punishment but try not to put your self in situations where you can be focused down. You are a AA powerhouse in this ship so recognise when you will need to play escort to save less fortunate ships on your team. Battleships will love your close support as much as your solo allied aircraft carrer when they are outnumbered by the enemy teams aircraft carriers. Use your strengths to bolster your team and support them when and where you can as this ship shines when played as part of a team. It's fast firing potential makes it a good money earner and a extremely fun ship to play. My advice is get one of these ships as fast as possible and just learn to love it, in all its sexy ship porn glory.


Quick Co-op battle screen shot. The amount of hits shot the DPM potential!


That's all for this week, I look forward to seeing you back here later week for a update on my Tiger tank progress. 


Tuesday, 11 August 2015

Omaha Class Cruiser, The Phoenix's Younger Brother

Hi all and welcome back for my fortnightly ship review. Following on from last week I am going to be taking a look at the Omaha Class cruiser that supersedes the Phoenix Class cruiser. I'll be giving a run down of its strengths and weaknesses and also a bit on its design and service history so you can better use this ship on the sea of World of Warships.

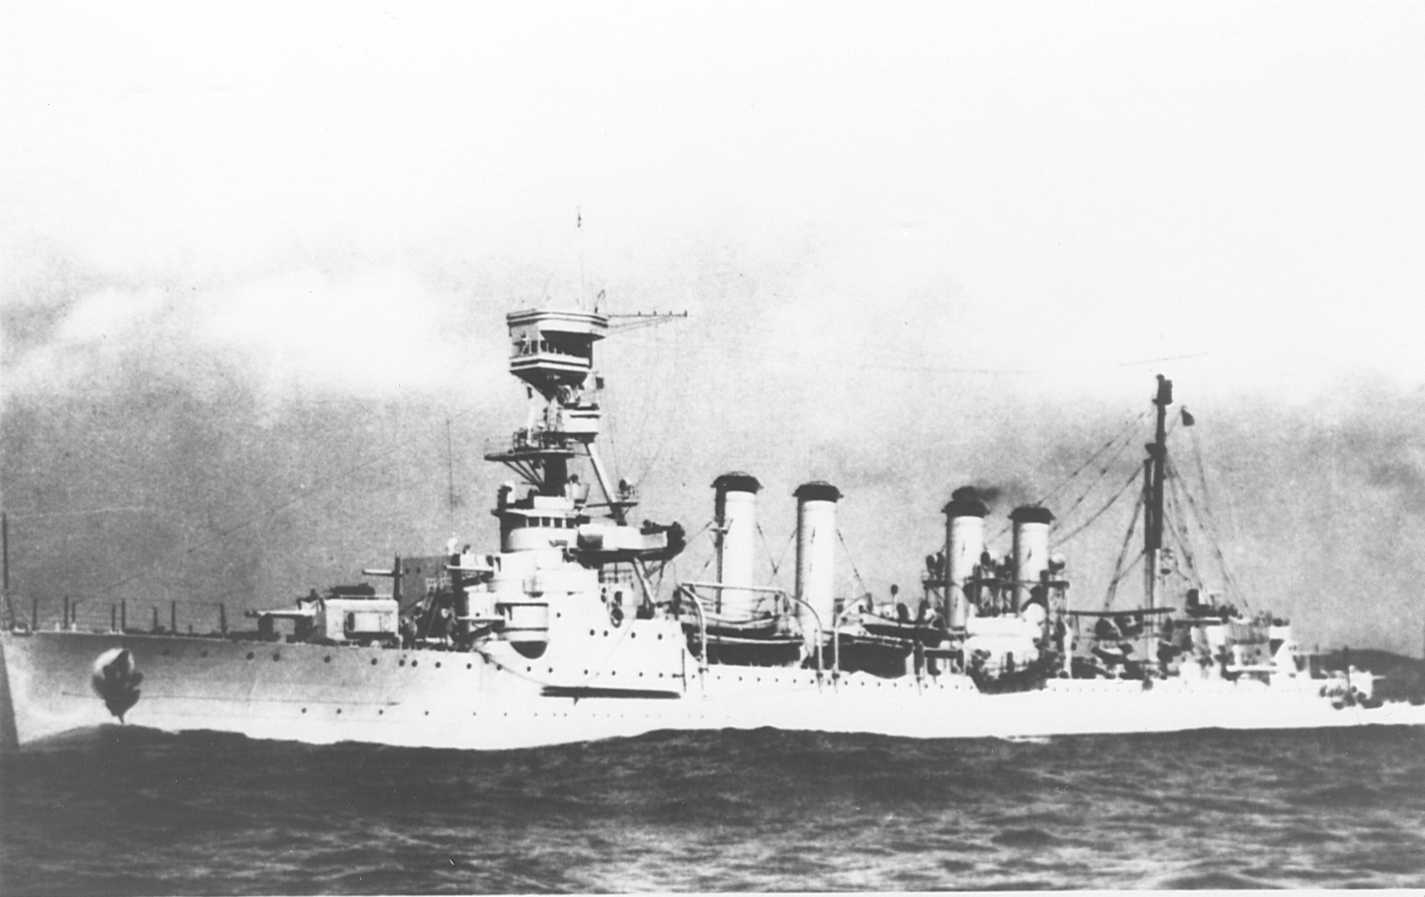
Following on from last weeks post, the Phoenix was the pre-cursor design that originally went into the plan and development work for the Omaha class cruiser. The Omaha's design and development was as a direct result of the introduction of the British Centaur C Class Cruisers. The American Navy felt that they had nothing that could for fill the role of light scout cruiser like this new British Cruiser and wanted a ship that could push up with other destroyers to give support to them and relay enemy position information to a larger fleet.


The Omaha Class Cruiser


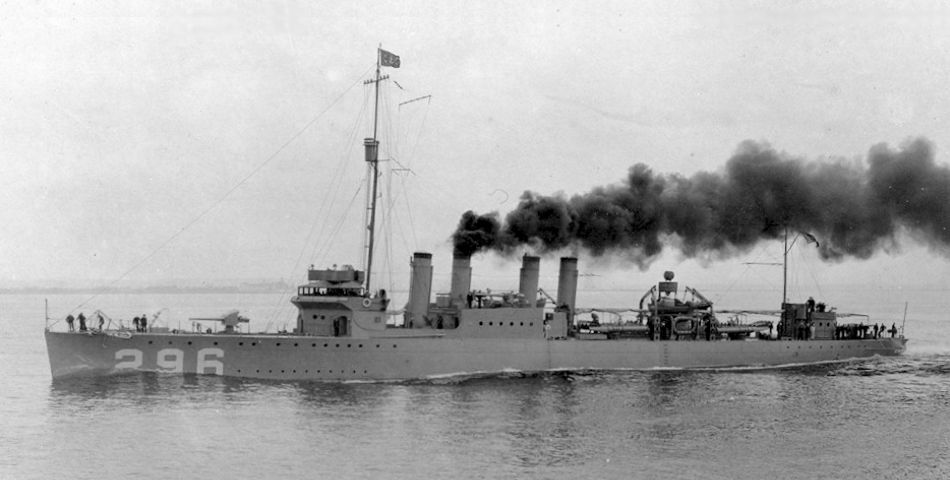
When the Omaha was in its design phase it was specifically made to look like the Clemson class destroyers currently in use by the US. The Omaha was given four smoke stacks in a arrangement like the Clemson and was even painted in the same camouflage scheme to further increase the resemblance.


Clemson class destroyer

The Omaha also shows the movement away from casemate mounted gun design to the fully turreted guns design philosophy after the first world war. The Omaha was launched in the 1920's and has a displacement of 7100 long tons or just shy of 7214 metric tons. Design changes during mid production meant that on the Omaha's launch it was a badly overloaded design. Sacrifices in weight to maintain the ships initial speed specification lead to the ship compromising on crew habitability. The ship was poorly insulated meaning it was too hot in the tropic theatre of operations and too cold in the freezing climates. On top of this the overburdened design frequently lead to the ship taking on water over the bow and through the Torpedo compartments located at the aft of the ship. A serious flaw was the lack of water tight bulkheads anywhere above the main deck or aft on the main deckThe Hull had a nasty habit of leaking due to its light build, this lead to sustained high speed steaming contaminating the oil tanks with sea water. Sea water in the oil Boilers was a big risk as this could cause the boilers to explode if not properly tended.


Originally designed to serve as a scout the Omaha class cruisers served throughout the inter war periods as the lead ship in fleet flotillas (or small ship formations such as destroyers). With the introduction of air scouts and scouting roles being taken over by heavy cruisers (due to the Washington Treaty) the Omaha never really fulfilled its design function. The Omaha cruisers were relegated to fleet screening where its high fire-power output and speed were needed.

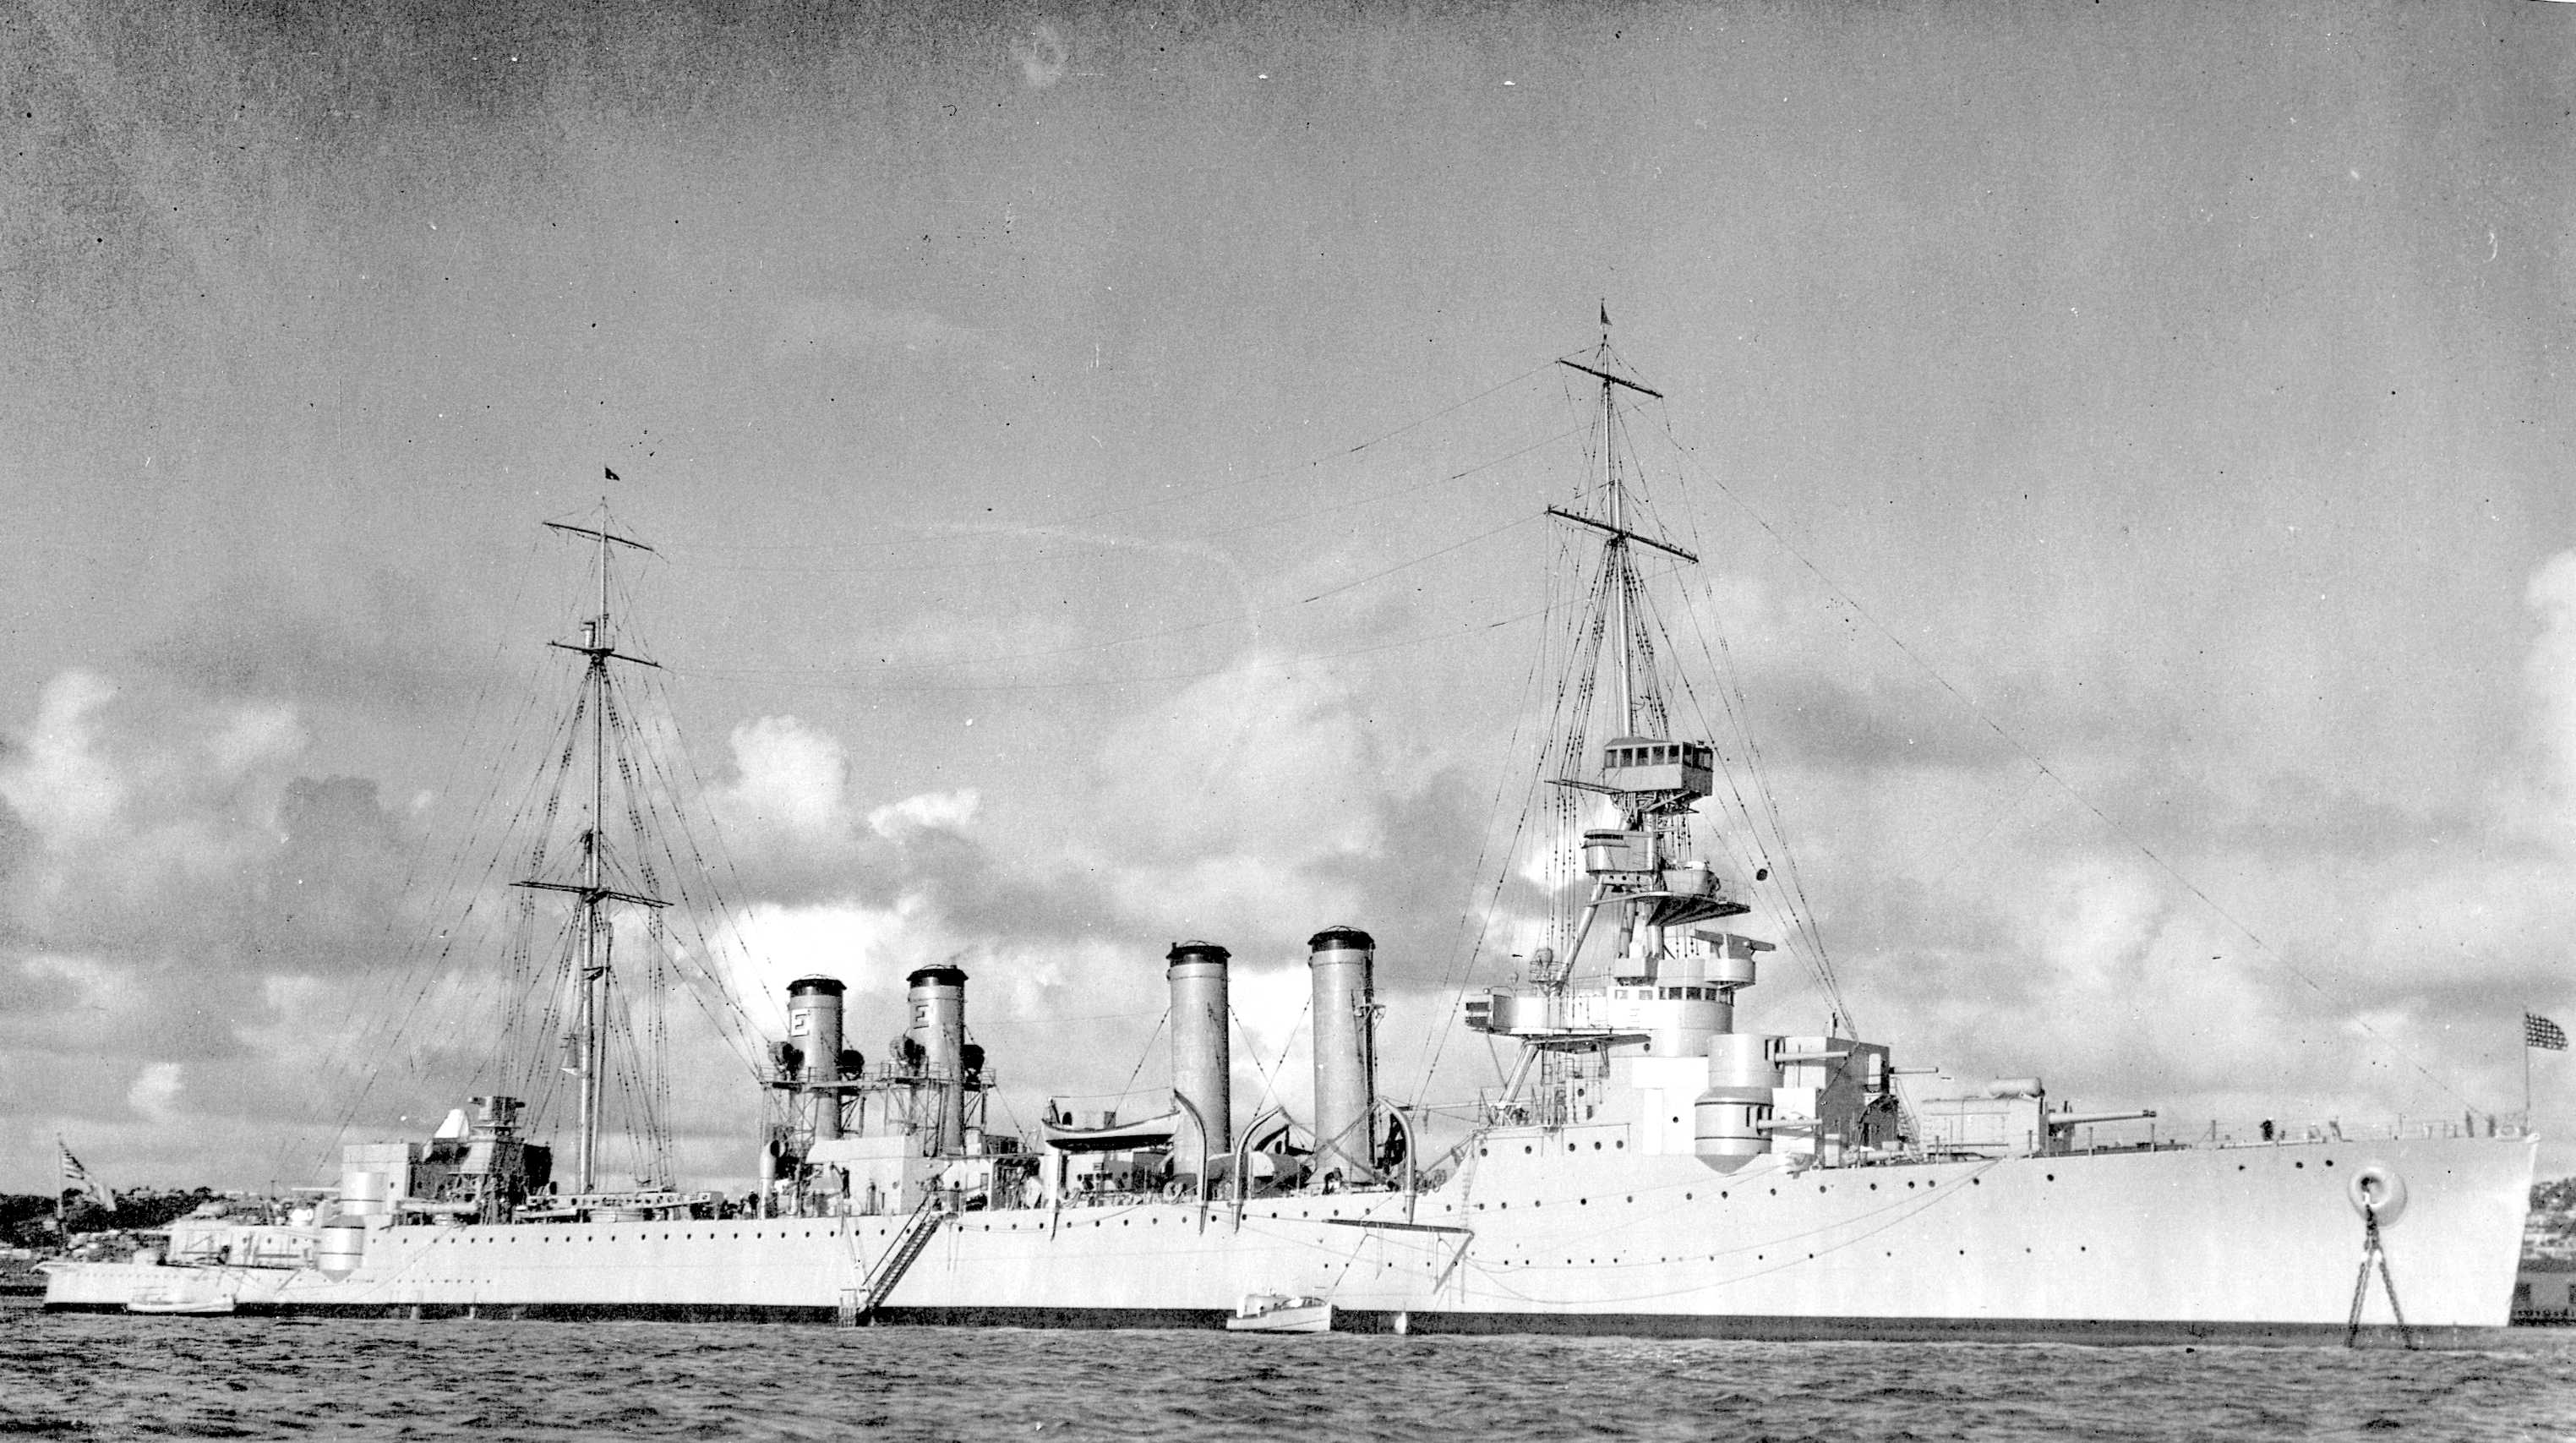
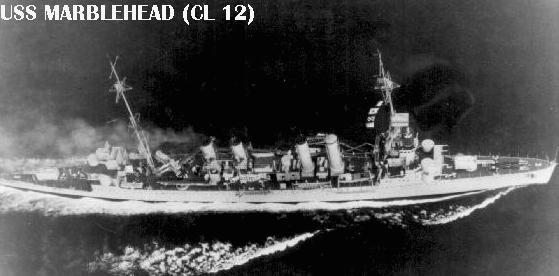
Entering into the second world war the Omaha was the oldest serving Cruiser that was still in service in the US Navy and was mostly assigned secondary and patrol roles where the least danger was. Naturally this meant that the ships didn't have a hugely exciting service history. 2 Omaha ships were present in Pearl Harbour, the Detroit and Raleigh Omaha class Cruisers. The Raleigh was torpedoed during the attack at Pearl Harbour but not sunk. The Marblehead and the Richmond Omaha class cruiser had the most interesting history. The Marblehead  in the battle of the Makassar Strait received 2 bomb hits that penetrated the decks and killed 15 crew and 1 near miss that caused a hole underneath the waterline and jammed the rudder. The marblehead survived the attack and was able to get temporary repairs before heading back to the east coast of the US.


The Richmonds engagement in the Battle of Komandorski Islands was one of the more unusual engagements of the second world war. The fleet which the Richmond was in was on its way to intercept a Japanese supply convoy on their way to the Aleutian Islands. The Japanese convoy consisted of more ships than the original intelligence lead them to believe. When the 2 fleets met it was in open ocean and neither fleet had air or submarine support. The ensuing battle was one of the last purely naval gunnery duel in naval history. The battle was inconclusive with both sides receiving heavy damage, the Japanese Admiral rather than capitalising on his number superiority and the heavy damage done to the US attackers retreated leaving the Battlefield fearing a probable air attack from the US in support of their fleet .

The Richmond Omaha class cruiser managed to badly damage the Nachi Heavy Cruiser during this battle knocking out her electrics to the ammo hoists and gun mounts with 2 hits from her 6 inch guns whilst dodging gun fire and torpedoes in return.


In World of warships the Omaha is a good cruiser. Her armament is better than the preceding Phoenix Class Cruiser and with playing through the previous tier you should be well aware of its strengths and weaknesses. Like the Phoenix the armour for a light cruiser sucks but the Omaha has a lot of guns with a decent fire rate mixed with decent speed, making you a very potent threat for other destroyers and cruisers. With a full broadside she can fire 8 guns and each gun can spit 8.6 rounds per minute. Compared with the Phoenix, Kuma and Furutaka she outclasses all her competitors on the amount of guns and DPM she can dish out. At tier 5 the Japanese cruisers get their 205mm guns but bigger is definitely not better in this instance. The rate of fire of the Omaha outclasses the Furutaka's to such a extent you should be able to win one on one fight every time.


Approaching the enemy showing as little a target as possible whilst maintaining the largest amount of guns on target

The Omaha is also very manoeuvrable having the smallest turning circle of any cruiser in a 1 tier spread (in both the american and jap tech trees). Its rudder shift speed is very good also at 7.5 seconds. The Furutaka has a 1.6 second disadvantage at 8.6 seconds whilst the Aoba has a 11 second rudder shift time. This makes the Omaha very responsive which is good for avoiding gun fire and torpedoes. With the light armour of your cruiser this will be your main defence because not taking fire is how you will survive. Due to the bad armour of the Omaha is suffers for a smaller heath pool than the Japanese Furutaka but this isn't really a ship that you should be having a lone wolf mentality in at the start. You should be choosing when to use your health to trade for a kill or strategic point capture

The Turret Rotation Speed from the Pheonix to the Omaha takes a substantial drop from 18  seconds to 24 seconds. The gun arrangement on the ship means that you will always have some guns to fire on enemies that are flanking you but you will notice this the most when you are trying to turn your turreted guns all the way around when dodging in coming fire. This requires better battlefield awareness than the Phoenix to make the most of your gun advantage in the middle of a fight. Being able to respond to threats before they happen will help you dish out the damage and get kills in this ship so pay attention to your mini map as much as possible for your team and enemies positions.


The main problem that you are going to face in the Omaha is that its no where near a match to any of the ships one tier higher than it. The Cleveland has 9 amazingly fast firing turreted guns which have a good range. The Omaha's armour just can't compete with the Cleveland overwhelming fire power. The Aoba houses 6 205mm guns that have a reasonable fire rate and long range. The Aoba's Torpedoes are deadly with a damage potential of 16.2k combined with a 10 km range. The Guns on the Omaha would let you put up a fight but the light armour of the cruiser is again the Omaha's biggest weakness. A few lucky/well aimed shots from a Aoba can ruin your day when captaining a Omaha as the Aoba's shells hurt. Between Tiers 5 and 6 their is no bigger jump in ship performance anywhere else on the tech tree than here in the cruisers line. (This reiterates my point from a previous post that their should be another ship here that replaces the Phoenix/Omaha so this jump is not so harsh in the American cruiser line)


Proof that the Omaha can be good when used effectively


This however does not mean this is a bad ship, in fact this ship is great when you use it well. This ship is a improvement on the Phoenix in almost every way. More guns more AA more health just makes this American better. Remembering your armour is bad and positioning yourself to avoid incoming fire is the key to survival in this ship. Bad positioning against Japanese cruisers higher calibre guns generally ends in citadel hits. Angle your armour to make the best of it or alternatively wolf pack and give them something else to shoot at. The same principles of the Phoenix apply but this time you have more fire power, keep those guns singing whilst supporting other cruisers and destroyers. If your out in front and feel your in a bad position its not a bad thing in this ship to fall back. The Omaha can't take sustained fire so use the ship accordingly Use your fire rate to get consistently good games with high damage output . Remember this is the last US non premium Cruiser that gets torpedoes so use them whilst you've got them as a trump card. 

Tuesday, 14 July 2015

Imperial Japanese Furutaka

Hi all and welcome back for another ship review.

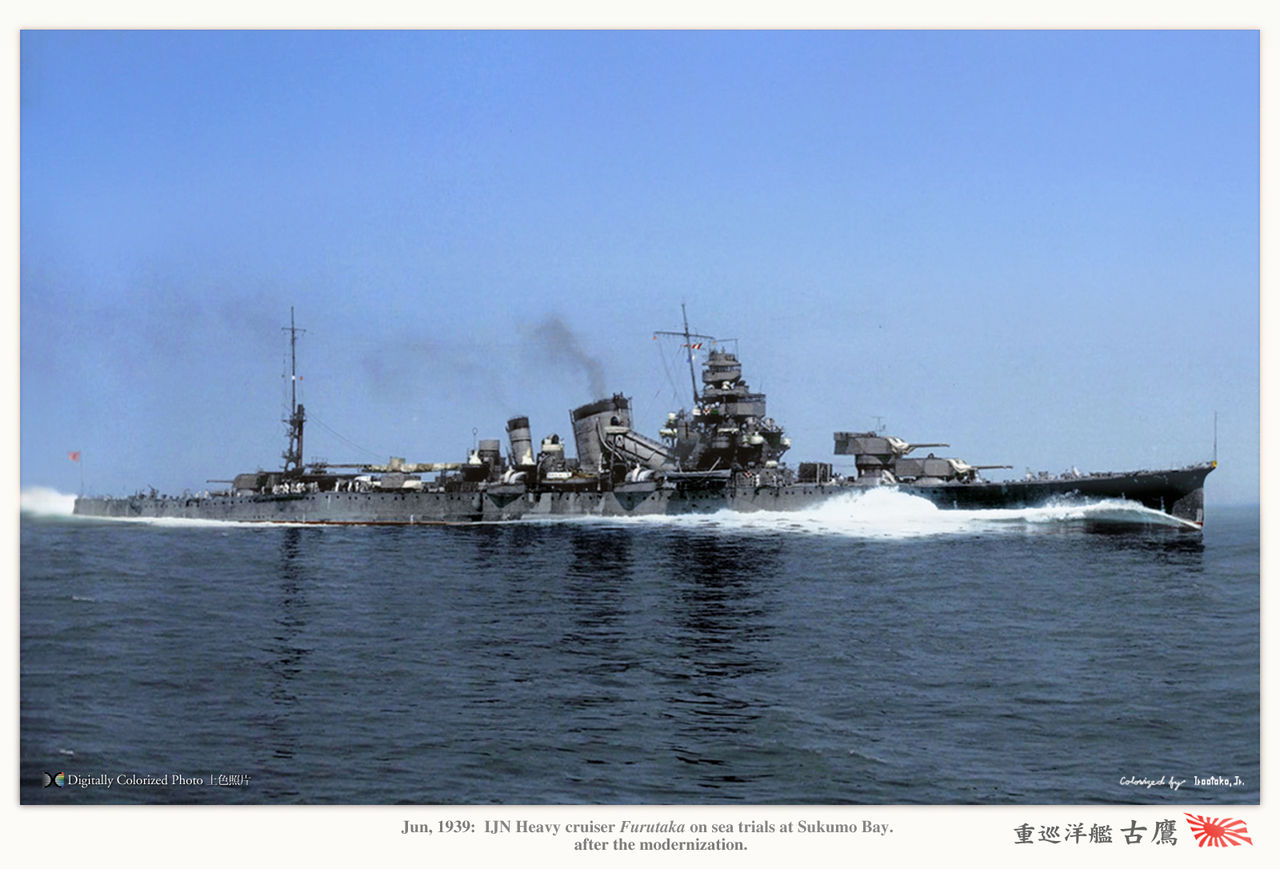
This weeks ship of focus will be the tier 5 Japanese Furutaka. This is the first cruiser in the game to have 203 mm guns. This 'up gunning' changes how this ship should be played coming from the previous tiers Kuma and Tenryu Class Cruisers.


The Furutaka was the first generation of the Japanese navy's high speed heavy cruisers. With the development of the American Omaha (also in World of Warships) and the British Hawkins class scout cruiser the development of a cruiser capable of dealing with this new threat was needed. Following the earlier experiments from the Yubari cruiser, (See my previous ship review on the Yubari for more info) the lessons learnt from that ship were transferred into the design of the Furutaka. The Furutaka was laid down in the 5th of December 1922 and launched on the 25th of February 1925. Upon her initial commissioning in 1926 she was assigned to the 5th cruiser division until 1931 where the Furutaka was placed in reserve fleet. She underwent significant refits during the 1930's where she was fitted with more fire power and defensive armaments.The Furutaka was fitted with a plane catapult which solved the much complained about problem of having to lower planes into the water before they took off (not particularity handy in an engagement).


Her final refit in 1937 saw the Furutaka received her trademark 201 mm guns that we see in World of Warships (203mm in World of Warships but I'm not going to deliberate over 2mm... they are still big guns for a cruiser), new oil fired boilers and the extra addition of new 'Long Lance' torpedo tube mountings.

Entering WW2 the Furutaka was involved in the invasion of  Guam which happened at about the time of the Attack of Pearl Harbour.  After the successful occupation of Guam and the following attempt at capturing Wake Island which had failed, the Furutaka was assigned to cruiser division 6 where the Japanese successfully mounted a second attack and occupied Wake island on the 22nd of December 1942.

The Furutaka was involved in the Battle of the Coral Sea where she was tasked with the escort of the light carrier Shoho. Following a 2 day attack which started on the 7th of May 1942, the US Carriers USS Yorktown and Lexington succeeded in sinking the Shoho and severely damaged the Shokaku carrier. After the attack Furutaka was tasked with escorting the battered surviving Shokaku carrier to Truk for repairs.


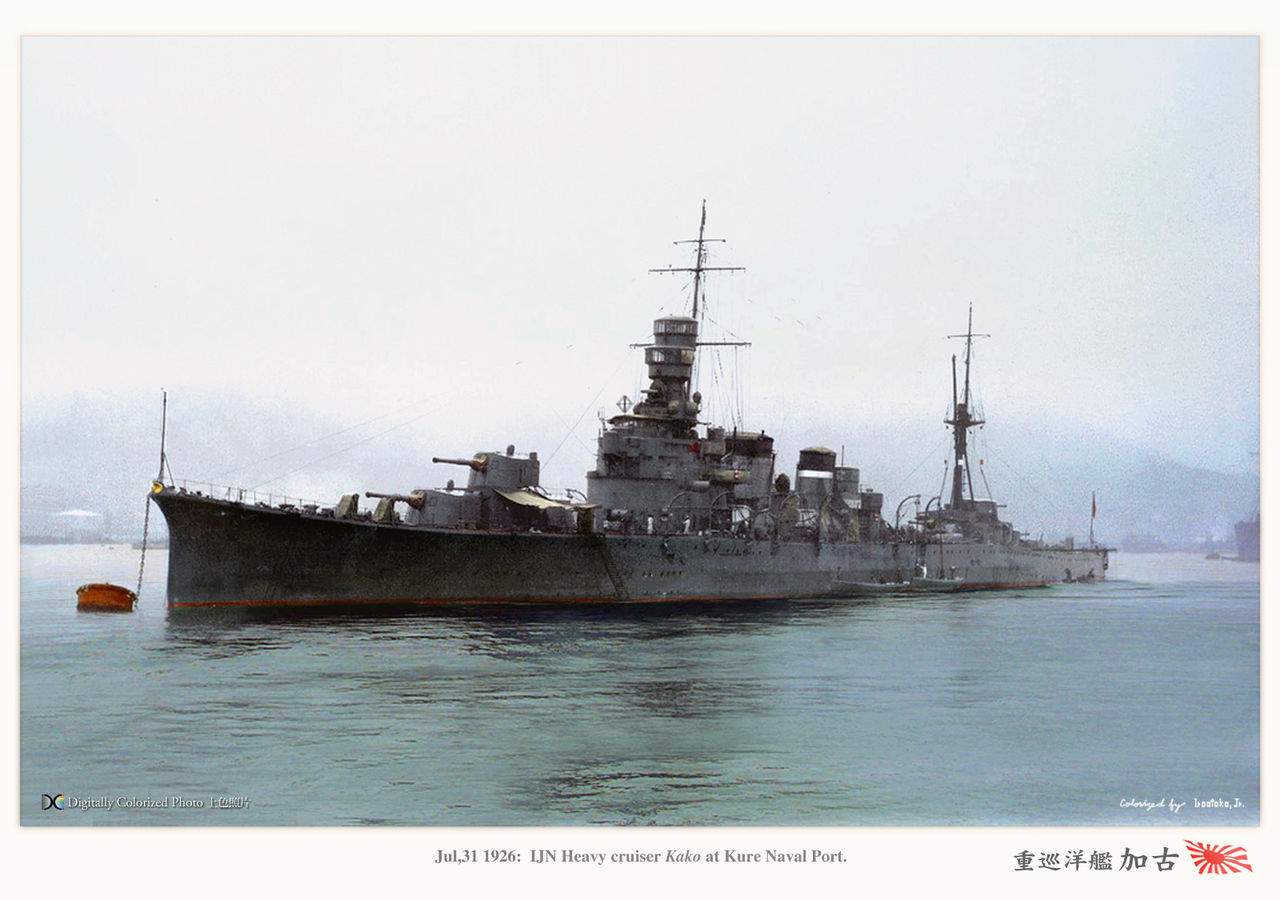
August 1942 in the Battle of Savo Island, the Furutaka took part in an successful attack against an enemy fleet. Under the cover of darkness with flares dropped by spotter planes to silhouette the enemy ships,  the Furutaka accompanied by the cruisers Chokai, Kako, Kinugsasa, Tenryu, Yubari and Destroyer a Yunagi, attacked by firing multiple shells and torpedoes. The resulting battle ended with the Heavy Cruisers USS Astoria, Quincy, Vincennes and HMAS Canberra being sunk. Heavy Cruiser USS Chicago and destroyers Ralph Tabot and Patterson being damaged. On the Japanese side a total of only 6 shell hits were received.

The Furutaka's conflict in the Battle of Cape Esperance (also known as the second batle of savo island) was to be her last after an attacking American fleet successfully managed to cross the fleet containing the Furutaka's 'T'. In the confussion of the Attack the Japanese fleet thought they were under friendly fire and began a 180 degree turn. The Aoba was heavily damaged as the ship exposed her sides in the turn.


The Furutaka fell out of the line of battle to engage Salt Lake City only to find herself coming under fire from the destroyer USS Duncan. After numerous shell hits the Furutaka was put out of action, where she was later to be hit by a Torpedo. Combined with up to 90 shell hits her storage of Type 93 Long Lance Torpedoes seated in her mid decks finally went up from the resulting fires. The Furutaka sank stern first with the loss of 33 and 110 counted as missing. 514 survivors were rescued by 3 passing destroyers. 115 were captured by the American fleet.

In World of warships the Furutaka is a tier 5 cruiser. I have found this a ship that has some draw backs that many players (including myself) have found challenging to grasp. The Japanese get their big caliber 203mm guns on the Furutaka and upwards. Due to this up gunning the Furutaka subsequently suffers from a rate of fire loss which in turn results in a big damage per minute disadvantage against the American nations cruisers . The lack of rounds per minute and slow turning of the turrets mean this is not a brawling ship and seats more in a support ship role. Given the opportunity to put down fire on the enemy the guns can really show its superior caliber. Taking fire and manoeuvring to avoid the shells causes this ship its main problems as I will explain as go through comparing this ship to its alike tiers.


First we will start with the Furutaka's good points. For a Cruiser the Furutaka has a decent health pool and has a good Torpedo armament for a cruiser. The Guns are very punchy and have good burst potential if using cover to your advantage between shots. As the guns are of larger caliber they do more reliable damage against armoured targets so have more chance of citadel hits. As a Japanese Cruiser you have a better concealment rating than your american cruiser equivalents but at 12.2 km this is no destroyer. She has a good top speed too so will be normally up alongside the destroyers in the initial engagement. Unfortunately that's really all this ship has when looking at it on paper.


This ship was oringinally designed to specifically destroy Phoenix/Omaha Cruisers but its horrible turret rotation speed and rate of fire of the guns that really let this ship down in World of Warships. The Omaha (Tier 5 American cruiser) in a straight up gun duel can put out over double the amount of damage per minute than the Furutaka with its guns alone (assuming all shots fired are AP and hit citidels the Furutaka has a DPM of 98700 and the Omaha has a DPM of 213280). Even the Phoenix Cruiser vastly out damages the Furutaka in a one on one duel where in lies the first major weakness of this ship. It just can't dish out the damage when its needed to so leaves you in a arisen of trying to dictate the engagements.

This is the First ship I have looked at and feel it needs a decent buff to make it competitive. Being a Japanese ship with such low  rate of fire you would have thought that the turret speed may be ok to compensate... Nope, its 45 secs for 180 degrees turret rotation... like a battleship (face palm). The Omaha has a 24 second 180 degree turret rotation speed. I could carry on with this but you know where I'm going with this... Bigger in this instance definitely isn't better. The Furutaka does however have a secondary armament that can support up to a spectacular range of 4 km. This short range really isn't going to help you in any instance unless you have a destroyer trying to suicide run you.

The main guns slow rotation speed makes you have to straighten out in dangerous situations to get guns on target. where the ship doesn't really have the armour to take prolonged punishment its definitely a risk business. This makes you an easy target for enemy gunners and in my opinion is the single worst thing about this ship.


Due to turret number 4 due to being next to the plane catapult, it has a limited firing arc. In most situations won't be able to fire that turret at what ever your aiming at as you should be angling your armour against fire to maximum the ships armour potential and make yourself a smaller target.

This isn't the most manoeuvrable of cruisers, having quite a large turning circle and slower rudder shift speed for a cruiser. Its not terrible or unworkable when it comes to dodging incoming fire or torpedoes but its still not up to the American cruisers standard. The manoeuvrability mixed with the ships decent speed working fairly well when getting out of dangerous situations however but doesn't have such a superior speed advantage where you could run away from other cruisers. The speed is good enough to chase most fleeing destroyers down so that's definitely a plus for the Furutaka

This really looked to be a terrible ship to play when as I am working my way along the Japanese Cruiser line again. It has some very horribly noticeable weaknesses that are by no means hard to miss. Surprise however when I played in this ship it didn't completely suck. Knowing its blatant weaknesses and playing this ship as a burst damage support ship seems to suit the Furutaka's characteristics of play.

You will not be brawling in this ship as you won't rotate your turrets fast enough to keep up with throwing the ship about and targets circling you.  The guns are reliable in that they do decent damage consistently upon hitting their target. She does seem to be better armoured than the american tier 5 light cruiser and does benefit from angling the armour from incoming cruiser/destroyer caliber AP shells. Getting into engagements where you can work as a team and sit behind close range specialist brawlers. Keeping attention away from you whilst dishing out damage with the bigger guns is the way to use this ship. Going alone against other ship will get you focused down quickly and it can be frustrating knowing you are getting your ass handed to you by rapid firing lower tiered ships spamming HE shells.


Don't get me wrong I don't think this is a horrific ship but I don't think its great either. The Furutaka is one of the biggest missed opportunities for Wargaming World of Warship team to make a really fun ship and all it would take is a slight buff of turret rotation speed and fire rate. I can deal with the manoeuvrability being worse but giving half the amount of damage to an equal Tier is pretty bad balancing in my opinion. Its not impossible to do well if you correctly position your ship in battle but in most instances this is very situational and won't always work out in your favour. With HE being so effective against armour in the Open Beta it negates a lot of this ships big gun caliber advantages. it will be interesting to see if any changes come in to effect that may make this a more competitive ship

That's all for this weeks review I look forward to seeing you back here for my Tiger Update later in the Week.


Tuesday, 7 July 2015

USS St.Louis, The Keeper of Guns and Future Seal Clubbing.

Welcome back for another ship review on my Blog. Things over the last 2 weeks have been a little crazy with Berlin and also with going south to Lands End (in Cornwall, UK) on a last minute trip. Needless to say I haven't had a huge amount of time for gaming these past 2 weeks but what I have saved for this week is a ridiculously good tier 3 Cruiser that throughout the closed beta I had a fair amount of fun playing.

All the way through the closed beta, every player that I talked to loved this ship and many came to the conclusion that they would be keeping a harbour slot ready for it when the open beta went live. This ship is of course the USS St. Louis. When fully upgraded this little power house sports 14 rapid firing guns that would give butterflies to even the hardiest of American redneck's. The St. Louis is equipped with ample amount of armour so can be a real pain in the ass to kill without taking large amounts of damage in return.


To see just how typically American this ship is you only have to look down the length of its port and starboard sides to see multiple barrels poking their way out of the hull. This ship pretty much sets the standard for all American cruisers to come. Where the focus of Japanese cruisers is a mixture of guns and Torpedoes the American cruisers do away with any distractions and focus on high DPM Guns.


The St. Louis and The Cleveland are pretty much indicative of this characteristic in the lower tier game play and demand respect from all opposing players that encounter them. Needless to say that these 2 cruisers will be common place in all good captains harbours in World of Warships as they are so much fun to play.

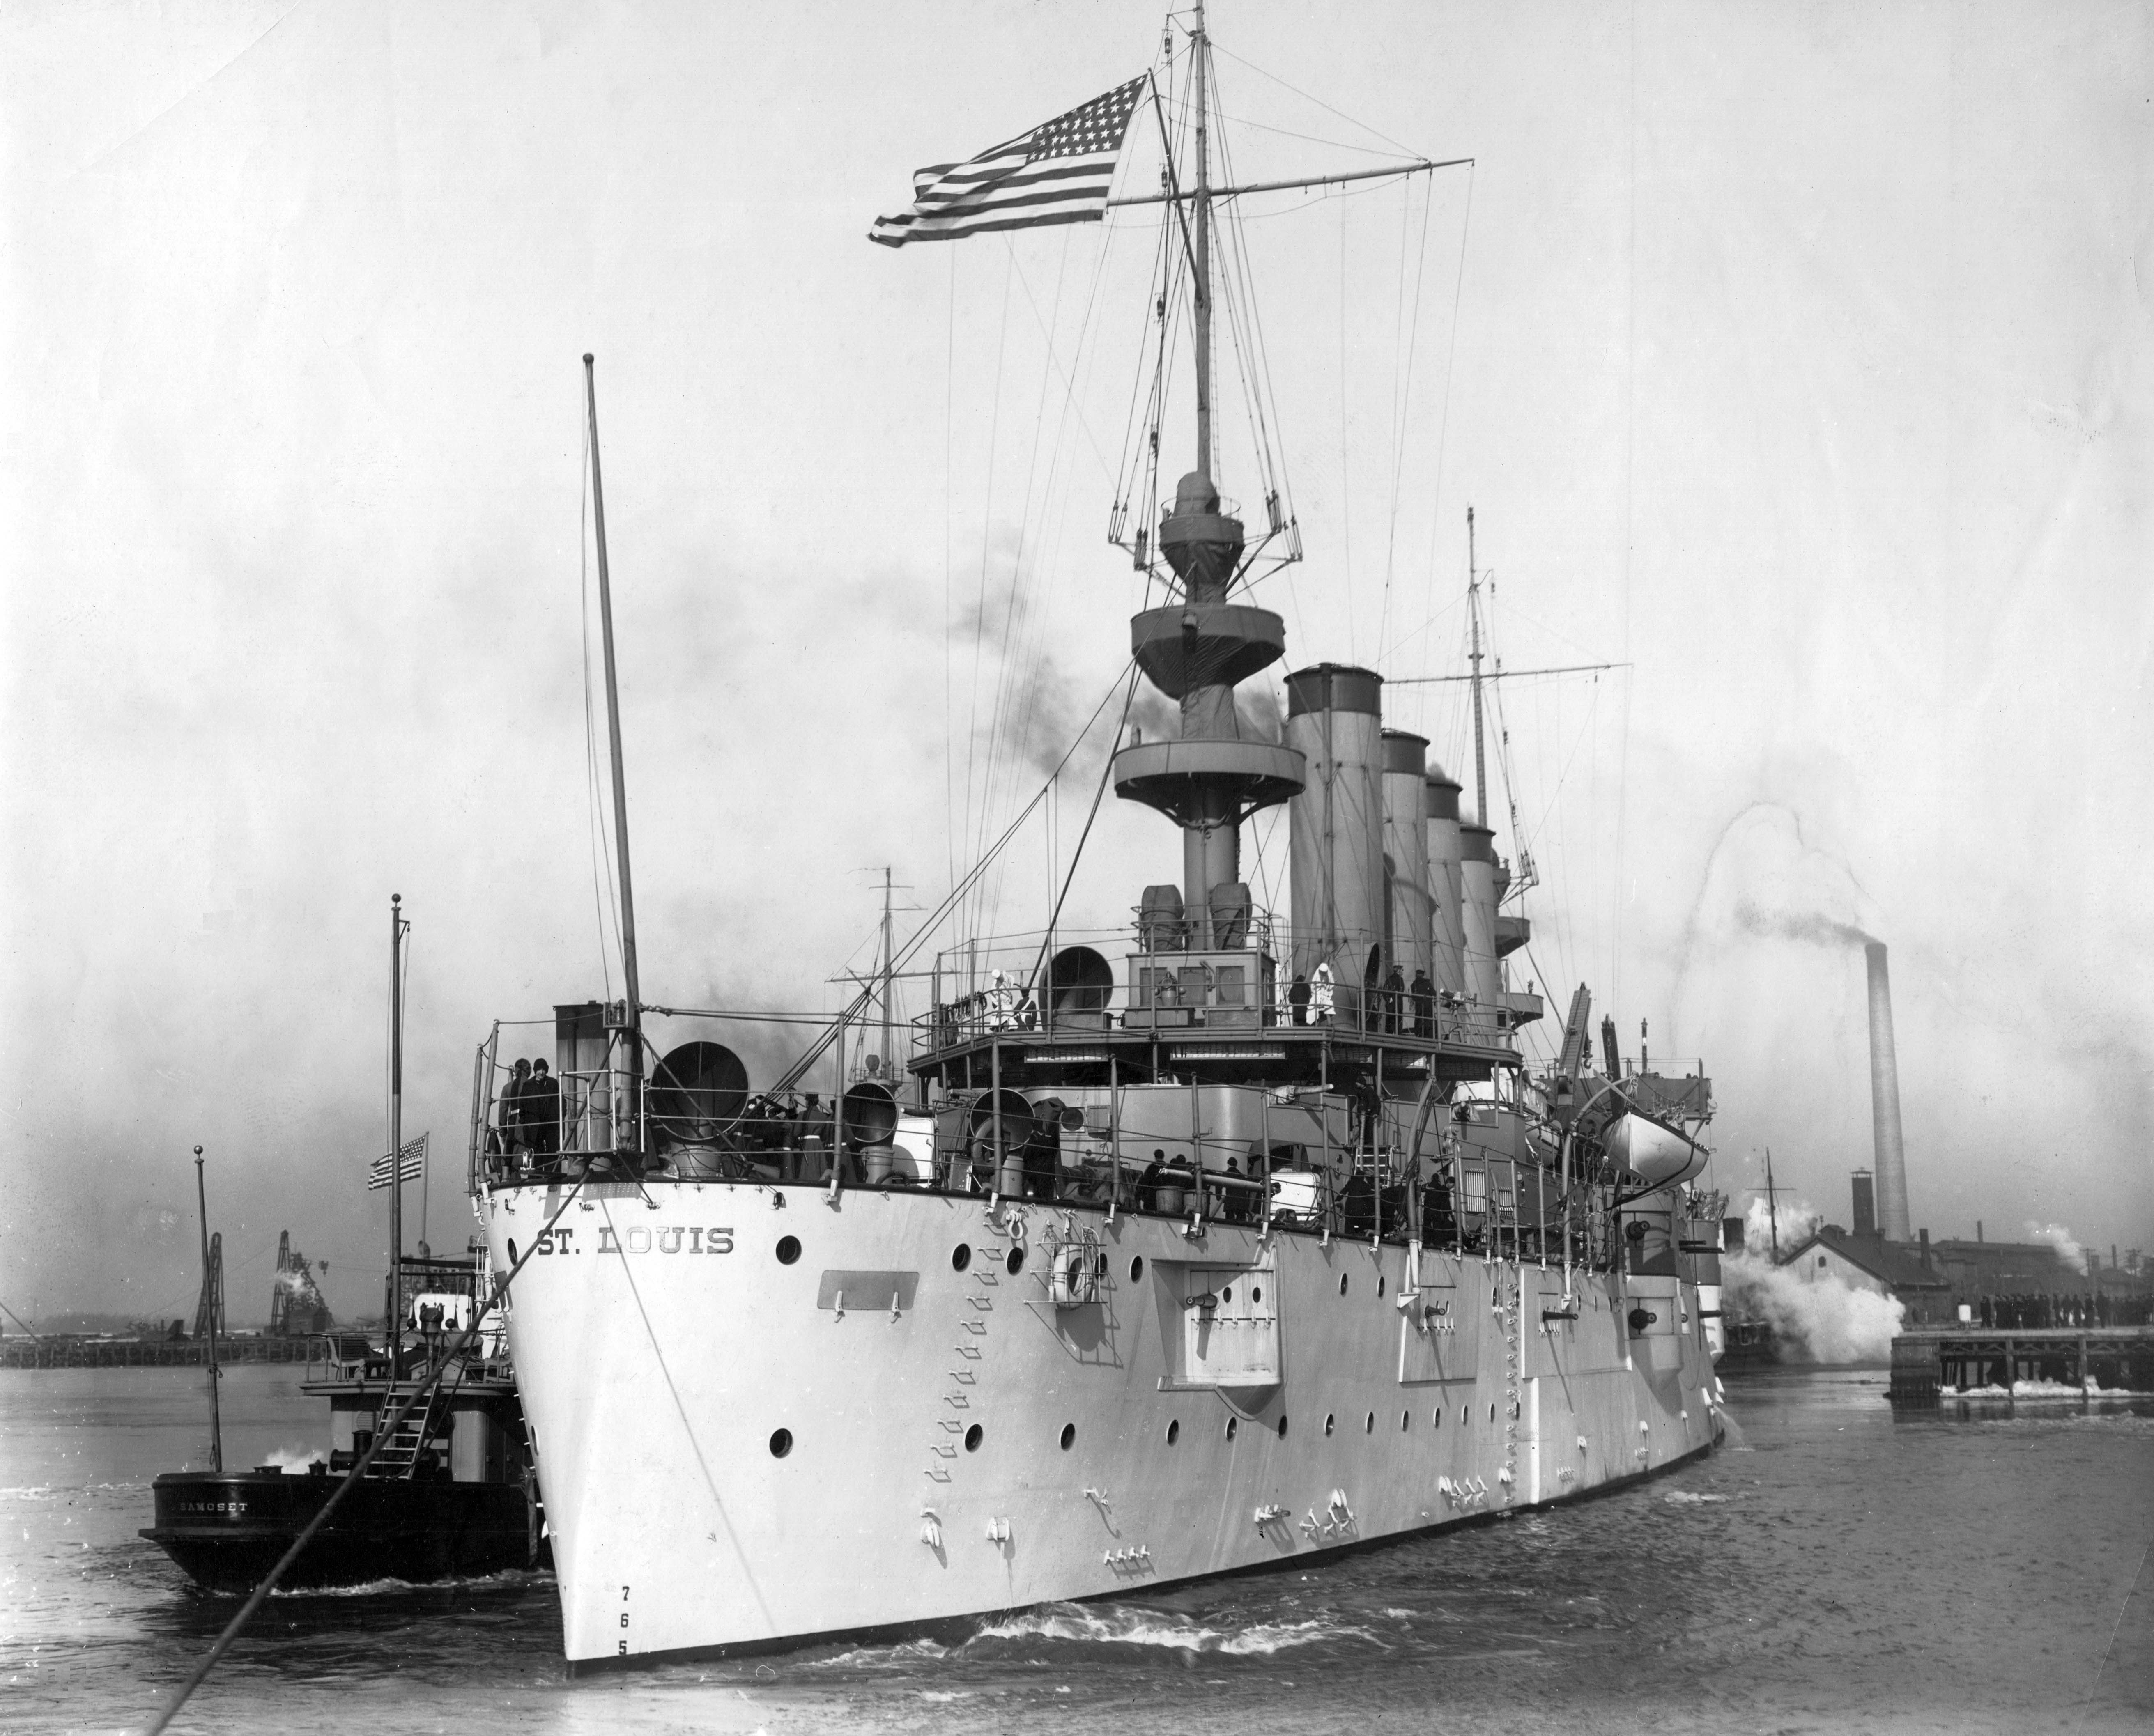
Historically in real life the USS St. Louis (C-20) had a pretty unremarkable service history. The St. Louis was launched in 1907 after sea trials to the Pacific Fleet. During her design phase the consensus was made for improvements on the existing Columbia class cruiser design to which she would be based upon. The decision was made up the armour her hull in comparison to other Columbia class cruisers, increasing her displacement from 6000 tons to 9700 Tons. This made the St. Louis a fully fledged protected Cruiser. With all the extra armour that was fitted to the cruiser and in a bid to save weight, the St. Louis was fitted with 6 inch guns rather than the standard 8 inch. A larger power plant was also needed in the ship to counteract the extra weight from the added armour. 


Throughout the St. Louis's service life there was only one point of note but this didn't really involve the ship but more the crew that manned her. On the 4th of Feb 1917 the crew stopped the scuttling of a interned German Sloop Geier by boarding with an armed party. The Geier was captured before her planned scuttling and ended up serving the United states under the new name of the Schurz. The St. Louis was mostly consigned to transporting goods and convoy escorts other than this singular event. The St. Louis was eventually decommissioned and scrapped in 1930.


In World of Warships this is a stonkingly good tier 3 cruiser. This ship is literally crapping guns with fourteen 152 mm guns with a secondary armament of eighteen 76.2 mm guns. On a tier 3 Cruiser this ship even can hold its own against battleships of equal tiers. Having so many rapid firing guns makes this ship a real threat for destroyers and other cruisers. The St. Louis has almost 30K of hit points and is very heavily armoured for a cruiser. This means you can weather a fair old chunk of punishment before going down swinging. When compared to the Japanese T3 Cruiser you can really see this amplified when the Tenryu has a mere 17.7 K HP. 


Having 6 guns on both the port and starboard sides of the ship and one rotating turret in both the fore and aft of the ship. This means with additional 2 guns that can rotate 180 degrees on the deck you can have a maximum potential 8 guns on target when firing a full broad side. Due to the positioning of the guns facing directly outwards from the ship you won't have to wait for your turrets to turn when changing directions. You will always have some guns on target if you get surprised by the enemy or if you have to switch targets.

With all these great advantages there has to be some disadvantages that stem from its historical design choices that favoured many guns and large amounts of armour. All this extra weight ladened on a cruiser makes the St. Louis suffers most in its speed and rudder shift time. Torpedoes will be your biggest nightmare as the St. Louis drives very similar to a skip and doesn't respond well to sudden threats. The gun range isn't great either at 10km, presenting the danger that many ships can use their speed and range to keep you at a distance where by shoot you without you being able to respond in kind. Not many players will be wise enough to realise this at tier 3 and will generally close to shorter ranges where they can actually hit you. This will be playing into your hands and the strengths of your ship especially if they close into your secondary range adding to your ginormous gun array. 


One thing to note with the St. Louis is it doesn't have a great concealment range so being careful with your approach using some cover in the initial stages of the match is best advised. Most Battleship captains will always choose to shoot at a cruiser they know they can get big numbers of damage from over another opposing well armoured battleship.

In conclusion with this ship, the key to your success in this ship is to simply keep the guns singing. You have lots of them so use your main strength as much as you can. This is a strong cruiser for its tier but its still a cruiser and charging into to many enemies will normally get you focused down even if you can put up a fight. When facing off against torpedo baring ships try to predict when they will be firing their torpedoes and start your evasive turns early. The speed and rudder shift time are terrible on this ship but the turning circle is good. Reacting early in these dangerous situations will help you survive. Doing aggressive manoeuvres in other ships tends to leave you having to turn turrets around to defend yourself but with the gun arrangement in the St. Louis you can fire continuously and cause your enemy to retreat under a withering hail of fire.


The characteristics of captaining the St. Louis feels very similar to the HMS Warspite with her fairly slow speed, good armour, slow rudder shift time and good turning circle. Not to mention they both have fantastic armaments. If you find yourself getting on with the St. Louis I would highly recommend looking at the Warspite. As you can see below you can get great results from the Warspite once captained properly.


Until later in the week take care and I'll see you back here soon.


Wednesday, 24 June 2015

World Of Warships Hatsuharu Destroyer, The Doom Bringer

Welcome back.

By the time you are getting this it will be Wednesday and I will be enjoying a well deserved break in Berlin, Germany with my wonderful girlfriend. As there will only be one post this week due to my holiday so I hope you make the most of it & enjoy it!

This week I will be looking at a one of my most loved ships in my harbour, the Hatsuharu Tier 7 Japanese Destroyer. This is the first Destroyer in the Japanese line to get the Type 93 Long Lance Torpedoes. This 610mm Type 93 is a massive step up from the from the previous tiers 5-6 in damage. These Torpedoes are fast, have a long range and a hard punch with a base alpha damage of over 17 k.


The Hatsuharu Class Destroyer

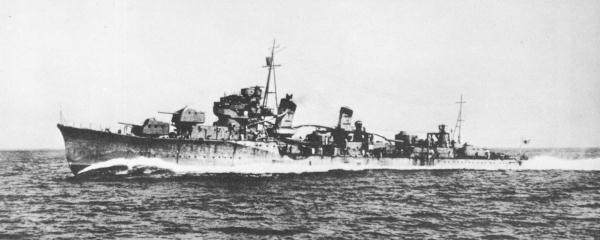
The Hatsuharu class destroyer was built at the beginning of the 1930's. At this time the Imperial Navy's ship developments were limited by the London Navy Treaty.The design limitations imposed by the treaty meant that the Hatsuharu was smaller than previous Fubuki and Akatsuki class Destroyers that had come before her previously. It also limited designs for the Hatsuharu to a displacement of 1500 tons. The designers had to stretch the contemporary destroyer design to its limit whilst still trying to arm the new destroyer design with almost equally powerful armaments of its earlier classes. This causes severe stability problems due to the ships smaller hull and displacement. The resulting top heavy designs created worrying structural weaknesses, not just the Hatsuharu but many of the ships of this treaty's era. These structural design flaws were fatally highlighted when the torpedo boat Tomozuru capsized in 1934 and a typhoon ripped the bows of two Fubuki class destroyers in 1935. As a result of these 'incidences', all the Hatsuharu class vessels went through a major rebuild or were extensively modified to remedy their stability problems.


So Pretty Yet so Dangerous

Suffering stability problems for weaponry caused a lot of issues but Hatsuharu but it was able to hold its own in a fight. It used the same calibre 50 type 3 naval guns (12.7cm) as its Fubuki class predecessor however its guns could serve as dual purpose anti air as well anti ship with having a 75 degree elevation. An additional two 40mm AA guns also served as closer range air deterrence if the need presented itself. The 2 Triple 61cm torpedo launchers could do a full 360 degree turn in around twenty five seconds thanks to its electro hydraulic system and each emptied launcher tube could be quickly reloaded with the use of a mechanical wired system (Kiryoku sōtenshiki jihatsu sōten sochi) in around 23 seconds (I wish it was like this in world of warships).


During the second world war The Hatsuharu class destroyers saw action in the Battle of Midway, battle of Kolombangara and even escorted the mighty Yamato on her final Operation tengo. In the Battle of Kolmbangara the 'Yugure' Hatsuharu class destroyer assisted in the sinking off USS Gwin and the damaging of HMNZS Achilles, USS Honolulu and USS St. Louis. All the Hatsuharu class destroyers in service were eventually sunk in different conflicts throughout the second world war either by air bombings, submarine torpedoes or by mines.

In World of Warship this destroyer really enters the Japanese Destroyers into the arena of versatile long range strikes. The speed of the torpedoes mixed with its range their 10 km range has surprised many a ship I had been stalking whilst captaining this ship. The Hatsuharu gains a larger surface detectability range of 6.7km but still maintains a comfortable 3 km safe area in which to launch surprise attacks from without ever being spotted.


Like most Japanese destroyers the guns are pretty unremarkable being of smaller number and a with slower rotation speed than their American counterparts. At Tier 7 The American Mahan is a pretty poor destroyer in comparison to the Hatuharu. Its guns have a longer range and quicker rotation speed but has exceptionally poor ranged torpedoes (the worst in the game at 4.5km un-upgraded and 6.4 km upgraded). A Mahan has a surface detectability of almost 8 km so has to sail well within secondary range of most battleships to be effective. Unsurprisingly the Mahan has been given more health than the Harauhatsu to take a little extra punishment but its still a destroyer and won't last long under sustained punishment. Battleship weaponry seems to get a lot more accurate when firing at targets between 12 and 6 km so puts the Mahan at a distinct disadvantage when engaging larger ships.

The guns are not as painful to use as previous tiers of Japanese destroyers having around half the turret rotation speed of the Minekazi & Mitsuki (45 seconds on these ship where the Hatsuharu has a 25 secs for 180 degrees). This welcome change lends towards more versatile play for Japanese destroyers where guns actually might be a viable option in some most scenarios. As the Hatsuharu has similar sized guns to the Mahan  the American has to rely on its main advantage of faster firing guns to get it out of trouble. Being able to spot and outrun the Mahan whilst maintaining stealth gives the Hatsuharu the advantage as a destroyer to react and avoid a close up brawls. Forcing American destroyers to take up chase limits their fire which takes their gun advantage away from them.  Maintain a decent distance using your higher speed, whilst drive them back by your firing guns (which will be novel for most Japanese destroyer player) and torpedoes. This is normally enough to deter even the most dogged of attackers after setting them on fire a few times and causing them to take evasive manoeuvres dodging incoming torpedoes.


The Mahan Tier 7 American Destroyer

I like the Hatuharu. I have to admit when sailing the T6 Mitsuki I found it hard to adjust my playstyle for that ship. The Minekaze was a great little destroyer and I felt the Mitsuki was a bit of a let down. This made me think about what impact the future changes in the heavier higher levelled destroyers would effect my play. I am happy to say that the Hatsuharu is much more fun to captain than the Mitsuki and I have begun to see high amounts of damage rack up in most of my games. I find its balance of power, speed and stealth really aids my approach to the battlefield which works well as a fast paced doom bringing machine. I would definitely recommend this ship for anyone that loves that hard hitting potential only destroyers can give.


Hatsuharu Doom Attack

I hope this review has helped you make a decision on whether you would like to take up Japanese destroyers and would love to hear your feed back. Till Next time.