This is a personal blog of a professional 3D Artist from the moment I picked up a 3D program to present time. It contains my interests in games and my modelling practice, mixed in with things that I have found interesting over my time writing on it. I pride myself with being able to put myself into my writing so don't be too shocked if you see some of my own twists on making points here too.
Hi all and welcome back to my tiger tank weekly post.
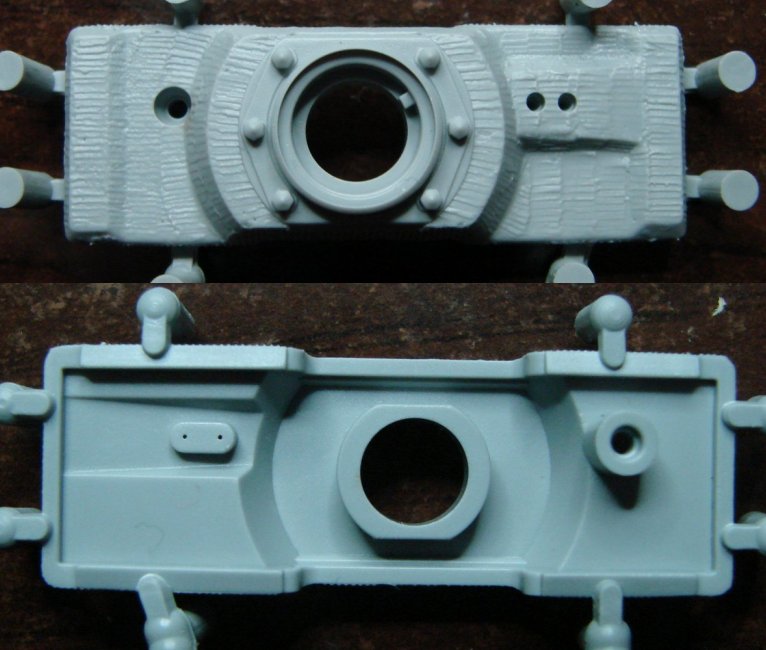
This week I have made a start on my mantlet for the Tiger Tank. I originally thought that there was only two variations of the turret mantlet, one from early production and one from its later production. This was mostly down to that there is one very visual difference between the two which is the reinforced bar that runs across the telescopic vision port holes. I didn't really have too much knowledge on that and took that visual difference as the main distinction between the two.
Late Production Mantlet
Tiger 131 Early Production Mantlet, Recognisable by the Visual Bar on the Right Being Absent
Looking around for more reference imagery I came across this image that illustrates the variations of mantlet during the tanks development throughout the war. It's pretty interesting to see how the shape changed and decisions made to aid the tanks combat performance.
A Good Illustration of Mantlet Development Thoughout the War
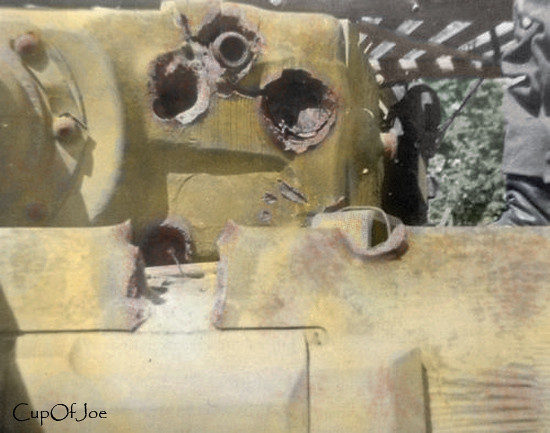
Adding sun shields and magnetic bomb protection were an obvious additions to aid the crew with vision and survivability. However the added armour to the telescopic openings and side cheek is not so obvious a decision. These must have been added to counter where the tiger was taking hits on the mantlet but this is me just speculation from the images I have seen from battle damage. it could also be a addition to accomodate additions to the internals but I will have a more in depth look at this for next week.
Battle Damage Mantlets
A Shell is Still Visible, Stuck in the Mantlet of this Battle Damaged Turret.
Here is how I have been getting on with my modelling for this week. I already had the gun sleeve modelled so I just had to use this as a base to build the mantlet around its shape. I know I had modelled the Sleeve with the correct radii and thickness's so this gave me the recess depth and shape for the mantlet as a starting point.
As you can see this is still a work in progress. I have a fair bit of work to do on this, cleaning up with some of the model pinching and also completing the back part of the mantlet where it connects to the trunnions. I'm pretty happy with the progression so far although its no where near done to the amount of detail I want to be. Part of my meticulous nature is that im never happy with what I've done when I've finished it. I guess this keeps me on edge to progress further with my work and continue to improve. Stay tuned for more updates on this one, the mantlet is one of the defining characteristics of the tiger and I definitely want to do this one right.
Thanks for your continued support and visiting of my blog, I very much appreciated. I hope you all have a good weekend (and if your in the UK a good bank holiday weekend) and I will catch you here next week for another Tiger tank progression report.
Welcome back for another ship review on my Blog. Things over the last 2 weeks have been a little crazy with Berlin and also with going south to Lands End (in Cornwall, UK) on a last minute trip. Needless to say I haven't had a huge amount of time for gaming these past 2 weeks but what I have saved for this week is a ridiculously good tier 3 Cruiser that throughout the closed beta I had a fair amount of fun playing.
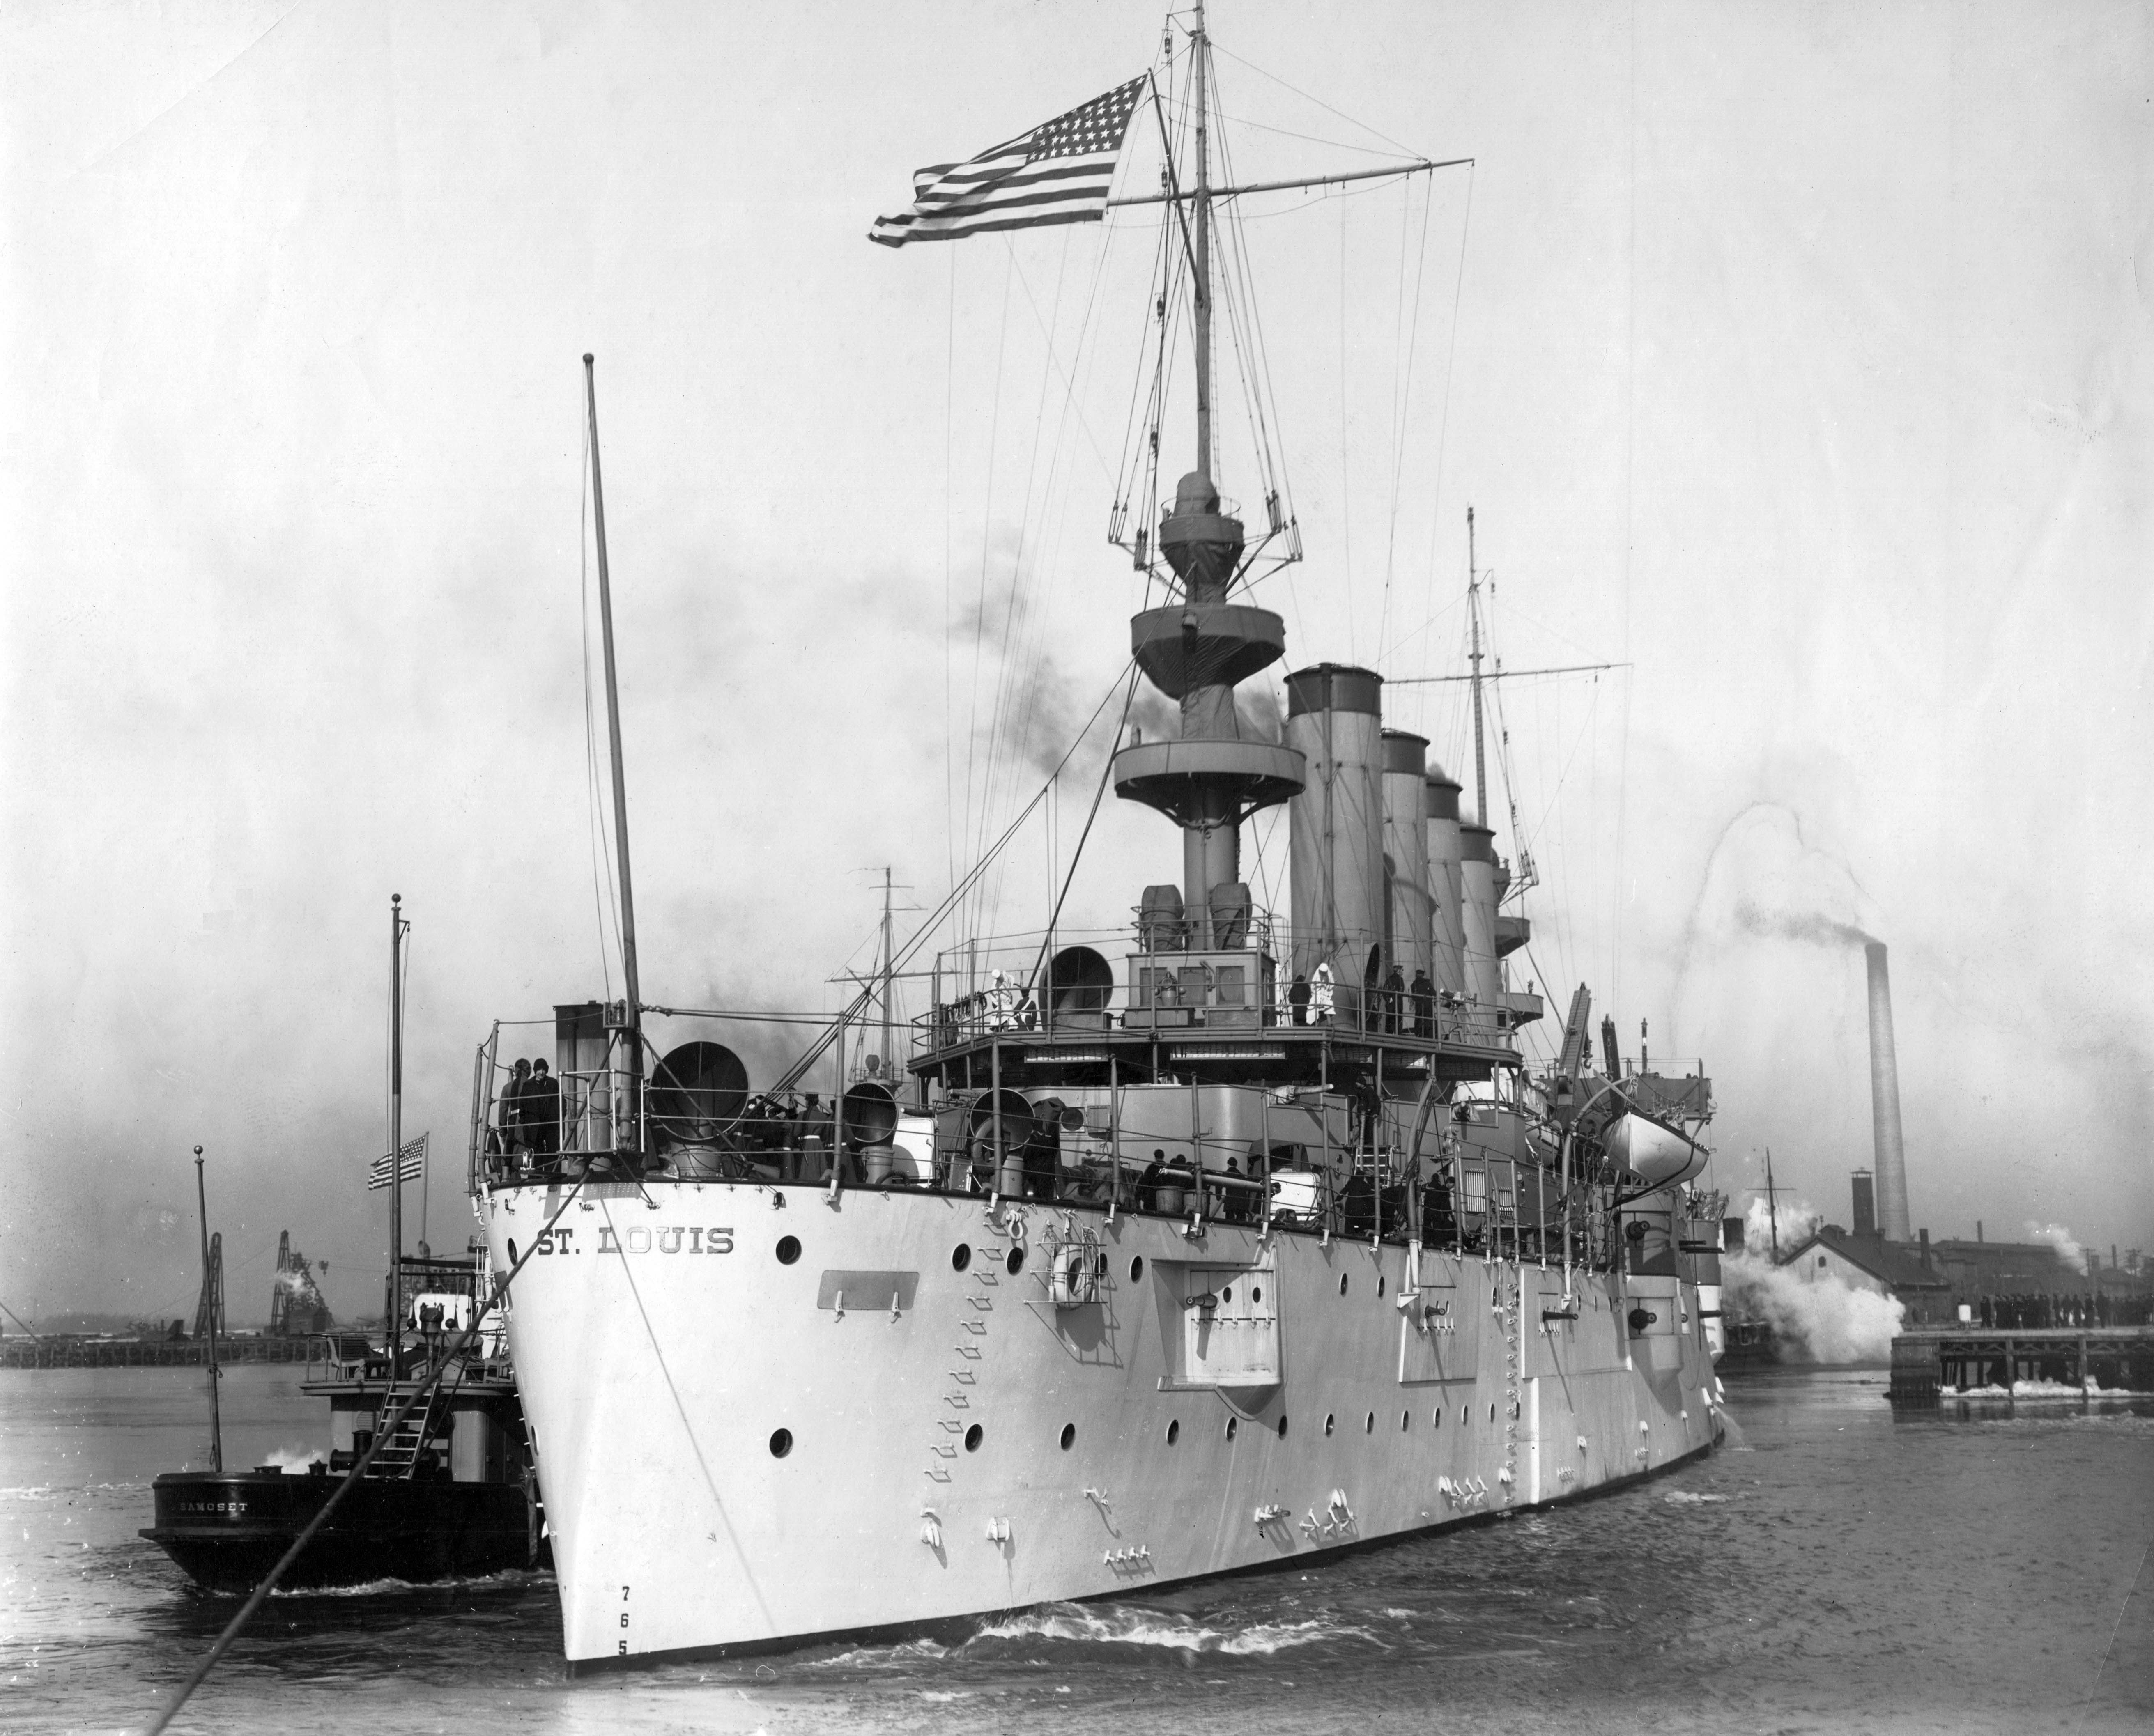
All the way through the closed beta, every player that I talked to loved this ship and many came to the conclusion that they would be keeping a harbour slot ready for it when the open beta went live. This ship is of course the USS St. Louis. When fully upgraded this little power house sports 14 rapid firing guns that would give butterflies to even the hardiest of American redneck's. The St. Louis is equipped with ample amount of armour so can be a real pain in the ass to kill without taking large amounts of damage in return.
To see just how typically American this ship is you only have to look down the length of its port and starboard sides to see multiple barrels poking their way out of the hull. This ship pretty much sets the standard for all American cruisers to come. Where the focus of Japanese cruisers is a mixture of guns and Torpedoes the American cruisers do away with any distractions and focus on high DPM Guns.
The St. Louis and The Cleveland are pretty much indicative of this characteristic in the lower tier game play and demand respect from all opposing players that encounter them. Needless to say that these 2 cruisers will be common place in all good captains harbours in World of Warships as they are so much fun to play.
Historically in real life the USS St. Louis (C-20) had a pretty unremarkable service history. The St. Louis was launched in 1907 after sea trials to the Pacific Fleet. During her design phase the consensus was made for improvements on the existing Columbia class cruiser design to which she would be based upon. The decision was made up the armour her hull in comparison to other Columbia class cruisers, increasing her displacement from 6000 tons to 9700 Tons. This made the St. Louis a fully fledged protected Cruiser. With all the extra armour that was fitted to the cruiser and in a bid to save weight, the St. Louis was fitted with 6 inch guns rather than the standard 8 inch. A larger power plant was also needed in the ship to counteract the extra weight from the added armour.
Throughout the St. Louis's service life there was only one point of note but this didn't really involve the ship but more the crew that manned her. On the 4th of Feb 1917 the crew stopped the scuttling of a interned German Sloop Geier by boarding with an armed party. The Geier was captured before her planned scuttling and ended up serving the United states under the new name of the Schurz. The St. Louis was mostly consigned to transporting goods and convoy escorts other than this singular event. The St. Louis was eventually decommissioned and scrapped in 1930.
In World of Warships this is a stonkingly good tier 3 cruiser. This ship is literally crapping guns with fourteen 152 mm guns with a secondary armament of eighteen 76.2 mm guns. On a tier 3 Cruiser this ship even can hold its own against battleships of equal tiers. Having so many rapid firing guns makes this ship a real threat for destroyers and other cruisers. The St. Louis has almost 30K of hit points and is very heavily armoured for a cruiser. This means you can weather a fair old chunk of punishment before going down swinging. When compared to the Japanese T3 Cruiser you can really see this amplified when the Tenryu has a mere 17.7 K HP.
Having 6 guns on both the port and starboard sides of the ship and one rotating turret in both the fore and aft of the ship. This means with additional 2 guns that can rotate 180 degrees on the deck you can have a maximum potential 8 guns on target when firing a full broad side. Due to the positioning of the guns facing directly outwards from the ship you won't have to wait for your turrets to turn when changing directions. You will always have some guns on target if you get surprised by the enemy or if you have to switch targets.
With all these great advantages there has to be some disadvantages that stem from its historical design choices that favoured many guns and large amounts of armour. All this extra weight ladened on a cruiser makes the St. Louis suffers most in its speed and rudder shift time. Torpedoes will be your biggest nightmare as the St. Louis drives very similar to a skip and doesn't respond well to sudden threats. The gun range isn't great either at 10km, presenting the danger that many ships can use their speed and range to keep you at a distance where by shoot you without you being able to respond in kind. Not many players will be wise enough to realise this at tier 3 and will generally close to shorter ranges where they can actually hit you. This will be playing into your hands and the strengths of your ship especially if they close into your secondary range adding to your ginormous gun array.
One thing to note with the St. Louis is it doesn't have a great concealment range so being careful with your approach using some cover in the initial stages of the match is best advised. Most Battleship captains will always choose to shoot at a cruiser they know they can get big numbers of damage from over another opposing well armoured battleship.
In conclusion with this ship, the key to your success in this ship is to simply keep the guns singing. You have lots of them so use your main strength as much as you can. This is a strong cruiser for its tier but its still a cruiser and charging into to many enemies will normally get you focused down even if you can put up a fight. When facing off against torpedo baring ships try to predict when they will be firing their torpedoes and start your evasive turns early. The speed and rudder shift time are terrible on this ship but the turning circle is good. Reacting early in these dangerous situations will help you survive. Doing aggressive manoeuvres in other ships tends to leave you having to turn turrets around to defend yourself but with the gun arrangement in the St. Louis you can fire continuously and cause your enemy to retreat under a withering hail of fire.
The characteristics of captaining the St. Louis feels very similar to the HMS Warspite with her fairly slow speed, good armour, slow rudder shift time and good turning circle. Not to mention they both have fantastic armaments. If you find yourself getting on with the St. Louis I would highly recommend looking at the Warspite. As you can see below you can get great results from the Warspite once captained properly.
Until later in the week take care and I'll see you back here soon.
By the time you are getting this it will be Wednesday and I will be enjoying a well deserved break in Berlin, Germany with my wonderful girlfriend. As there will only be one post this week due to my holiday so I hope you make the most of it & enjoy it!
This week I will be looking at a one of my most loved ships in my harbour, the Hatsuharu Tier 7 Japanese Destroyer. This is the first Destroyer in the Japanese line to get the Type 93 Long Lance Torpedoes. This 610mm Type 93 is a massive step up from the from the previous tiers 5-6 in damage. These Torpedoes are fast, have a long range and a hard punch with a base alpha damage of over 17 k.
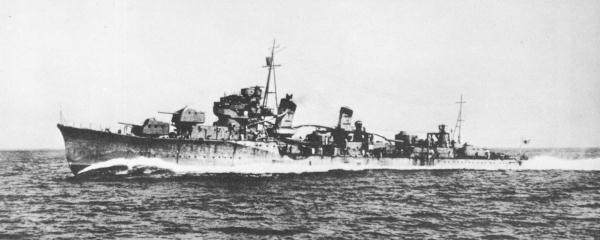
The Hatsuharu Class Destroyer
The Hatsuharu class destroyer was built at the beginning of the 1930's. At this time the Imperial Navy's ship developments were limited by the London Navy Treaty.The design limitations imposed by the treaty meant that the Hatsuharu was smaller than previous Fubuki and Akatsuki class Destroyers that had come before her previously. It also limited designs for the Hatsuharu to a displacement of 1500 tons. The designers had to stretch the contemporary destroyer design to its limit whilst still trying to arm the new destroyer design with almost equally powerful armaments of its earlier classes. This causes severe stability problems due to the ships smaller hull and displacement. The resulting top heavy designs created worrying structural weaknesses, not just the Hatsuharu but many of the ships of this treaty's era. These structural design flaws were fatally highlighted when the torpedo boat Tomozuru capsized in 1934 and a typhoon ripped the bows of two Fubuki class destroyers in 1935. As a result of these 'incidences', all the Hatsuharu class vessels went through a major rebuild or were extensively modified to remedy their stability problems.
So Pretty Yet so Dangerous
Suffering stability problems for weaponry caused a lot of issues but Hatsuharu but it was able to hold its own in a fight. It used the same calibre 50 type 3 naval guns (12.7cm) as its Fubuki class predecessor however its guns could serve as dual purpose anti air as well anti ship with having a 75 degree elevation. An additional two 40mm AA guns also served as closer range air deterrence if the need presented itself. The 2 Triple 61cm torpedo launchers could do a full 360 degree turn in around twenty five seconds thanks to its electro hydraulic system and each emptied launcher tube could be quickly reloaded with the use of a mechanical wired system (Kiryoku sōtenshiki jihatsu sōten sochi) in around 23 seconds (I wish it was like this in world of warships).
During the second world war The Hatsuharu class destroyers saw action in the Battle of Midway, battle of Kolombangara and even escorted the mighty Yamato on her final Operation tengo. In the Battle of Kolmbangara the 'Yugure' Hatsuharu class destroyer assisted in the sinking off USS Gwin and the damaging of HMNZS Achilles, USS Honolulu and USS St. Louis. All the Hatsuharu class destroyers in service were eventually sunk in different conflicts throughout the second world war either by air bombings, submarine torpedoes or by mines.
In World of Warship this destroyer really enters the Japanese Destroyers into the arena of versatile long range strikes. The speed of the torpedoes mixed with its range their 10 km range has surprised many a ship I had been stalking whilst captaining this ship. The Hatsuharu gains a larger surface detectability range of 6.7km but still maintains a comfortable 3 km safe area in which to launch surprise attacks from without ever being spotted.
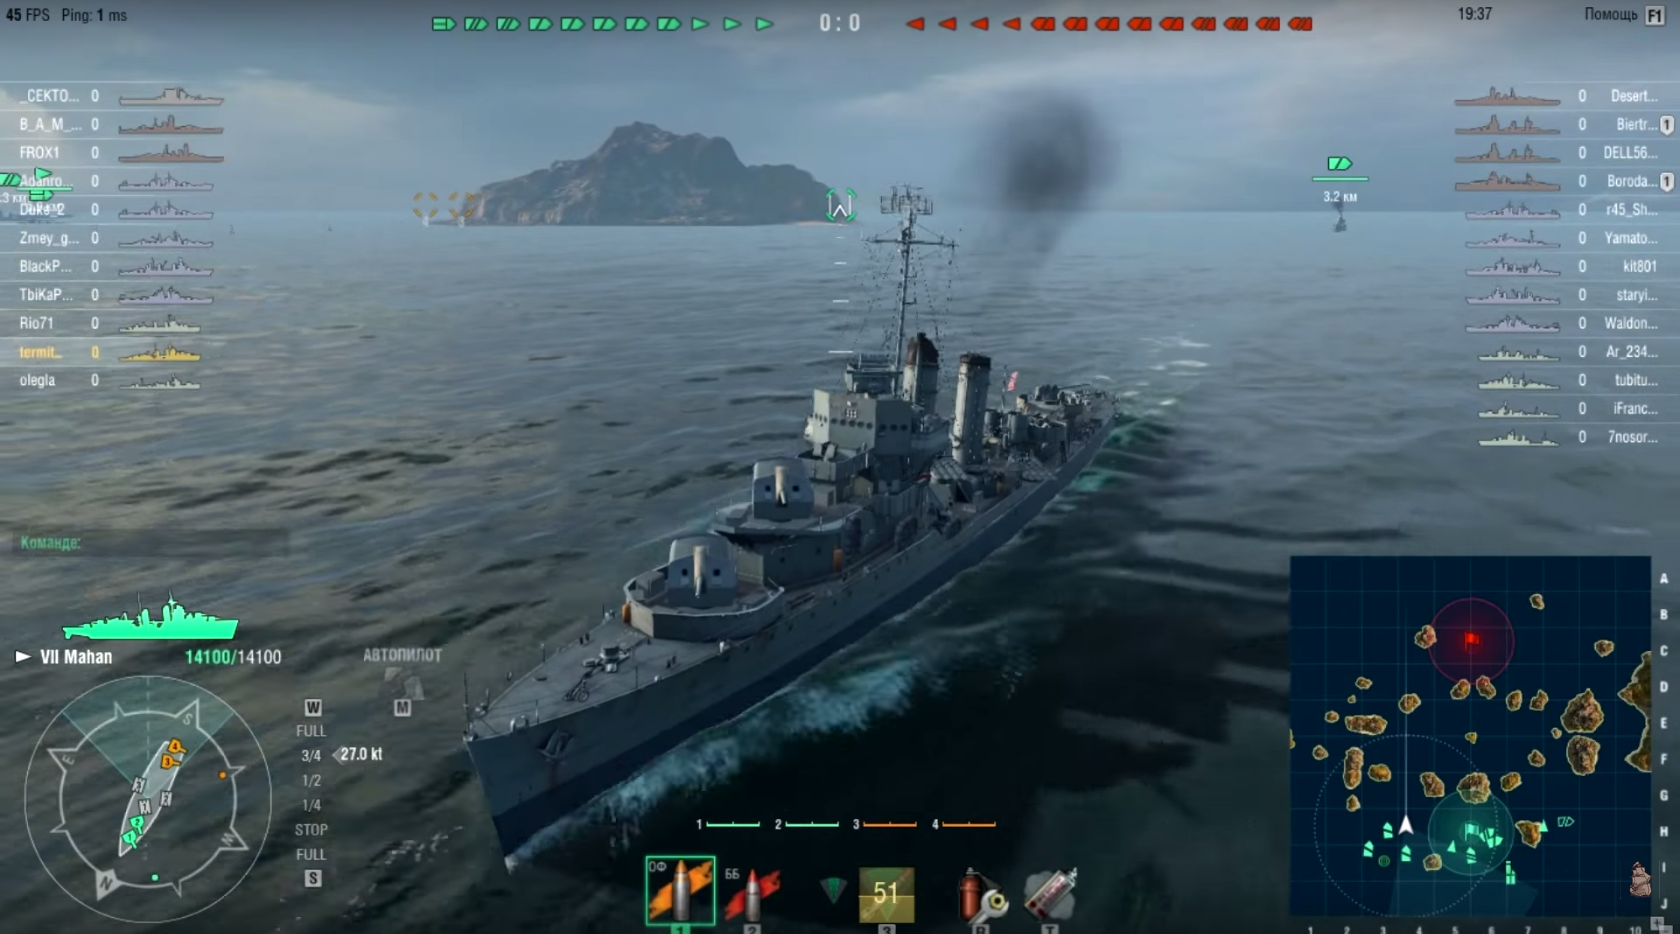
Like most Japanese destroyers the guns are pretty unremarkable being of smaller number and a with slower rotation speed than their American counterparts. At Tier 7 The American Mahan is a pretty poor destroyer in comparison to the Hatuharu. Its guns have a longer range and quicker rotation speed but has exceptionally poor ranged torpedoes (the worst in the game at 4.5km un-upgraded and 6.4 km upgraded). A Mahan has a surface detectability of almost 8 km so has to sail well within secondary range of most battleships to be effective. Unsurprisingly the Mahan has been given more health than the Harauhatsu to take a little extra punishment but its still a destroyer and won't last long under sustained punishment. Battleship weaponry seems to get a lot more accurate when firing at targets between 12 and 6 km so puts the Mahan at a distinct disadvantage when engaging larger ships.
The guns are not as painful to use as previous tiers of Japanese destroyers having around half the turret rotation speed of the Minekazi & Mitsuki (45 seconds on these ship where the Hatsuharu has a 25 secs for 180 degrees). This welcome change lends towards more versatile play for Japanese destroyers where guns actually might be a viable option in some most scenarios. As the Hatsuharu has similar sized guns to the Mahan the American has to rely on its main advantage of faster firing guns to get it out of trouble. Being able to spot and outrun the Mahan whilst maintaining stealth gives the Hatsuharu the advantage as a destroyer to react and avoid a close up brawls. Forcing American destroyers to take up chase limits their fire which takes their gun advantage away from them. Maintain a decent distance using your higher speed, whilst drive them back by your firing guns (which will be novel for most Japanese destroyer player) and torpedoes. This is normally enough to deter even the most dogged of attackers after setting them on fire a few times and causing them to take evasive manoeuvres dodging incoming torpedoes.
The Mahan Tier 7 American Destroyer
I like the Hatuharu. I have to admit when sailing the T6 Mitsuki I found it hard to adjust my playstyle for that ship. The Minekaze was a great little destroyer and I felt the Mitsuki was a bit of a let down. This made me think about what impact the future changes in the heavier higher levelled destroyers would effect my play. I am happy to say that the Hatsuharu is much more fun to captain than the Mitsuki and I have begun to see high amounts of damage rack up in most of my games. I find its balance of power, speed and stealth really aids my approach to the battlefield which works well as a fast paced doom bringing machine. I would definitely recommend this ship for anyone that loves that hard hitting potential only destroyers can give.
Hatsuharu Doom Attack
I hope this review has helped you make a decision on whether you would like to take up Japanese destroyers and would love to hear your feed back. Till Next time.
Welcome back to my blog for another World of Warships ship review,
I have a little bit of bad news to start off. Next week I will be away in Berlin for my first holiday in like forever (4 years to be precise... getting a stable career in the 3D Industry is a bit of a killer) so please forgive my absence but I will be doing an extra post this week which will go out on a delay for the coming week. It means a little more work for me this week to do so but at least you will be getting something here over the time that I will be away. I am planning on visiting the Berlin Museum of Technology so I'll be posting a few images from that up here when I am back for all those people that like efficient mechanical things.
For this weeks Ship review I will be taking a look at the Kuma class cruiser from world of warships. This capable cruiser is Currently a tier 4 cruiser (as all is subject to change in the Closed Beta). This cruiser has a well balanced stats and load out so read on and I'll give you the overall comparisons to its equal tiers. If your not interested in this ship I'll tell you about its weaknesses so you can seek to exploit them if you happen to cross guns with them.
The Kuma Cruiser
With the development of the new Omaha Class light cruiser following the end of World War 1 the Japanese Navy realised that they would be in danger of being out gunned by their pacific neighbour. With the Development of the Minekaze that had a formidable speed of 39 knots, the current Tenryu class cruiser, that had a maximum speed of 33 knots, were unable to keep pace. The long range Torpedo, the Type 93 Long Lance, was developed in the 1930s so plans were drawn up to create a special ‘Night Battle Force’ of torpedo cruisers. With the new development of the Type 93 these torpedoes had a longer range than most Battleship main armaments, the idea of the new cruiser development was to attack at night with a over whelming barrage of torpedoes. A later force would then follow up the morning after the night battle to dispatch a critically damaged enemy.
WW2 Kuma Class Cruiser Photo
The Kuma class cruiser was built between 1917 - 1921 and commissioned into the Japanese Navy between 1920 - 1946. Only 5 Kuma Class Cruisers were built, the Kuma, the Tana, the Kitakami, the Oi and the Kiso. Four of the Kumas were sunk throughout the course of the second world war. The Kitikami was converted into a torpedo cruiser before the second world war. For those that play World of Warships you will recognise this ship as a premium tier 8 cruiser. This may seem high when considering the Kuma is only a tier 4 cruiser but when you find out that the conversion put 40 torpedo tubes ( 20 each side) you can see its potential to just fill small island channels with a horrendous numbers of submerged torpedo death.
The Kitikami... ALL the Torpedoes
The Kuma sported seven 14cm guns in central line individually mounted turrets but due to their positioning a whole broadside would only be able to bring 6 of these to bear. The Kuma wasn't quite done their as it also carried 8 long range 533mm torpedoes as back up to its main gun arsenal. The Kuma lacked in anti air armament like its Tenryu predecessor. The two 8cm 3rd year type naval guns and two 6.5mm machine guns were not going to be repelling any determined air attack. Even though the Kuma class was Heavily disadvantaged in AA fire power it was Torpedoes that finished off 3 of the 4 sunk in total throughout World War 2.
Kuma Class Cruiser Stats
The Kuma in World of warships is a balanced ship where it currently seats in the tech tree when looking at its stats long side the Phoenix and Omaha cruisers it seems to be well balanced. When compared directly with tier higher tiered Omaha (which the Kuma was designed to compete with) it has slightly longer gun range, a longer torpedo range and better concealment ranges as it characteristic of the strengths of most Japanese ships. The Omaha trumps the Kuma with its gun caliber (getting 152mm to the Kumas 140mm), gun amount (having one extra gun) and a better manoeuvrability. This makes it a pretty good little ship for cruiser captains even when facing slightly higher tiers. The Kuma will always have to fear a engagement with the Cleveland class cruiser. 2 tiers above, the Cleveland will always present a significant threat due to its rapid firing guns (even high teir ships don't like this ship) but I think it's a little overpowered at the moment with what its capable of doing and will probably get hit with the nerf bat at some point (you may or may not agree but this video shows what its capable of).
The Mighty Jingles Presents The Cleveland
Having more health than both the Phoenix or Omaha means you can take a little more punishment that your american comparisons but the slower rudder shift time makes you less responsive to threats and dodging fire/Torpedo attacks.
In conclusion the Kuma is a well balanced ship with all the good parts of the Japanese characteristics. Its the first ship in the Japanese cruiser line that you will start to get a good feel for the direction they will be headed in future tiers. The T3 Tenryu felt more like a big destroyer than a cruiser so the Kuma is a more welcome divide from the early tiered gunboat style mixed play to more a specific class personalities. The extra range with fairly quick torpedoes again give a fighting change against Battleships without having to wade deep into their secondary ranges like the american Omaha and Phoenix, whilst having a decent amount of fast firing guns to make a difference when it matters. Be cautious of your slower reaction/rudder shift time when facing of against other like tiered cruisers and start to learn and work the Japanese style of play to your advantage. These traits are only accentuated more in the T5 Furutaka Cruiser (bigger guns, bigger torps, bigger fun =D) so the Kuma is a solid ship to find out if the Jap style of play is for you.
The Furutaka T5 Jap Cruiser
Thanks for reading and I hope to see you back here soon.
I thought I would give a quick update of where I am at with my Tiger. I've been concentrating on the little details that really start to pull this commanders cupola together and bring it to a close. I want to get this done in the next week as I have been spending a little too much time playing World of Warships. This is good for you meaning if your interested in this as I can give better ship reviews and work towards them all important higher tiered ships. I'm sure you all have your eyes set on particular ships that you will like to get if your waiting for access to the Closed beta. I am currently at tier 7 in the Japs destroyer line with my Hatsuharu ship.
Not my port but same pretty ship!
I have been looking for some decent reference imagery of this spring loaded hinge that aids the commander to open his hatch. Unfortunately I have been pretty unlucky with my efforts so from the images that I have been able to find I have had to still do some significant guess work with how this part works (if anyone has any decent close up pictures of this part from the 131 Tiger at Bovington Tank Museum it would be much appreciated) .
Any detail shots of this would be appreciated.
Here is my modelling work in progress with my early Tiger tank commanders cupola.Take care and have a good weekend and I look forward to seeing you back here at a later date to see my progress
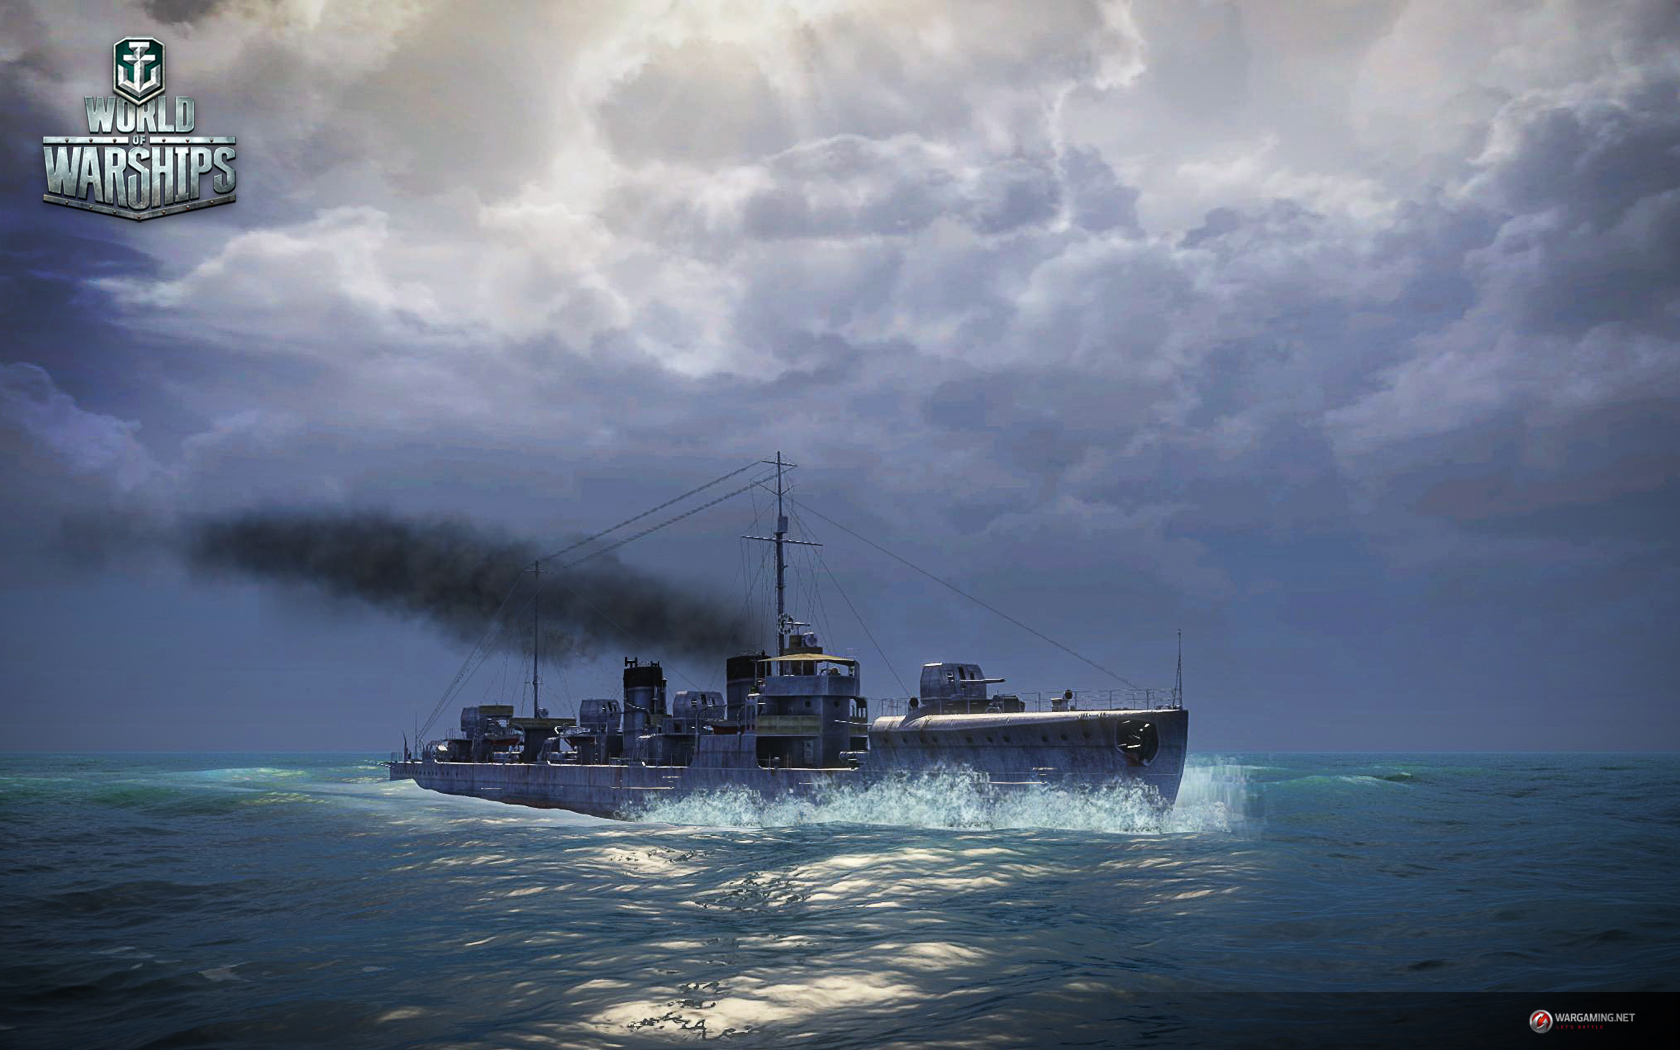
This week I am taking a look at one of my favourite destroyers currently in World of Warships, the Minekaze. For its tier I feel this is a incredibly competitive ship with its stealthy nature and fast reloading powerful torpedoes.
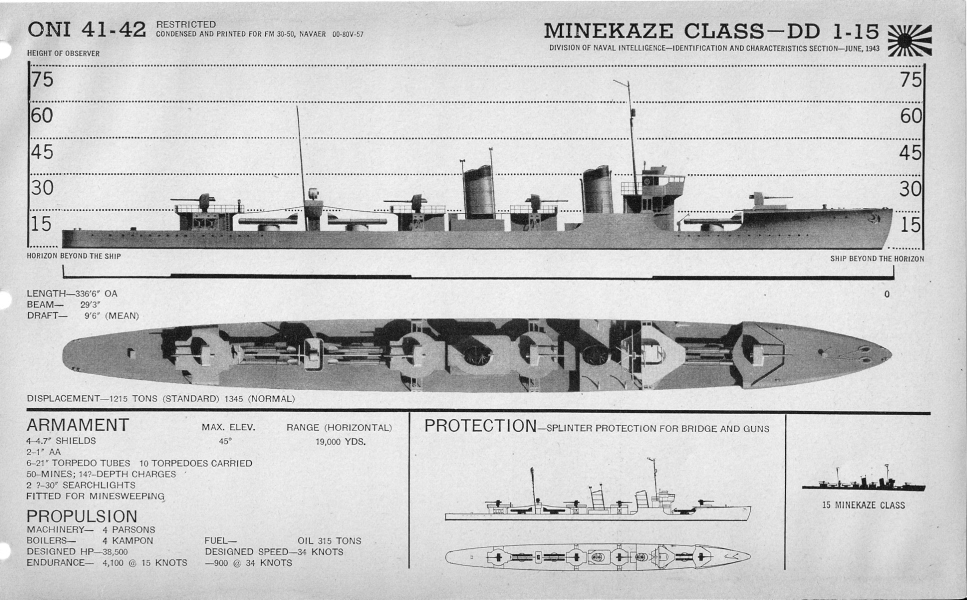
The Minekaze class destroyers consisted of 15 ships commissioned by the Imperial Japanese Navy whilst the first world war was still at its height. The first world war came to a end but of the ordered Minekaze destroyers were completed. The decision was made to continue their production to replace the already dated destroyers in the Imperial navy at that time. Unlike previous design choices the Japanese moved away from just copying pre existing British designs to take their own approach to creating an effective ship. The decision to lengthening the forecastle with a beak gave vital shielding from dangerous wash to crew members manning torpedo launchers at the front of the ship. This and other design choices made the Minekaze very competitive alongside any other destroyer of that time frame. The Minikazi was primarily designed as a destroyer escort for the Amagi class Battleships. The Amagi in an 'act of god made' was damaged extensively in its construction when a earth quake struck. This ultimately lead to this Battleship being scrapped and the Minekaze destroyers being deployed else where in the Imperial fleet.
The design and construction of the Minikaze Class destroyer came really at the wrong time frame to be of any effect in many of the major world war conflicts. Arriving to late for WW1 and being too outdated for Pacific conflicts by WW2 the service history of the Minikazi ship is somewhat unremarkable. Most of the Minizake Destroyers were relegated to either support ships or patrol boats. Many of of the 15 ships built were sunk by US Subs, used as target practice or taken as prize by other nations.Only a small percentage were eventually scuttled or broken down for scrap.
One of the Minikaze ships the Akikaze was the subject of a War Crime investigation after reports that civilians were strung up by the hands on a gallow, shot dead and then thrown overboard. No action was taken against the ships crew after the Austrailian War Crimes Trial was handed over to the American authorities. The Akikaze found equally gruesome end being eventually sunk by a torpedo hit (which was meant for the aircraft carrier Jun'yo but the Akikaze sacrificed herself to save the carrier) from the USS Pintado, resulting in the loss of all hands.
Here in World of Warships I really enjoy playing this tier 5 Destroyer. The Minekaze seems to be the last destroyer that has a focus on more guns and torpedoes before a lot of anti air starts getting strapped on to subsequent Japanese destroyers higher in the tech tree. Whilst this is good in a support anti air role (which at this tier is largely negated due to most ships having vastly better AA than proceeding tiers but more importantly me turning AA off right at the start) the lack of decient guns for self defence seems to be the major downfall of the Japanese destroyer line. The lack of gun performance is balanced with the having the best Torpedoes currently in the game for its tier.
In World of Warships the Minekaze is a solid destroyer for people that like the stealthy approach to game play. With a surface detectibility range of only 5.9km and a torpedo range of 7 km with its non upgraded torpedoes. These stats enable you to kill without ever been seen unlike the american line where you have to close to dangerously close to make use you your torps. You can upgrade the torpedoes to a 10 km range but this comes with the disadvantage of losing 11 knots of speed. I personally use the faster but lower range torps as I don't like giving people the option of dodging. The Torpedoes reload once every 46 seconds and with 3 separate dual launchers. With controlled fire I never seem to find myself in a position where I am caught out with at least 4 torpedoes ready to fire.
The guns on the Minekaze aren't particularly great. When compared to the Nicholas Destroyer (the equivalent American tier destroyer) the guns are only just a bit smaller being 120mm to the American 127mm but its the rotation speed that really hampers these guns performance. This seems to be the Japanese Nations characteristic with their destroyers having powerful torps but horrendous turret rotation speed.
The Minekaze has great manoeuvrability being over half a second faster rudder shift time than the Nicholas and Gremyashchy destroyers and is also the fastest of its equivalent tiers. These stats gives the Minekaze all the makings of a awesome ambush ship. In a Destroyer, being able to dodge and dish out pain quickly is the important feature to have and for tier 5 I think the Minekaze is probably the best at it.
In a close range knife fight you will probably be throwing this ship around to avoid incoming fire and this is where the slow turret will really start to be a problem. A one on one in close range, the harsh reality is you will probably lose against the American destroyers or cruisers unless you get some torpedoes on target at an early stage. You just won't be able to put the fire down needed to deter their attack. Using your stealth to your advantage will be key to your survival against other destroyers as you have the lowest detectability range and can turn away quickly if you see the odds stacked against you. American destroyers need to hit tier 9 before they can drop torpedoes outside their detectability range so drop torpedoes to force them into evasive manoeuvres and high tail it out of there. Better to run away and drop more torpedoes than stand your ground and be sunk.
Torpedoes on the Japanese ships really make this ship fun to play with. I have missed having the third launcher on the Mitsuki and Hatsuharu as it gives more flexibility on where you can place multiple shot. I remember one particular game where I launched 2 spreads down a channel between 2 islands after being spotted. The enemy ship turned having seen them went right around one of the islands only to find I had launched the final 2 torps to meet him as he nosed round the island. The Mitsuku and Hatsuharu only have 2 launchers (with more torps launched with each launcher so swings and rounds abouts) so I would have had to be more restrained in that kind of attack. Having this option with the Minekaze give more flexibility with your attack choices.
Having centrally mounted torpedoes in the kamikaze something that I like over its American counterpart. The tier 5 Nicholas has more launchers but these are mounted to the sides of the ship. To make use of your larger number of launchers you have to expose both port and starboard lengths of your vessel. Steaming about in this manner tends to make make your attacks movements very predictable which normally leads to you being very dead after taking more fire.
So to conclude this review of this great little destroyer, its a great hit and run ship. With strong torps, low detectability range and god like manoeuvrability its a competitive ship for its tier. Keep your distance from dangerous ships to negate your bad turret rotation speed and attack when the time is right. Its always a mistake in the Minekaze to sail straight in a gun fight to allow your slow turrets to bear on a target. It is generally better to use your small profile and fast reloading torps to your advantage. I have really had fun playing this ship in Co-op and random battles and have had a good amount of success getting a few 5 kill matches (yet I forgot to take a screen shot to prove it... yep noob mistake there but bellow is my max ships sunk. I've had a few 5 kill matches and the Minekaze is definitely responsible for a few along with the Warspite).
I hope you enjoy this little ninja of a ship as much as I have and would like to hear if you share my opinion on this ship. Do you agree that this is a strong ship for its tier, or do you prefer the guns ho approach of the american line? I'd love yo hear your opinions. I look forward to seeing you here later on in the week for an update on my slow but steady progress on my tiger tank.
Welcome Back,
For all you hard working 3D Artists this is a post you should definitely read. I thought I would write about a 3D model Previewer I am thinking about using to display my models on here in the future. Its pretty good not only for you to look around my models I am doing to see how its been done, but also enable you get up close and personal at all the detail from different angles than just a single photo. For me this means I will have to be more diligent as all the mistakes people may not be able to see will now be viable to anyone with a keen eye =D.
Wargaming seems to uses this site for proving their models for the game engine. Its also a place where fans can view their hard work up close and see the beauty's they are grinding for. To keep it short I am going to embed some of their newest models for you to view and have a play with and will use this where possible to show you my updates of my Tiger model.
For those of you that play world of tanks regularly you will instantly recognise these tanks. some being apart of the Berlin trio and others being higher tier tanks. These 3d models should give you an idea of how much hard work goes into each of these tanks. With Wargaming making HD models for its tanks with PBR textures, these are representative of their current and upcoming standard they are aiming for with in game models.
Though I would give you a update on how I have been progressing on my Tiger Tank. With this week being bank holiday Monday in the UK (Over which I went to a music festival Dot to Dot Nottingham and saw lots of great bands such as Amber Run and Saint Raymond) I've only managed to fit in a little bit of modelling but now the Cupola is really starting to take form with those extra detail that really polish a model. .
This week I looked at modelling the hinge system that connects the hatch to the drum cupola. The hinge works on a 3 piece system with 2 hinges and a link to help close the lid on this great beast. The main Hinge seats underneath what looks like a spring system that would help the commander lift the hatch of his cupola. as the lid was 15mm thick it mush have been fairly heavy. The hatch diameter was 420mm lined with a thick rubber seal to prevent water form entering in deep wading and heavy weather conditions.
Tiger Drum Cupola
The hinge in itself seemed pretty complex for its purpose but the Tiger in general was notorious for being ridiculously over engineered. In WW2 to consider which nation had the least fuel and metal to come up with an idea for a fuel munching metal beast like the Tiger tank was almost insane.
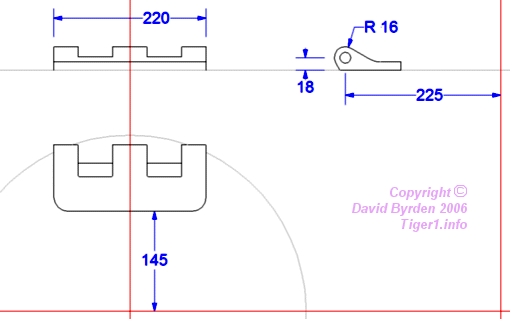
Hinge Technical Drawings
Above is the technical drawings of the commanders hatch lid hinge. I noticed that the fall off curvature from the hinge wasn't quite right in comparison to what is shown from Pictures taken of Tiger 131 in the Bovington Tank Museum. I altered my model whilst using the measurements given to more accurately depict the hinge.
Hinge Wireframe
Hinge Turbo Smoothed
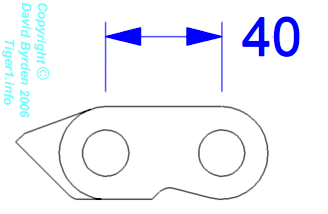
The eyelet that connects the two Hinges looks almost like a bike chain with a little extra to help the lid rest in a stable position when opened.
Eyelet Link technical Drawing
Wireframe of Link
Turbo Smoothed Link
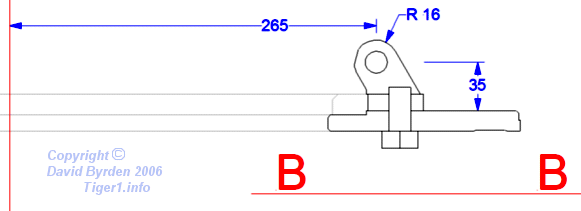
The final bit of the hinge is now the bit that is connected to the drum itself. its more or less the mirror of the first hinge I made but with a few different features.
Second Hinge Technical Drawing
Wireframe of Second Hinge
Turbo Smoothed Second Hinge
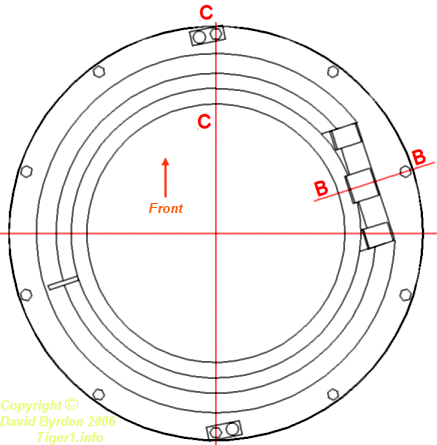
So the top of the Cupola is starting to take shape now, I have a few more things to do then I can add the 18 degree offset to the top details. Its just easier to keep things this way until the end as any 3D person will know.
Progress So Far =)
What the Top of the Cupola Will Look like with the 18 Degee Offset
That's all for this week, I hope to catch you back here soon. Till then take care and have fun playing what every you play. Before I go I would like to thank the Tiger website I have been using for all your technical drawings. You have been a great resource. Find the link to it here











_Taisho_11.jpg)