I did plan to get this post out over the weekend but as things fate conspired against me (i.e. a USB stick had a untimely death when going back to a family event) so I will get this post out as part of my first double post this week. This is just a quick update on How I have been getting on with my Tiger tank and a little sneak preview of my working process.
After doing a bit of searching about the look of the Tigers there are 2 distinct types of cupola. The earlier drum cupola mounted in earlier versions gave the commander a higher point of view when viewing the battle field but left his head quite exposed. For those of you that play world of tanks you will be used to seeing the later style turret on the Tiger though I'm not quite sure where the first turret that tiger uses comes from as I have seen no imagery of that style of turret been fitted to a tiger (anyone fancy giving a comment on that would be interesting)

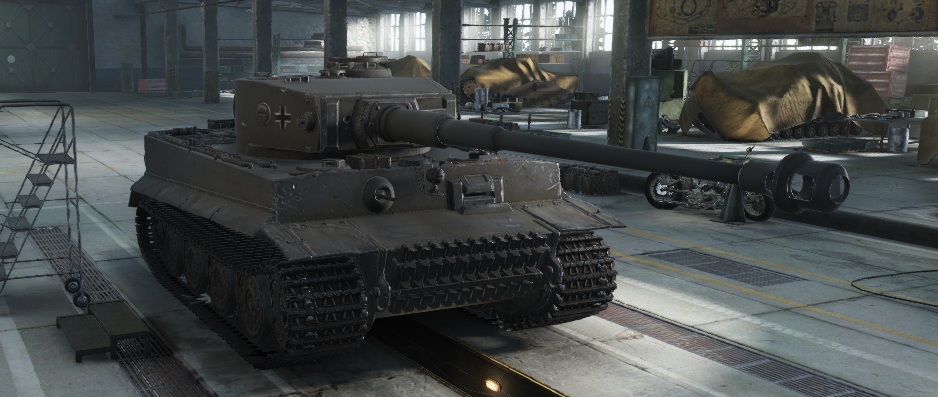
The asymmetric turret everyone recognises with the Tiger Tank
What is this turret? Stock turret in WoT but when was this used?
When most of the tank from the front had 100mm of armour, which on a ideal engagement would be facing the enemy at a 45 degree angle, made the effective armour around 140mm ish thick (without the proper maths done). A direct shot to the commanders cupola assuming the shot hits on a dime, is only 75mm. Though hitting a drum design exactly at perpendicular angle is pretty hard to go when engagements for tigers were mostly at long range.


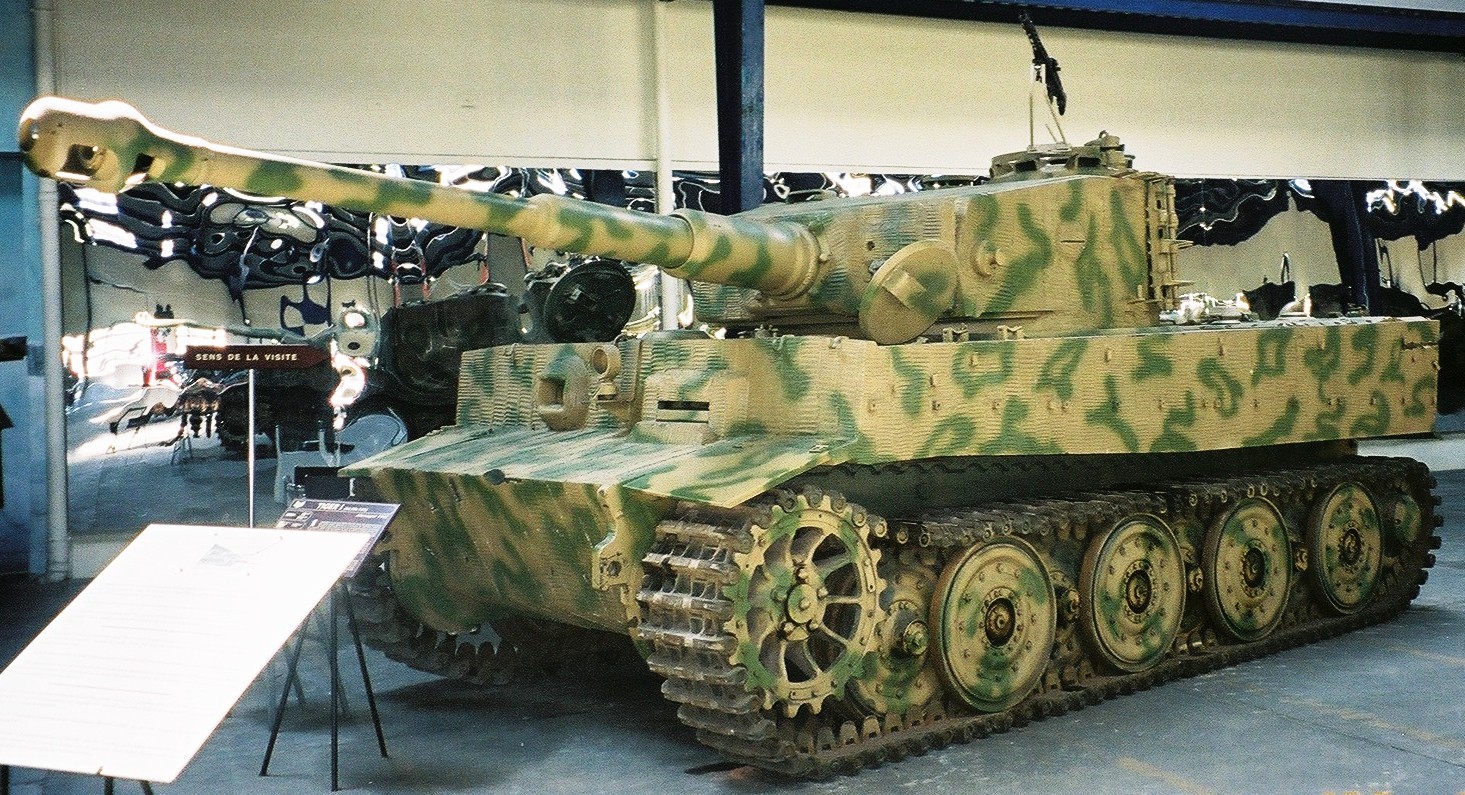
Older Drum Design Cupola
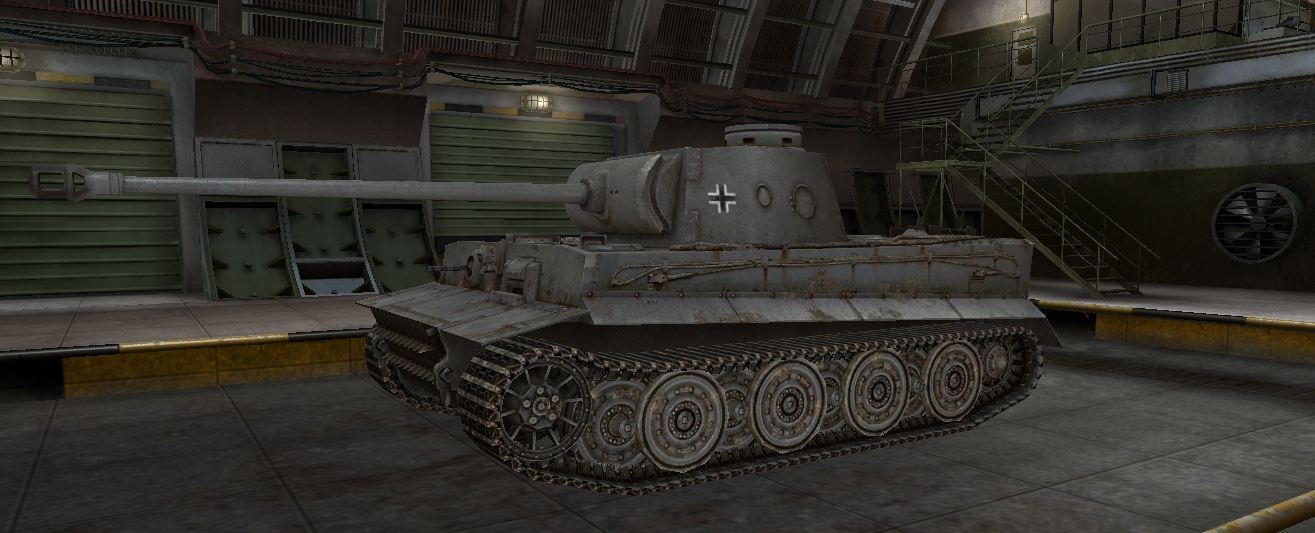
Later variant of Tiger shown by the later varient of cupola, road wheels and gun mantlet
Building the Tigers early cupola really highlights how complex the tank was in comparison to Russian and American tanks. Designed for deep wading up to 4 meters the tank had to have drainage holes cur into areas which water would collate. The 10 round holes cut into he top of the cupola allowed water to drain off from the cupola lid whilst having a 18 degrees offset so the water did not run off directly into the vision slits lower down (very early editions of this cupola had drainage holes above the view ports before this error was noted).
The thickness of the armour variates throughout the drums total structure but on the whole it maintained a 75mm thickness along the main body that covered the commanders head.
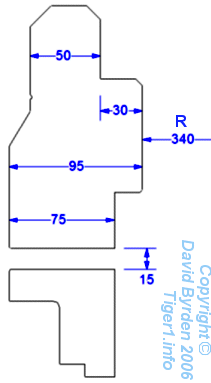
Cut through of thickness for tigers Drum Cupola
The Diameter slightly as well as shown in the image below.
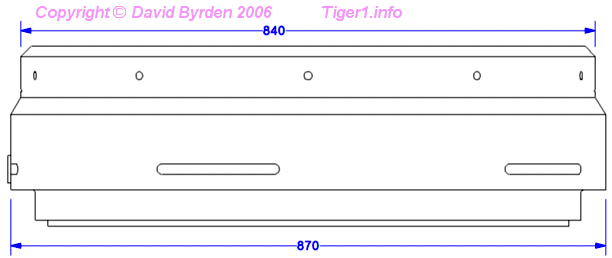
Diameter of different parts of the Cupola
All these reference images for sizes and positions are from www.Tiger1.info which has been a amazing site for technical information throughout this project so far so I can't recommend it enough.
Doing 3D meshes with cuts in always presents a challenge of how best to position your geometry to best get what you are trying to achieve whilst keeping your mesh tidy. This is again harder in cylinders as securing lines in the wrong areas cause pinching. Without creating my own tutorial which would be pointless there is loads of tutorials out there on youtube and this in particular tutorial shows exactly how I structure my geometry when I created my Cupola.
I went one step further than this guy however by figuring out the maths about where I could place my cuts along the Circumference of the cylinder to get the geometry to seat in the exact positions I wanted them too. In short I figured out the circumference, (because I knew the Diameter I could figure out the circumference which is C=πd) then set out cylinders with the exact lengths (for the view port slits in the cupola) and diameter (for the drainage holes) then bent the boolean'd mesh around a central point to create a cylinder. This may be hard to visualise in your head so ill put some pictures below.


Doing this method should in theory place the cuts from the boolean in the exact place they should be if its a perfect circle.
After a little bit more work that what I have shown you here this is where I am with the Cupola. I still have more work to go with it like creating the welds for where it connects to the turret and the hinge to model but I'm fairly pleased with the result. The cylinder still has a little bit of pinching but its pretty negligible

The Un-Subdivided Wireframe Mesh

The Smoothed Mesh (turbo smoothed)

Smoothed Non Wireframe Result WIP
This is where I am so far, working full time means little time for me to do my own work but its important that I keep it up share and review it for my own self progression. Thats all for now, I hope you've enjoyed this little snippet of my work and keep looking back as I battle my way through this bad boy to create a banging looking Tiger tank.
No comments:
Post a Comment