Friday 28 August 2015

Tiger Tank Progress Report, The Mantlet Work In Progress

Hi all and welcome back to my tiger tank weekly post.

This week I have made a start on my mantlet for the Tiger Tank. I originally thought that there was only two variations of the turret mantlet, one from early production and one from its later production. This was mostly down to that there is one very visual difference between the two which is the reinforced bar that runs across the telescopic vision port holes. I didn't really have too much knowledge on that and took that visual difference as the main distinction between the two.


Late Production Mantlet


Tiger 131 Early Production Mantlet, Recognisable by the Visual Bar on the Right Being Absent

Looking around for more reference imagery I came across this image that illustrates the variations of mantlet during the tanks development throughout the war. It's pretty interesting to see how the shape changed and decisions made to aid the tanks combat performance. 


A Good Illustration of Mantlet Development Thoughout the War


Adding sun shields and magnetic bomb protection were an obvious additions to aid the crew with vision and survivability. However the added armour to the telescopic openings and side cheek is not so obvious a decision. These must have been added to counter where the tiger was taking hits on the mantlet but this is me just speculation from the images I have seen from battle damage. it could also be a addition to accomodate additions to the internals but I will have a more in depth look at this for next week. 


Battle Damage Mantlets


A Shell is Still Visible, Stuck in the Mantlet of this Battle Damaged Turret. 

Here is how I have been getting on with my modelling for this week. I already had the gun sleeve modelled so I just had to use this as a base to build the mantlet around its shape. I know I had modelled the Sleeve with the correct radii and thickness's so this gave me the recess depth and shape for the mantlet as a starting point.


As you can see this is still a work in progress. I have a fair bit of work to do on this, cleaning up with some of the model pinching and also completing the back part of the mantlet where it connects to the trunnions. I'm pretty happy with the progression so far although its no where near done to the amount of detail I want to be. Part of my meticulous nature is that im never happy with what I've done when I've finished it. I guess this keeps me on edge to progress further with my work and continue to improve. Stay tuned for more updates on this one, the mantlet is one of the defining characteristics of the tiger and I definitely want to do this one right. 

Thanks for your continued support and visiting of my blog, I very much appreciated. I  hope you all have a good weekend (and if your in the UK a good bank holiday weekend) and I will catch you here next week for another Tiger tank progression report. 

Tuesday 25 August 2015

World of Warships American US Navy Cleveland Class Cruiser - DPM Central Ship!

Hi and welcome back for my fortnightly World of Warships Ship review!

For this weeks review I will be taking a look a at one of the best ships for its tier in the game. This is non other than the Cleveland class cruiser. The Cleveland is one of the highlights of the US cruiser line. This ship doesn't seem to have any major weaknesses and does everything that you would expect from a cruiser very well. Having a total of 12 rapid firing guns, fast turning turrets, dangerously formidable AA defence combined with a strong mixed of all round manoeuvrability and armour, the Cleveland really something to write home about. When captained right this ships DPM put out some serious hurt to any and all ships and is able to take considerable punishment in return. Being a capable chip is not the only talent of the Cleveland, its also very charismatic, being one of the best looking ships on World of Warships. A sexy little addition of warship porn to any captains harbour.


Cleveland Class Cruiser on Patrol


The Cleveland is the first fully Second World war design in the American Cruiser Tree. The Cleveland was commissioned in 1942 and remained in service till 1979. The American Navy completed 27 Cleveland Class Cruisers from the originally planned 52. Nine of these 27 completed Cleveland cruisers were completed as Independent light aircraft carriers which is also in World of Warships. The Cleveland Served mainly in the Pacific Fleet throughout the Second World War in fast carrier task forces but some were stationed in and around Europe and Africa. Throughout the all the fighting in Second World War non of the Cleveland Class Cruisers were destroyed, some were heavily damaged in combat but were never sunk as a result of it.


Main Battery Fire

The Cleveland's cruiser were the back bone of the US Navy. They bared the brunt of Kamikaze strikes, torpedo hits and naval gunnery battles, even one (the Columbia Cleveland Class Cruiser)  played a part in the sinking of the Fuso Class Battleship at the Battle of Leyte Gulf. The Anti Air was so fierce that the Cleveland's could put up almost impenetrable walls of flak against incoming aerial attacks which saved many a escorted ship. One such example is the 'Cleveland' cruiser, even after suffering a direct bomb hit she was able this take down 7 attacking planes in a furious AA response in the battle of Empress Augusta Bay. The Cleveland Class Cruisers served the US Navy throughout the whole WW2 up untill most of them were scrapped between 1959 and 1961. Six of the Surviving cruisers were converted to guided missile cruisers and were reactivated during the 1950s and served into the 1970's. The last of the Cleveland Class Cruisers, Oklahoma City, was finally decommissioned on 1979 ending its 37 years of service. Its a testament to just how good these ships were in real life.


Ship Porn, The Cleveland Class Cruiser

Considering the ships history its no wonder this ship is such a formidable foe to face in World of Warships. The more service history you read from the achievements of the Cleveland's the more you begin to realise the awesome potential of this ships fire power and defensive armaments. The Cruiser was very robust being able to take large amounts of damage whilst still maintaining a effective fighting standard in the heat of battle. This seems to be modelled pretty well into the games as anyone that underestimated a Cleveland will definitely regret it when subjected to its hellish rapid firing guns.


Shells Away

Its 4 Turrets each mount triple 152 mm guns which each fire 7.5 rounds per minute. These guns have the potential to do 198000 hp damage per minute with HE alone. The damage potential of its AP rounds is a staggering 288000 hp. This is just what makes the American Cruisers so much fun to play. Destroyers will be taking detours to avoid you in this rapid firing ship as you can really ruin their day in just one well aimed salvo. The ship also has 12 dual purpose AA and anti ship 127mm secondary guns with a 4km range. Mixed with its 13x20mm, 12x40mm the combined fire power with the 12x127mm guns is truly terrifying for carrier captains. I actively screen for the rest of my fleet in this ship rather than run away from incoming air attacks. The Cleveland also has access to the defensive fire cool down, increasing its anti air power and decreasing all air attack accuracy for any air squadrons caught in its flak barrage. To top this is also has a deployable fighter aircraft for added measure... need I really say more about this ships huge anti air capabilities other than its just a power house!


More Ship Porn

Having a rudder speed of 9.4 seconds means this ship is no slouch in have to respond to dangerous situations, and is small turning circle (660m) means you will be dodging fire like a boss. The ship has a solid top speed of 34 knots meaning you will be able to effectively kite battleship's and keep them at range. I for one have been caught out whilst sailing my Warspite and chasing one of these ships and underestimating its ability to dodge incoming fire and put out some serious damage. The Cleveland also has a respectable health pool as well of 35.2  thousand hp. When the Aoba has 30k with less armour and even the proceeding Pensacola (pepsi cola... definitely a better name for this ship), you get a understanding of this ships ability to take on more than you would expect.


Cover Your Eyes Even More Porn!


I don't normally talk about my choices in upgrades that I put on my ships as this is mostly down to personal preference which I should really start to incorporate into my reviews but I think that the Cleveland is as good a ship as any to start with telling you how I set my ship up. With the Cleveland the main focus of this ship is its pure gunnery action, so with my first upgrade I went for the Main Battery Mod 1 to lower the chances of turret detonation or them being knocked out of a fight. For my second mod I went for the Main Battery Mod 2 so increase my turret traverse speed and firing speed. These first 2 mods are just to accentuate the main strengths of the Cleveland to their full potential. I may have choose the accuracy mod in the second upgrade slot  or the AA upgrade but I thought the added rounds per minute mitigated the increased accuracy and the defensive AA cool down made the need for the AA buff unnecessary. For my third upgrade I went with the Damage Control mod to prevent fires and reduce the risk of flooding. The Cleveland is still a cruiser and does still have a limited health pool, so as to avoid loosing extra health from taking fire damage, I choose this upgrade. You can still suffer from your engine being knocked out and rudder being jammed but I feel with most people firing just HE in this game rather than switching between AP and HE (dependant on situation) its better to take fire/flood prevention mod. For my Final Mod I took the rudder shift time improvement. I like my ships to be responsive as possible and this increases my rudder shift time by 10% which gives me an added edge in dodging and turning away from fire and torpedoes. I feel this ship doesn't take a long time to reach full speed so really doesn't need the added help reaching top speed as much as the added  rudder shift time.


Possibly the Most X Rated Review Ever

In conclusion for this ship, use its great DPM to bully cruisers and destroyer with high explosive and armour piercing rounds. Battleship drivers can also panic when they start to recieve the numerous hits you can put out so use this to your advantage. This ship performs best at around 10 to 12 km distance where its high firing arch can give good damage potential for your AP rounds and give you the time necessary to change course and dodge incoming fire. Learn to kite enemies toward your fleet whilst using your quick turning ship and turrets to rain down the pain on your pursuers. The health pool is good so you can withstand some punishment but try not to put your self in situations where you can be focused down. You are a AA powerhouse in this ship so recognise when you will need to play escort to save less fortunate ships on your team. Battleships will love your close support as much as your solo allied aircraft carrer when they are outnumbered by the enemy teams aircraft carriers. Use your strengths to bolster your team and support them when and where you can as this ship shines when played as part of a team. It's fast firing potential makes it a good money earner and a extremely fun ship to play. My advice is get one of these ships as fast as possible and just learn to love it, in all its sexy ship porn glory.


Quick Co-op battle screen shot. The amount of hits shot the DPM potential!


That's all for this week, I look forward to seeing you back here later week for a update on my Tiger tank progress. 


Saturday 22 August 2015

Week and Tiger Tank Progress Report

Hi all,

Sorry for the late posting this week as personal stuff has been getting in the way but better late than never right =D

Welcome back for this weeks Tiger Tank modelling progress post. This week has been pretty awesome that my work has given me a week paid to just research what ever I wanted to look into. This was such a great opportunity I wanted to make the most of it so my tiger has taken a bit of a back seat this week, not that I haven't done anything on it. I have finished off my smoke dischargers and placed them onto my turret with welds. I have also added welds to the outstanding escape hatch I was doing a while back and also made a start on the splash guards for the turret mantlet. I have also been blocking out my mantlet as well for the tank as well so over all its been a incredibly busy week.

As I mentioned I was given a R & D week on a subject of my choosing so naturally I choose some real time technical stuff  looking at dynamic materials that tessellate and react to weather effects. It's been almost 2 years since I've really got into the nitty gritty of the Unreal Engine since leaving Flix Interactive so its been a welcome change to get my hands dirty and start loving real time production again. I'll post up a few of my pictures of my work stuff this week below so you can see I what I have been doing.


Dynamic Materials that can be change the look of Environments in real time engines with use of Global Parameters... For this one... Snow =D


Using the same mathematical functions for the snow I created I made a Dynamic Wet Weather texture with Flowing Normal Maps.


As for my Tiger tank, as I mentioned I have finished off my smoke dischargers which you can see below. I have added some of the extra details I found from pictures of the Tiger 131 plus the welds for the brackets which the launchers were fitted too.


Tiger Tank Turret WIP


Splash Guard WIP ready for the Mantlet

I have also started with looking at the Mantlet on the turret. I have been collecting some information on the model as this will be a difficult mesh to do in one whole piece. The more reference the better before I start this so I can plan out where I am going to be adding all my geometry,


Thats all for this week I hope you have been enjoying the sun (if you've been in the UK) and the weekend also.


Friday 14 August 2015

Tiger Tank Smoke Launchers

Hi all welcome back!

I've had a little bit of a lazy and crazy week as work has been pretty hectic. I have started the Smoke launchers that are on the side of the turret but haven't finished them. I thought I would share my work in progress and hopefully next week I will be a bit more motivated to do work =S.


These launchers were used to cover advances or falling back under dangerous fire. The launchers could be filled with either Smoke or grenade rounds that could protect the tank against troops in close range. These grenade rounds were as dangerous to friendly troops as enemy troops once set off, as the saying says 'theirs no such thing as friendly fire.'


Here's where I have got this week. I hope you guys and girls have a great weekend and I'll see you back her later next week for another Tiger update =D

Tuesday 11 August 2015

Omaha Class Cruiser, The Phoenix's Younger Brother

Hi all and welcome back for my fortnightly ship review. Following on from last week I am going to be taking a look at the Omaha Class cruiser that supersedes the Phoenix Class cruiser. I'll be giving a run down of its strengths and weaknesses and also a bit on its design and service history so you can better use this ship on the sea of World of Warships.

Following on from last weeks post, the Phoenix was the pre-cursor design that originally went into the plan and development work for the Omaha class cruiser. The Omaha's design and development was as a direct result of the introduction of the British Centaur C Class Cruisers. The American Navy felt that they had nothing that could for fill the role of light scout cruiser like this new British Cruiser and wanted a ship that could push up with other destroyers to give support to them and relay enemy position information to a larger fleet.


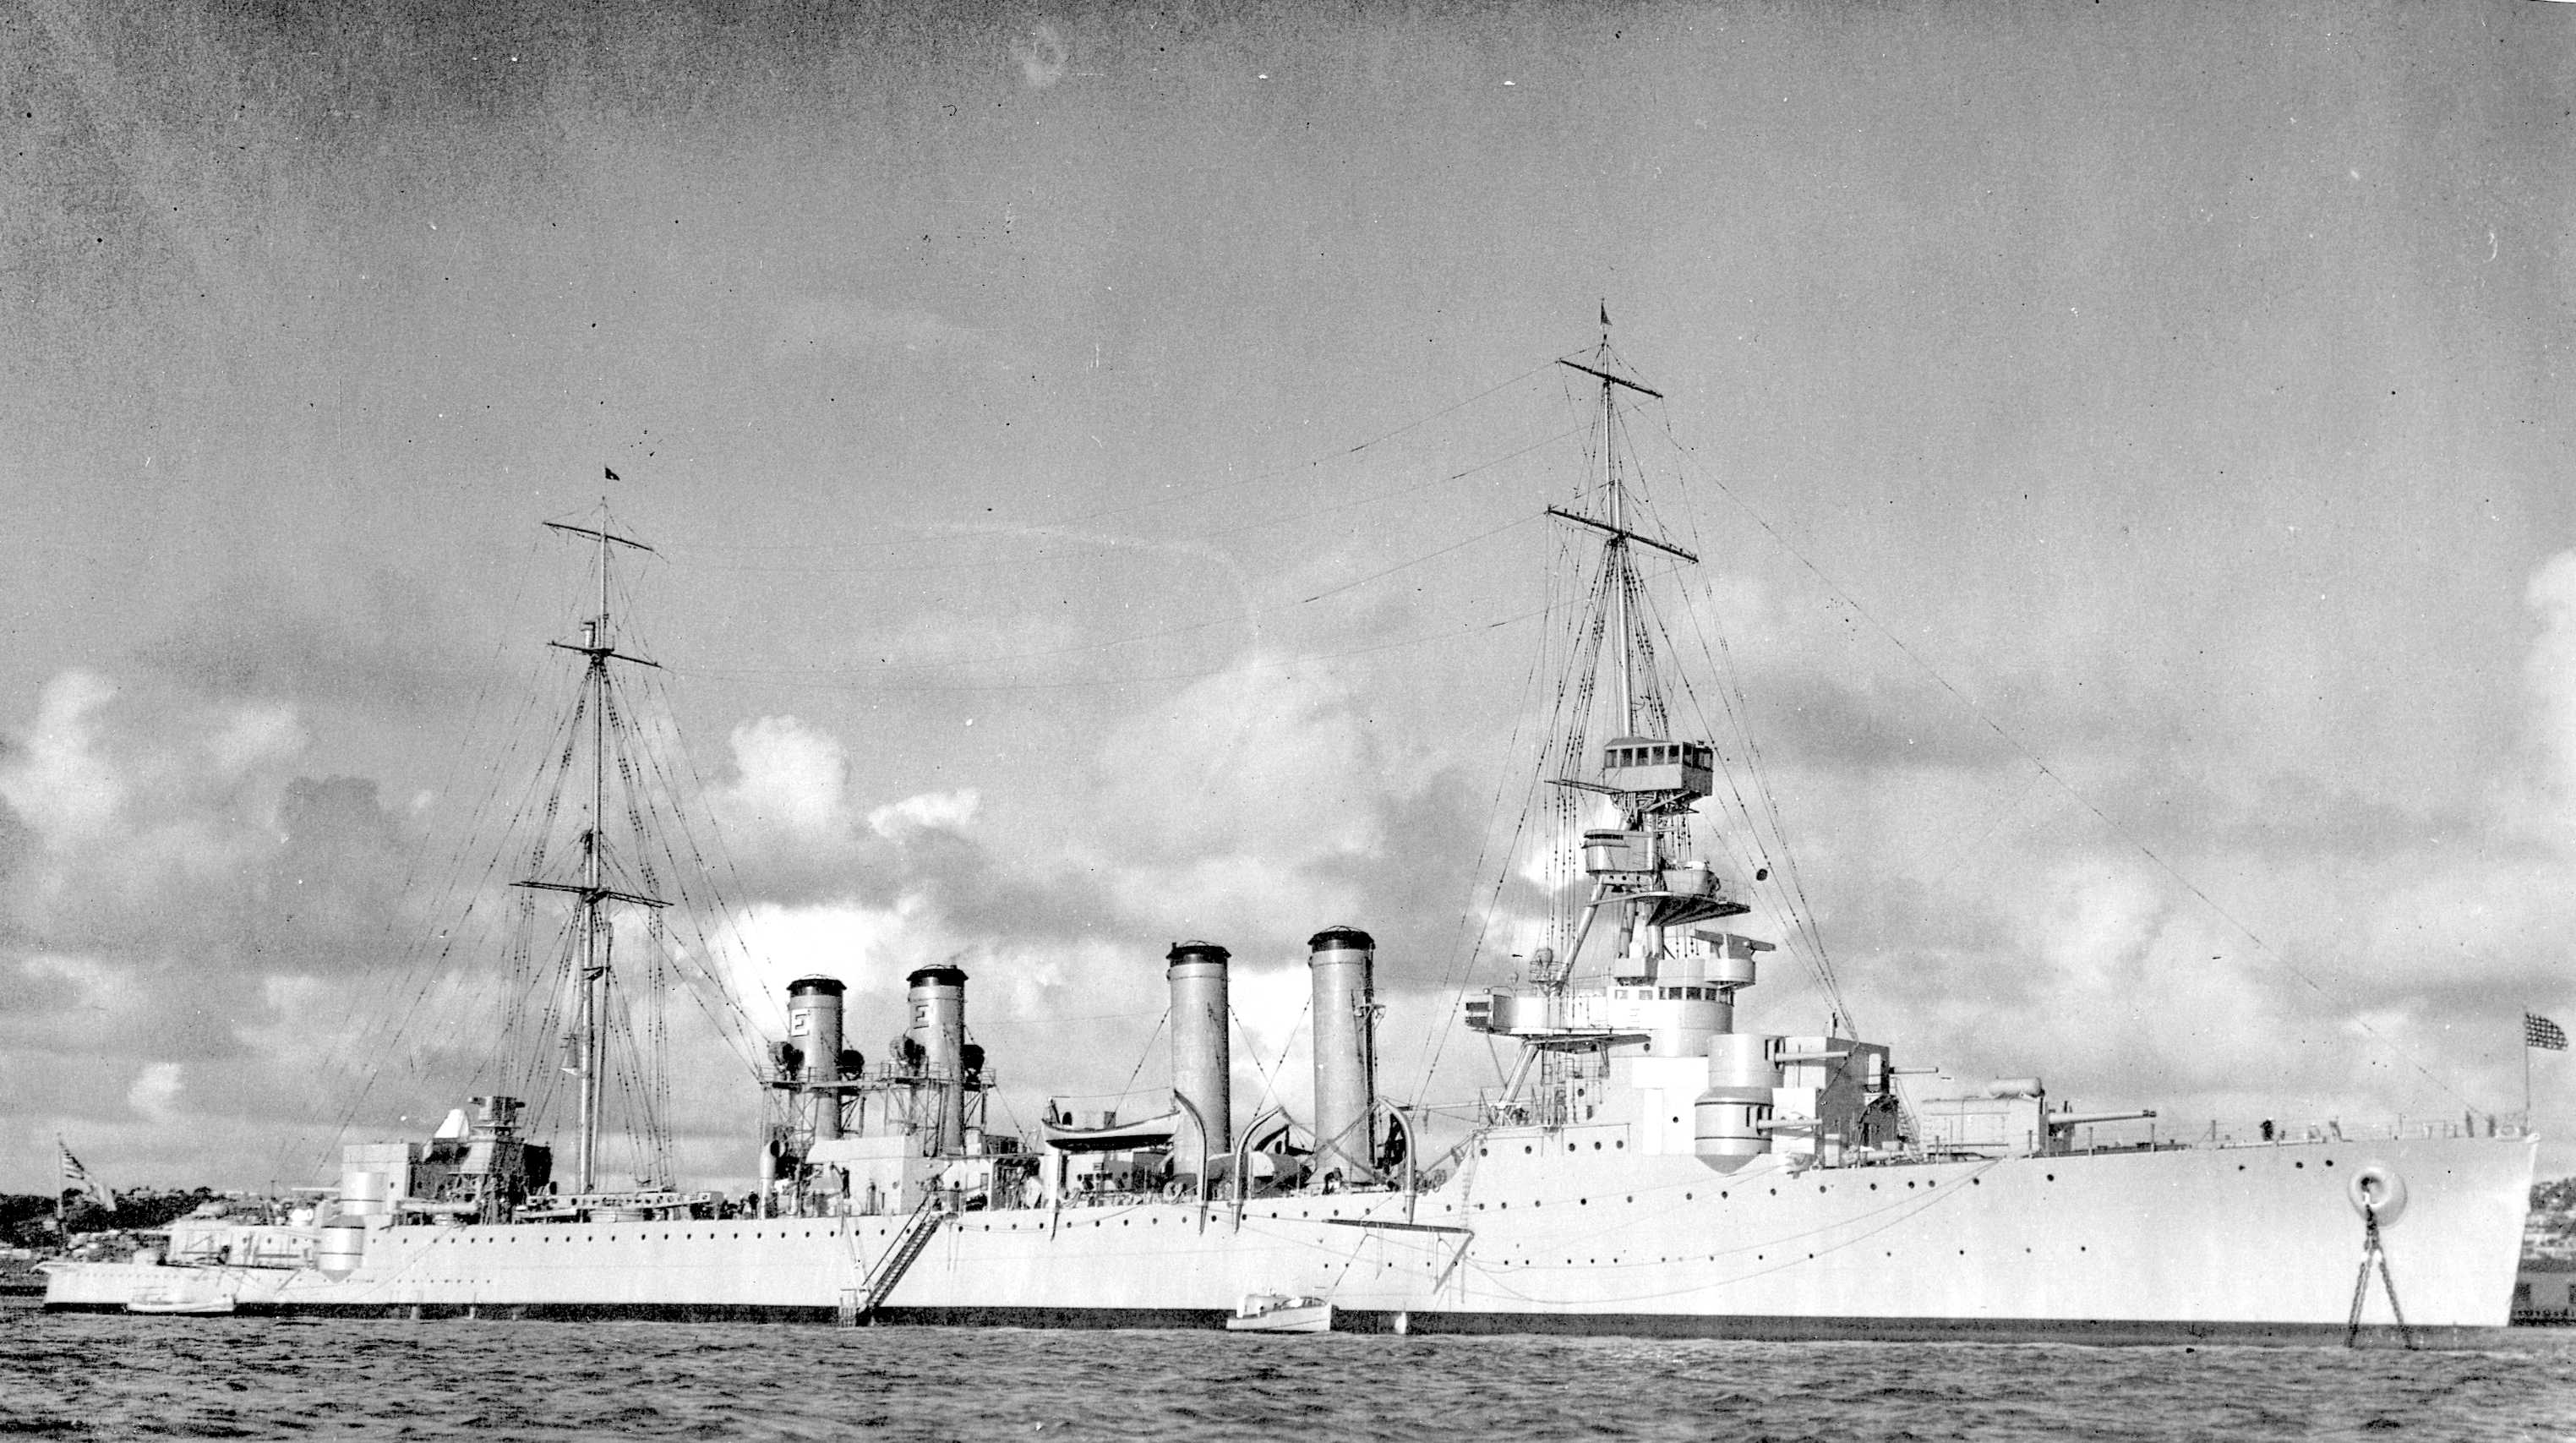
The Omaha Class Cruiser


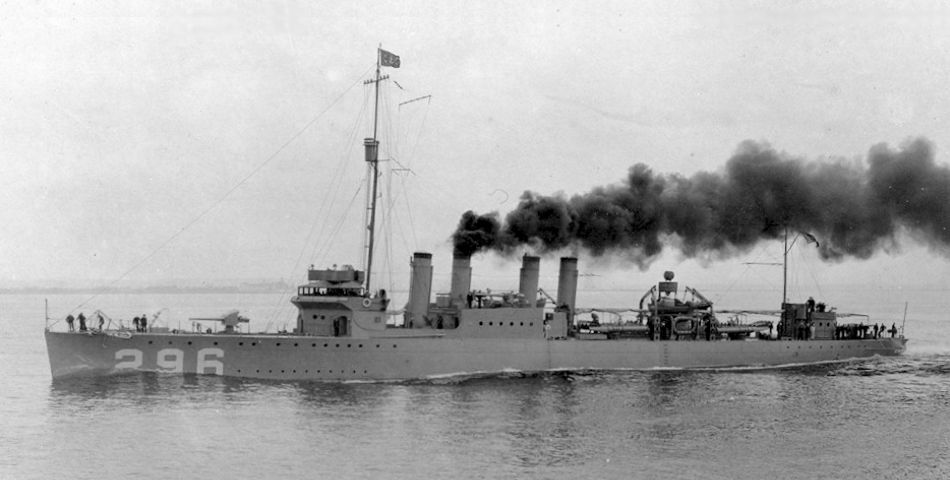
When the Omaha was in its design phase it was specifically made to look like the Clemson class destroyers currently in use by the US. The Omaha was given four smoke stacks in a arrangement like the Clemson and was even painted in the same camouflage scheme to further increase the resemblance.


Clemson class destroyer

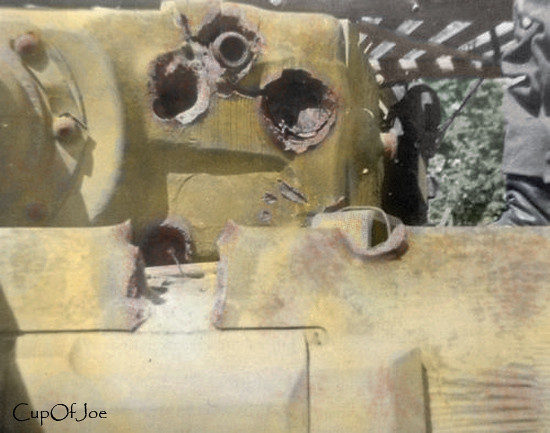
The Omaha also shows the movement away from casemate mounted gun design to the fully turreted guns design philosophy after the first world war. The Omaha was launched in the 1920's and has a displacement of 7100 long tons or just shy of 7214 metric tons. Design changes during mid production meant that on the Omaha's launch it was a badly overloaded design. Sacrifices in weight to maintain the ships initial speed specification lead to the ship compromising on crew habitability. The ship was poorly insulated meaning it was too hot in the tropic theatre of operations and too cold in the freezing climates. On top of this the overburdened design frequently lead to the ship taking on water over the bow and through the Torpedo compartments located at the aft of the ship. A serious flaw was the lack of water tight bulkheads anywhere above the main deck or aft on the main deckThe Hull had a nasty habit of leaking due to its light build, this lead to sustained high speed steaming contaminating the oil tanks with sea water. Sea water in the oil Boilers was a big risk as this could cause the boilers to explode if not properly tended.


Originally designed to serve as a scout the Omaha class cruisers served throughout the inter war periods as the lead ship in fleet flotillas (or small ship formations such as destroyers). With the introduction of air scouts and scouting roles being taken over by heavy cruisers (due to the Washington Treaty) the Omaha never really fulfilled its design function. The Omaha cruisers were relegated to fleet screening where its high fire-power output and speed were needed.

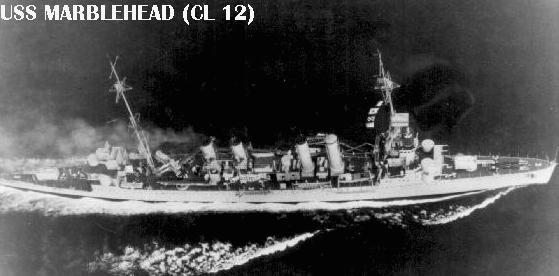
Entering into the second world war the Omaha was the oldest serving Cruiser that was still in service in the US Navy and was mostly assigned secondary and patrol roles where the least danger was. Naturally this meant that the ships didn't have a hugely exciting service history. 2 Omaha ships were present in Pearl Harbour, the Detroit and Raleigh Omaha class Cruisers. The Raleigh was torpedoed during the attack at Pearl Harbour but not sunk. The Marblehead and the Richmond Omaha class cruiser had the most interesting history. The Marblehead  in the battle of the Makassar Strait received 2 bomb hits that penetrated the decks and killed 15 crew and 1 near miss that caused a hole underneath the waterline and jammed the rudder. The marblehead survived the attack and was able to get temporary repairs before heading back to the east coast of the US.


The Richmonds engagement in the Battle of Komandorski Islands was one of the more unusual engagements of the second world war. The fleet which the Richmond was in was on its way to intercept a Japanese supply convoy on their way to the Aleutian Islands. The Japanese convoy consisted of more ships than the original intelligence lead them to believe. When the 2 fleets met it was in open ocean and neither fleet had air or submarine support. The ensuing battle was one of the last purely naval gunnery duel in naval history. The battle was inconclusive with both sides receiving heavy damage, the Japanese Admiral rather than capitalising on his number superiority and the heavy damage done to the US attackers retreated leaving the Battlefield fearing a probable air attack from the US in support of their fleet .

The Richmond Omaha class cruiser managed to badly damage the Nachi Heavy Cruiser during this battle knocking out her electrics to the ammo hoists and gun mounts with 2 hits from her 6 inch guns whilst dodging gun fire and torpedoes in return.


In World of warships the Omaha is a good cruiser. Her armament is better than the preceding Phoenix Class Cruiser and with playing through the previous tier you should be well aware of its strengths and weaknesses. Like the Phoenix the armour for a light cruiser sucks but the Omaha has a lot of guns with a decent fire rate mixed with decent speed, making you a very potent threat for other destroyers and cruisers. With a full broadside she can fire 8 guns and each gun can spit 8.6 rounds per minute. Compared with the Phoenix, Kuma and Furutaka she outclasses all her competitors on the amount of guns and DPM she can dish out. At tier 5 the Japanese cruisers get their 205mm guns but bigger is definitely not better in this instance. The rate of fire of the Omaha outclasses the Furutaka's to such a extent you should be able to win one on one fight every time.


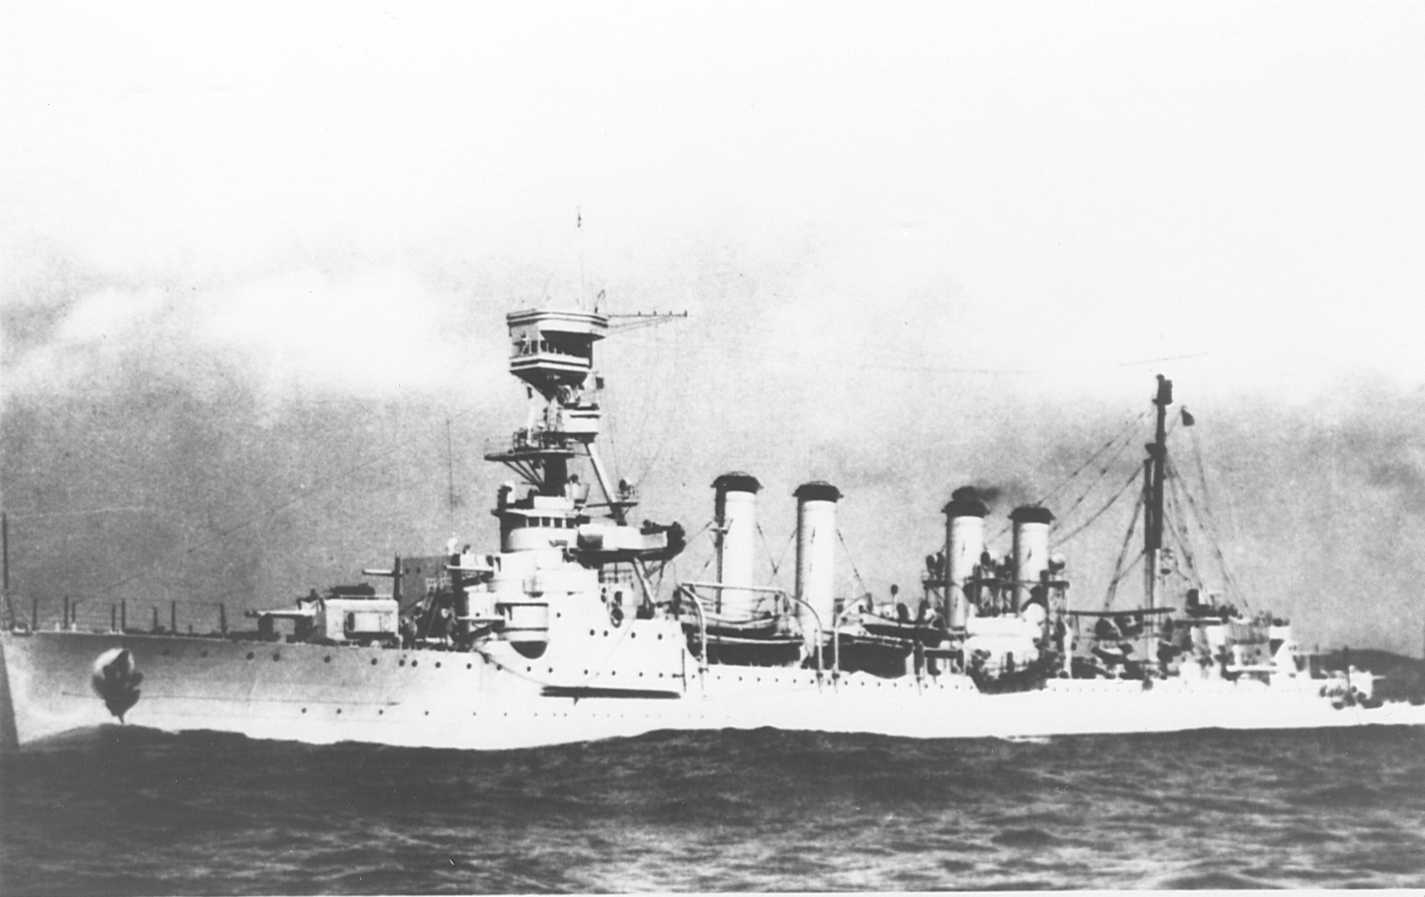
Approaching the enemy showing as little a target as possible whilst maintaining the largest amount of guns on target

The Omaha is also very manoeuvrable having the smallest turning circle of any cruiser in a 1 tier spread (in both the american and jap tech trees). Its rudder shift speed is very good also at 7.5 seconds. The Furutaka has a 1.6 second disadvantage at 8.6 seconds whilst the Aoba has a 11 second rudder shift time. This makes the Omaha very responsive which is good for avoiding gun fire and torpedoes. With the light armour of your cruiser this will be your main defence because not taking fire is how you will survive. Due to the bad armour of the Omaha is suffers for a smaller heath pool than the Japanese Furutaka but this isn't really a ship that you should be having a lone wolf mentality in at the start. You should be choosing when to use your health to trade for a kill or strategic point capture

The Turret Rotation Speed from the Pheonix to the Omaha takes a substantial drop from 18  seconds to 24 seconds. The gun arrangement on the ship means that you will always have some guns to fire on enemies that are flanking you but you will notice this the most when you are trying to turn your turreted guns all the way around when dodging in coming fire. This requires better battlefield awareness than the Phoenix to make the most of your gun advantage in the middle of a fight. Being able to respond to threats before they happen will help you dish out the damage and get kills in this ship so pay attention to your mini map as much as possible for your team and enemies positions.


The main problem that you are going to face in the Omaha is that its no where near a match to any of the ships one tier higher than it. The Cleveland has 9 amazingly fast firing turreted guns which have a good range. The Omaha's armour just can't compete with the Cleveland overwhelming fire power. The Aoba houses 6 205mm guns that have a reasonable fire rate and long range. The Aoba's Torpedoes are deadly with a damage potential of 16.2k combined with a 10 km range. The Guns on the Omaha would let you put up a fight but the light armour of the cruiser is again the Omaha's biggest weakness. A few lucky/well aimed shots from a Aoba can ruin your day when captaining a Omaha as the Aoba's shells hurt. Between Tiers 5 and 6 their is no bigger jump in ship performance anywhere else on the tech tree than here in the cruisers line. (This reiterates my point from a previous post that their should be another ship here that replaces the Phoenix/Omaha so this jump is not so harsh in the American cruiser line)


Proof that the Omaha can be good when used effectively


This however does not mean this is a bad ship, in fact this ship is great when you use it well. This ship is a improvement on the Phoenix in almost every way. More guns more AA more health just makes this American better. Remembering your armour is bad and positioning yourself to avoid incoming fire is the key to survival in this ship. Bad positioning against Japanese cruisers higher calibre guns generally ends in citadel hits. Angle your armour to make the best of it or alternatively wolf pack and give them something else to shoot at. The same principles of the Phoenix apply but this time you have more fire power, keep those guns singing whilst supporting other cruisers and destroyers. If your out in front and feel your in a bad position its not a bad thing in this ship to fall back. The Omaha can't take sustained fire so use the ship accordingly Use your fire rate to get consistently good games with high damage output . Remember this is the last US non premium Cruiser that gets torpedoes so use them whilst you've got them as a trump card. 

Saturday 8 August 2015

World of Warships Bizmark and Turpitz Alert

First match of the day in a CO OP match and what happens. I have 3 Wargaming test accounts with the new German line up ships in my game!


The Bizmark


The Turpitz 

I can confirm that the Turpitz will have torpedoes also but I wasn't quick enough to grab a comparison screen shot before the match started.

Friday 7 August 2015

Tiger Tank Trunnions

Hi all and welcome to my weekly Tiger Update!

This week I have had a bit of a lazy week with the Tank giving myself a little bit of a break but I have still taken the time to finish off the Trunnions that were fitted to the Tiger 1. These Trunnion's allowed the Turret to be lifted off the Tank body via a crane and were strong enough to support the gun's weight/recoil.


Tiger Tank 131 Turret Trunnion with 'Authentic Battle Damage' (definately a kung fu panda reference here)

Holes were bored through the turret walls and cheek pieces for the Trunnion's to seat into. Bearings were then seated onto the extremity on the interior of the tank to help the Turrets 88 to sit and move on. The Trunnions also has holes throughout its structure to help with lubrication of the bearings.


Trunnion Cross Segment


Here's how I have been getting on with this one. I have still do do the welding that secure the trunnion's to the exterior of the Turret walls but im pretty pleased with this one so far.


A nice little find related to Tiger Tanks is that Wargaming have uploaded their Type 6 Heavy onto their sketch fab. This was essentially a Tiger from German that was sent over to the Japanese to study and create their own variant.


For those that don't know about this check this video from Wargaming introducing the Japanese Tiger.


That's all for this week. I hope to see you back here early next week for my latest ship review. Have a great weekend and I will see you then