Showing posts with label 3ds max. Show all posts

Sunday, 26 August 2012

Robot Love...2


Hey all, welcome back!

From the time I have had spare from working (which isn't a lot) I have put a few extra things in to my robot/drone that I want to share. The last post I put up went over my concepts and some of the fleshing out of the main body. I also talked a bit about the importance of silhouette and the players need for quick recognition with enemy types. I will show you what I have done so far and talk you a bit through what I have done and thought about as I progressed. I apologize for the lack of stage by stage images, I just got cracking with it when I could and took images towards the completion of each stage.

Now I had the main body shape more or less figured I wanted to start putting in some of the main functional points of the drone. Modelling something like this you may find that if you don't account for functional parts you may accidentally start modelling things in areas areas of movement.

After playing about with the sketched gun concept in 3D I settled on a more organic approach using a scorpion stinger and also some references from a Anime called Zoids to create a gun with pop up guns. This was in a effort to reduce on the over all length of the gun as I intended the gun to be picked up by the tail. It would need to slip out of its mounted position pretty easily so that design decision would help that. Here are a few images of the modeled gun.


I also had to look at the gun from all angles so I could make sure I would know that the players recognition with it would definitely be an aggressive weapon and it would be time to take cover.

The next major moving part will be the legs. Legs for mechanical characters can be created in many ways as they don't have to conform to the ideals of organic structures. They can extend and spin in 360 degrees if the designer so intends. In my drone I needed the legs to fold up neatly to accommodate a flying model of a sort of manta ray like shape but also retain enough mobility to create believable walking movement. I pulled some more references to aid me deisgn how the legs would work from spiders, Final Fantasy 8's spider drone (http://images3.wikia.nocookie.net/__cb57887/finalfantasy/images/c/c3/FF8_X-ATM092.png) , Gundam (https://blogger.googleusercontent.com/img/b/R29vZ2xl/AVvXsEjE095vYEJzwJH7tv-ZpruEZOTuUTgBvjewQvNCw01W8nQVM_8BXbaMot2-ch4BJFuwVfjE-7ec2yaWBjJL8b0EAUp10zv-dgvJ-pSDi4ZLtSwo_bD3Fht-zU2EPphDymgCtfnfOnareO95/s1600/5.jpg) and from Zoids as a solid starting point.When got into modelling the legs I did so in their extreme positions so make sure that at all extents sat nicely with each other and didn't cut.


Once happy with the shape and design structure I had created I did a quick Hierarchy Rig on the legs and played with them to see if the design was lending as much movement as I wanted.


I then attached the leg plating onto the mechanics followed by attaching the whole legs onto the model itself. Its pretty important to keep things simple until you have the main moving parts in. Adding extras to bolster the characteristics before this will only ever lead to problems further in to the modelling process.


This is all I have at this point but keep checking back for more at later dates and I may have posted more. Thanks all and feel free to comment or leave constructive feedback. I am also free if people have queries or proposals for tutorials they would like as well. Cheers =D.

Thursday, 26 April 2012

Ammo shortage!

For all the people following this blog they will have known I have been working on the outside area for the building I created a while ago. I have been working on the texture getting it to tile and its starting to take shape and im just feeling my way round the getting the characteristics in that I like. The whole struggle for jobs at the moment has been a real demoralizing time for me and I am sure others that have been forced into the unknown of unemployment at the current economic state. If work seems a bit slow that is more than likely why. It is however important however to keep optimistic and push through. I thought for the mean time I could work on producing some models at the end of my day for turbo squid to keep me financially going for the mean time. A hour or so at the end of the day to crack out some small models that are easy to model and texture to get a nice outcome. This will few extra props for my portfolio and also varying my workflow to keep me motivated. Heres a quick ammo crate that I have modeled in high poly and also a beginnings of a tree.


Thursday, 12 April 2012

final jeep renders


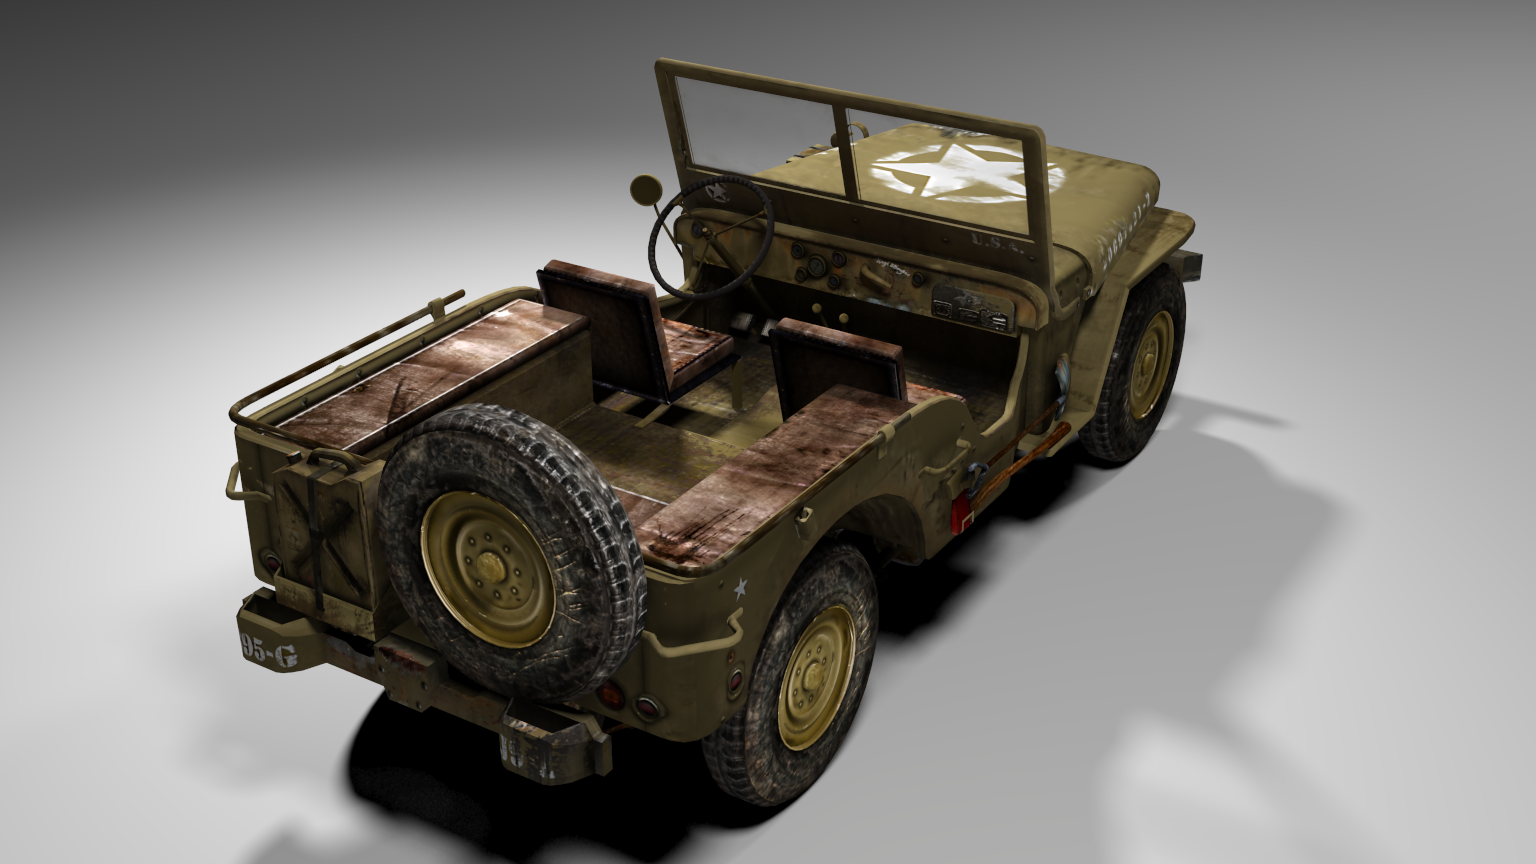
Well after a few days of tweaking and adjusting I think I can proudly close the jeep project and add it to my portfolio. A few extra adjustments to textures and modifying the ambient occlusion bakes on the mesh lead to these images. Enjoy

Monday, 9 April 2012

Blog Update, life of modularity

Hi and welcome to all blog followers far and wide,
Things have got pretty hectic with the holidays and job opportunities being thrown down, and around at the least expectant moments. I have had to do a few proving projects so have had to drop most of my usual things to do them. Unfortunately I wont be able to post them up due to confidentiality but I can say they looked pretty good at the end. In between all this juxtaposition I have finally just about finished my jeep (that seems to have been going on forever). I have a few little changes to do to the textures getting parts to blend with the rest and then I will start posting up some test renders to finally add the jeep to my portfolio site. I have also started a modular building that I posted up on the work in progress segment in my portfolio. (www.danielrohde.crevado.com)As you can see I have been pretty busy with getting this all together plus other projects. The above images are my current project that I have in progress. It is all designed in a modular style to fit in a 2k texture. one set for the outside and one for the interior. Here is the interior diffuse texture pretty much finished (the texture is used on the test render to see how the pieces slotted together along with spec, occ and normal maps).

Its not long now till I begin my work experience with Undrawn Reality (previously called Raw Games) so I'm excited for that to begin. I can then start absorbing infomation and useful tips in the form of osmosis as I am willing to guess there is a lot to learn.

I have a visit also over this weekend to go see Lucian Freud 's life work that's exhibited in London so I will post us things that I can from that.

That's all I can think of for now, chow! =)

Monday, 20 February 2012

Willie Jeep (Work In Progress) 9


This is the interior texture applied after yesterdays tinkering. Finally I'm starting to see the massive change in the Jeep from naked to fully textured. The early stages of the interior texture are looking good already. I may have encountered a problem in not leaving enough UVW space for the seats to add stitching to the fabric. This was a first attempt at lynching a stitching texture from a picture to apply it. It could be the picture resolution or layout, but what ever happens the stitches definitely look wrong and need some revision. The dash board is starting to look good as I concentrated on getting that part right yesterday, although im not sure if I have over done it? Maybe a polycount post to see what people think.

Tuesday, 7 February 2012

Texture update for jeep: details, details and more details details


Further workings on edges and the windows. a few extra decals and writing on bumpers.

Friday, 3 February 2012

Texture update for jeep: finishing the under carriage,window masking and body dust


Today I ended up finishing the rest of the under carriage blending and texturing. I them moved on to the top side paintwork covering the shell of the jeep. This of course ment that I would have to be extra careful in my approach to texturing it as players would see this more than the undercarriage. The paint as it stood for the topside looked pretty bland and needed some dirt to add to its believability. Using some decaled textures, I screened over the top to give a dusted look with the aid of the smudge and eraser tools. I created a mask layer for the wind screen to give the opacity and to gain the illusion of the existence of glass in the windscreen. I still haven't got that quite right just yet but this will, as normal, change in time. Another thing I'm not quite happy with at the moment is the wheel colour and the dirt upon it. For the mean time the textiring for the tyres will stay as it is but when the model is more complete I will come back to finish them off a bit more. Further more I have had some good comments off polycount.com following the jeeps progression that has been quite encouraging. Working so hard in my room to get employed can be a bit disheartening so getting gems off proactive practitioners is golden for your motivation.

Tuesday, 31 January 2012

Another Hard days work textureing.

Here is today's progression on the body work of the jeep texture. Further workings into the chassis and exhaust and a bit of work on the suspension. I got some nice detailing but I still think the overall base colour of the body work is wrong. I'll look at changing that to be a bit darker tomorrow to see how that looks on the model. Further working into completing the underneath of the model, then working on the outside look for the overall finish.