Showing posts with label computer game design. Show all posts

Tuesday, 17 November 2015

Sci Fi Rifle Finished

Hi Everyone,

I thought I would give you an update on how I have been getting on with my portfolio work. I am happy to say I finished off my Rifle today so I'll be sharing that with you. I posted up where I had got with it but felt that it needed a sight adding to it to brake up the top rail of the gun. Since posting up my last post I modelled a high poly reflex sight, baked it and textured it. I have a few renders to share as well as the models I have done.


Here is the exploded high poly model I did for the reflex sight as well as the modelled low poly bellow.


Here was my bake I got out of X Normal and Substance Painter.


After a bit of tinkering in Substance Painter and some playing about with Marmoset 2, here are the fruits of my work.


This was just a quick update on how this has gone. I hope you like the results. Hope to see you here again soon, especially now I will be finishing my Tiger Tank now. 


Sunday, 26 August 2012

Robot Love...2


Hey all, welcome back!

From the time I have had spare from working (which isn't a lot) I have put a few extra things in to my robot/drone that I want to share. The last post I put up went over my concepts and some of the fleshing out of the main body. I also talked a bit about the importance of silhouette and the players need for quick recognition with enemy types. I will show you what I have done so far and talk you a bit through what I have done and thought about as I progressed. I apologize for the lack of stage by stage images, I just got cracking with it when I could and took images towards the completion of each stage.

Now I had the main body shape more or less figured I wanted to start putting in some of the main functional points of the drone. Modelling something like this you may find that if you don't account for functional parts you may accidentally start modelling things in areas areas of movement.

After playing about with the sketched gun concept in 3D I settled on a more organic approach using a scorpion stinger and also some references from a Anime called Zoids to create a gun with pop up guns. This was in a effort to reduce on the over all length of the gun as I intended the gun to be picked up by the tail. It would need to slip out of its mounted position pretty easily so that design decision would help that. Here are a few images of the modeled gun.
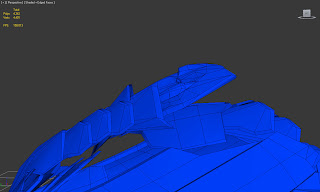
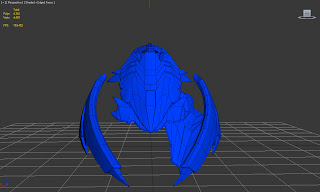
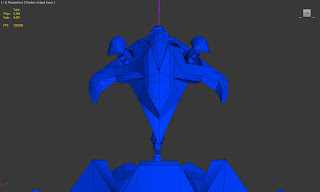
I also had to look at the gun from all angles so I could make sure I would know that the players recognition with it would definitely be an aggressive weapon and it would be time to take cover.

The next major moving part will be the legs. Legs for mechanical characters can be created in many ways as they don't have to conform to the ideals of organic structures. They can extend and spin in 360 degrees if the designer so intends. In my drone I needed the legs to fold up neatly to accommodate a flying model of a sort of manta ray like shape but also retain enough mobility to create believable walking movement. I pulled some more references to aid me deisgn how the legs would work from spiders, Final Fantasy 8's spider drone (http://images3.wikia.nocookie.net/__cb57887/finalfantasy/images/c/c3/FF8_X-ATM092.png) , Gundam (https://blogger.googleusercontent.com/img/b/R29vZ2xl/AVvXsEjE095vYEJzwJH7tv-ZpruEZOTuUTgBvjewQvNCw01W8nQVM_8BXbaMot2-ch4BJFuwVfjE-7ec2yaWBjJL8b0EAUp10zv-dgvJ-pSDi4ZLtSwo_bD3Fht-zU2EPphDymgCtfnfOnareO95/s1600/5.jpg) and from Zoids as a solid starting point.When got into modelling the legs I did so in their extreme positions so make sure that at all extents sat nicely with each other and didn't cut.
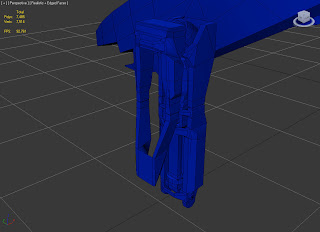

Once happy with the shape and design structure I had created I did a quick Hierarchy Rig on the legs and played with them to see if the design was lending as much movement as I wanted.
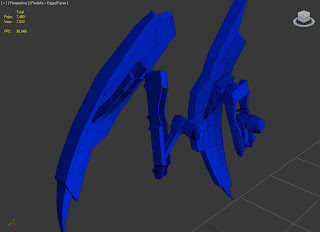
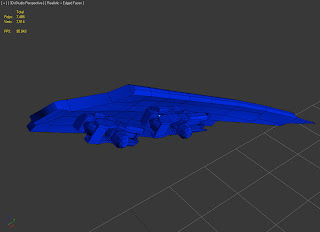
I then attached the leg plating onto the mechanics followed by attaching the whole legs onto the model itself. Its pretty important to keep things simple until you have the main moving parts in. Adding extras to bolster the characteristics before this will only ever lead to problems further in to the modelling process.
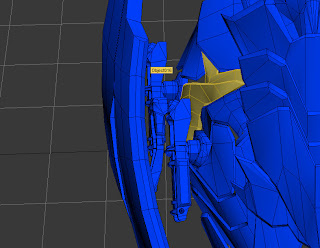

This is all I have at this point but keep checking back for more at later dates and I may have posted more. Thanks all and feel free to comment or leave constructive feedback. I am also free if people have queries or proposals for tutorials they would like as well. Cheers =D.

Thursday, 26 April 2012

Ammo shortage!

For all the people following this blog they will have known I have been working on the outside area for the building I created a while ago. I have been working on the texture getting it to tile and its starting to take shape and im just feeling my way round the getting the characteristics in that I like. The whole struggle for jobs at the moment has been a real demoralizing time for me and I am sure others that have been forced into the unknown of unemployment at the current economic state. If work seems a bit slow that is more than likely why. It is however important however to keep optimistic and push through. I thought for the mean time I could work on producing some models at the end of my day for turbo squid to keep me financially going for the mean time. A hour or so at the end of the day to crack out some small models that are easy to model and texture to get a nice outcome. This will few extra props for my portfolio and also varying my workflow to keep me motivated. Heres a quick ammo crate that I have modeled in high poly and also a beginnings of a tree.


Tuesday, 18 October 2011

Willie Jeep (Work In Progress) 5


Just finalising the modelling now before the push to the next stage of dividing the model up high and low poly for normal mapping and UVW Unwrapping. The renders of the model are looking good so that's half the battle done, then the horror of unwrapping this beast into two 2048x 2048 texture squares. If I haven't posted in around a month assume I've killed myself. =)

Tuesday, 15 March 2011

Live Client developmet... so far.. continued

Now I had made a substantial start on the outside area with time running short and knowing how many weeks I had left I made a move and start on the construction of the challenge area one. Taking forward my knowledge of mistakes I had made on the construction of the outside area. I made sure before I started I knew what kinds of things I would be creating before hand. After recapping on my original design for this challenge ... (below) I got down to experimental building


I found 3DS Max a really good inventive tool. From my Drawings and research I could take certain aspects of things that I liked or was attracted and incorporate them into the design flow of a object as I was constructing it. after some considerable amount of building time here was a simulated look of how the environment would look like.

I quickly got on high poly asset building and texturing to create over all look.
Here are the assets from this scene in the games engine fully textured(with a design concept in there too).


When it came to the ball design I had a idea of a spindle designed ball that had water contained in the middle. The water colour in the middle would indicate the hole to shoot the ball in as the hole would be illuminated in the same colour. One ball in the correct coloured hole would open the door.

The only problem that presented this was how to create a convincing water texture using the games material editor. I will openly admit that I am pretty much a complete novice when it comes to textures in games engines. and water was going to be a challenge... and I can say with confidence I was right.

I found a tutorial in my book that covered the basics and worked through to the advanced stuff. trying to learn what each node does in UDK's plug and play, and slowly but surly this was the result of my endeavours.


a convincing water texture nether the less but I wanted to see if i could work on with what I'd learnt and to see what other people did and combine my 2 findings together to see what I could get.

eventually and with along time I came up with this.


which was a lot more tasty than the first =)

This pretty much brings me up to speed on my blog so thanks for reading an keep checking as there will be more coming up soon.

Monday, 14 March 2011

Live Client developmet... so far

As its been a while since I have last posted up on my blog ill try and cover a lot of there I am at the moment in one foul swoop. Its getting close to hand in time now so heads are down getting all the final stuff made.

Basically over the last few weeks I have been making and texturing like a demon trying to get enough assets out in this small time to make this project look half good. just as a recap this is more or less what my concept design was and where I thought it was going...


So in my development process here are a few of the things i made to fit in with the outside environment.


I knew I would have to revisit the base textures at some point so as a model to test them in the world space they were fine as they were.

After getting quite a few of my assets had been made I started to get towards the construction stage just to see how it looked when it was put together.


As with most developmental processes it needed a lot of work. I had a few play experiments with how the assets could be placed as well as changing the approach to the building to give it a few of a imposing building, but to little avail. I began to look over characteristics of different cultures temple like structures to gain some influence in how to create a temple like feel to the building as one it was very ridged in its structure, and two it didn't look like a temple. After looking over my images i had come to stockpile, I came to a conclusion that I had a lot of cultural influences in my workings which could lead to a confusion in how the piece visually presented itself. However I found that Persian style architecture seemed to embody the curvaceous stylistic approach I had worked towards.


I did a bit more designing and playing around with the environment but I felt I would have to leave the outside for a later date as I now had to start working on the inside to get the main bulk up my work in place to meet the criteria of my brief. this is more of less some of the designs and state of how I have left the out side area for now.